ai Auto Landscape Masks in Lightroom and Adobe Camera RAW
Ai powered masks aren’t new in Lightroom and ACR, but a new set of “smart” masks have been added. (The processing in ACR and Lightroom are the same, so this feature works the same on both).
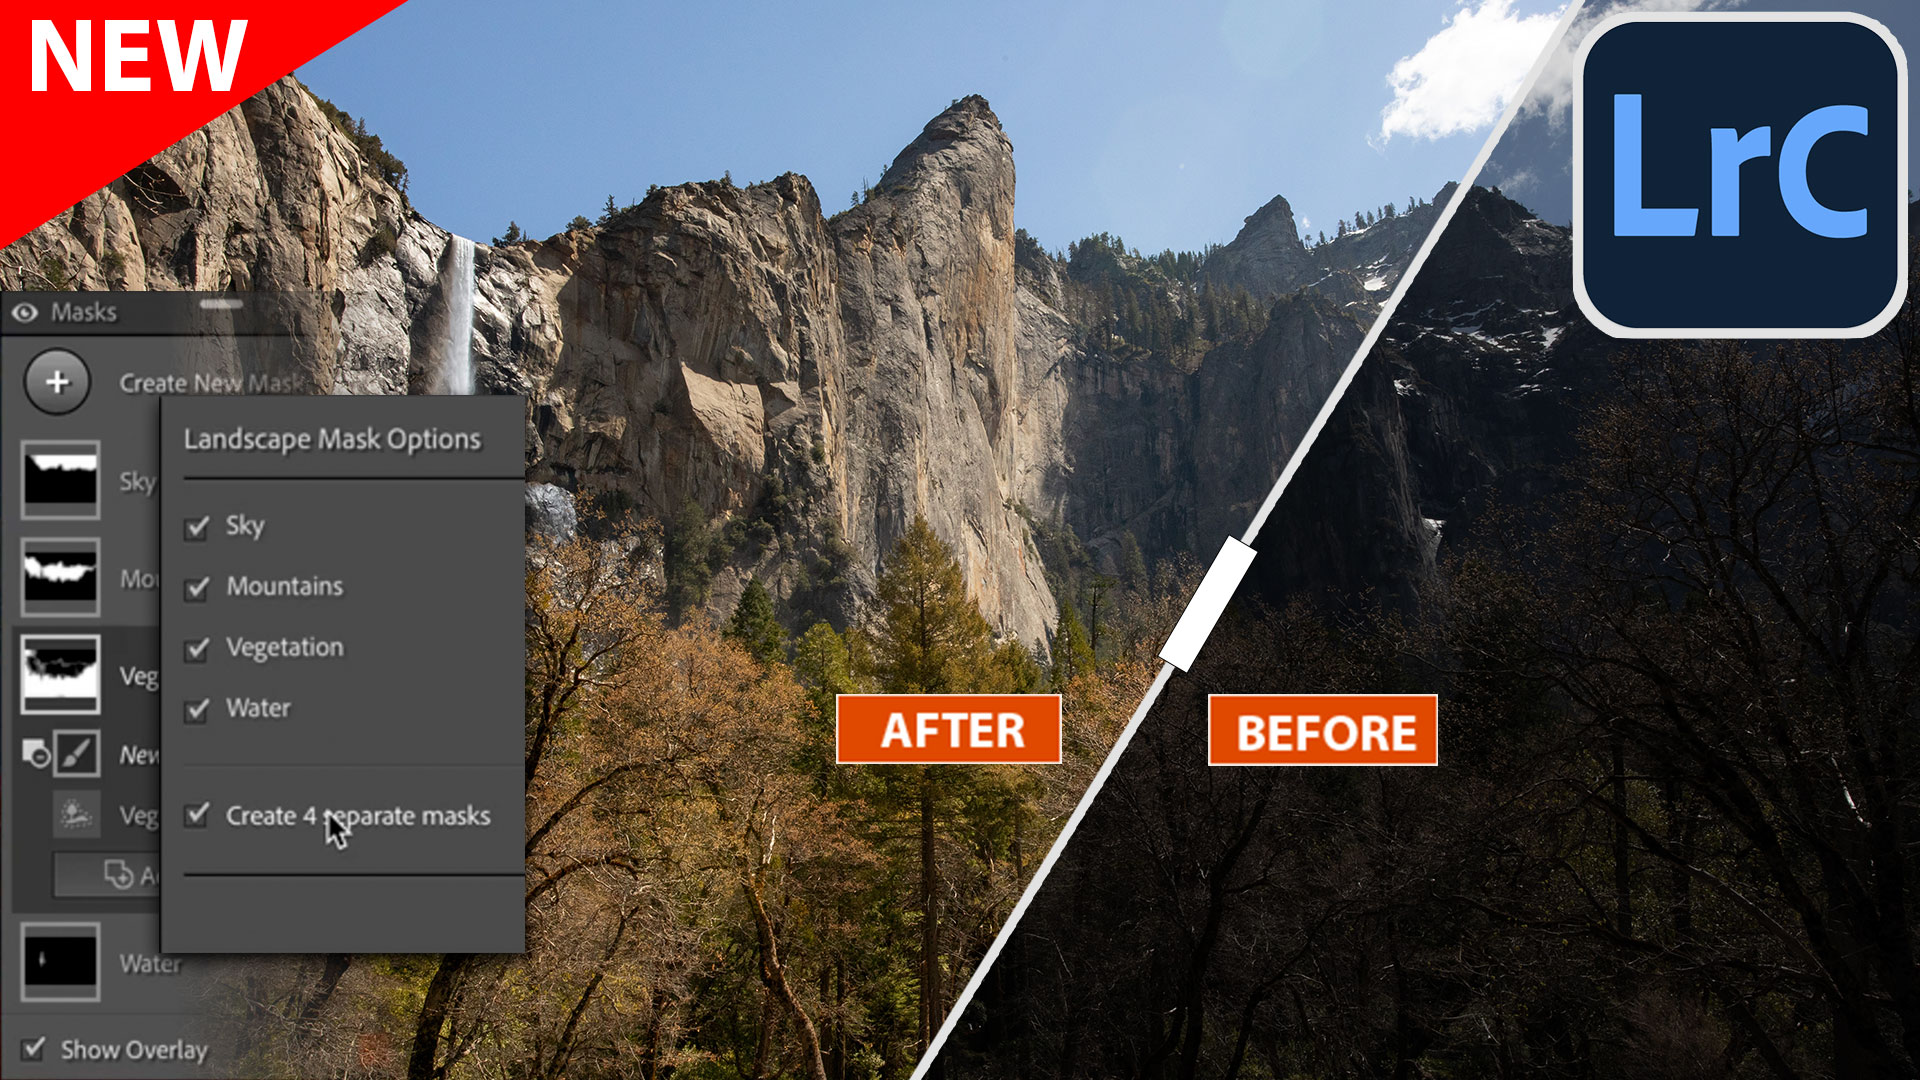
Perhaps you are familiar with the people masks, that isolate different parts of people to help with retouching. Now Lightroom can recognize different part of landscape photos such as sky, buildings, mountains, water, natural ground, artificial ground and Vegetation. Masks can auto magically be generated so you can adjust these different parts quickly. Let’s have a look.
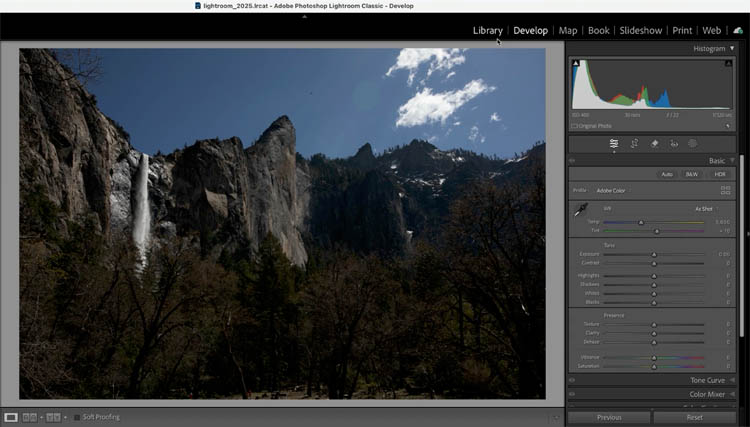
Choose the develop module.
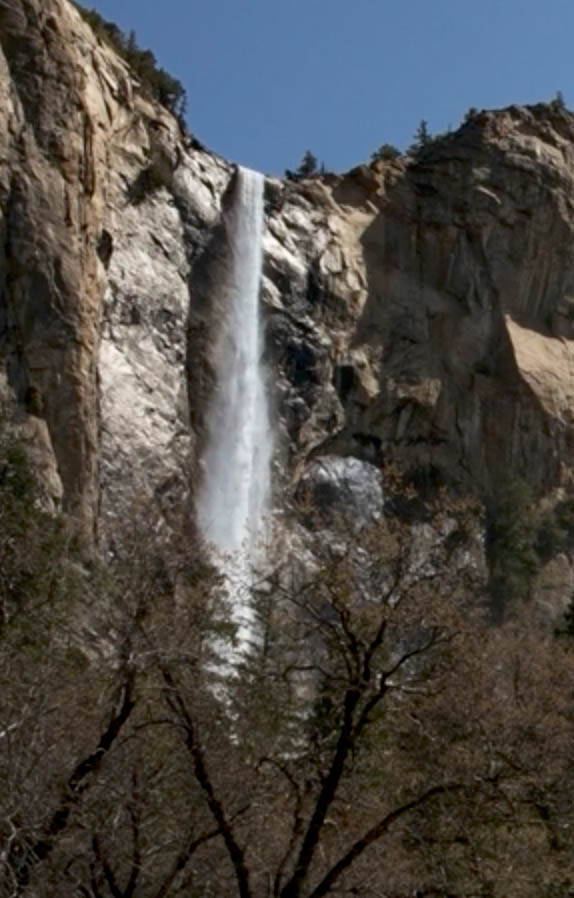
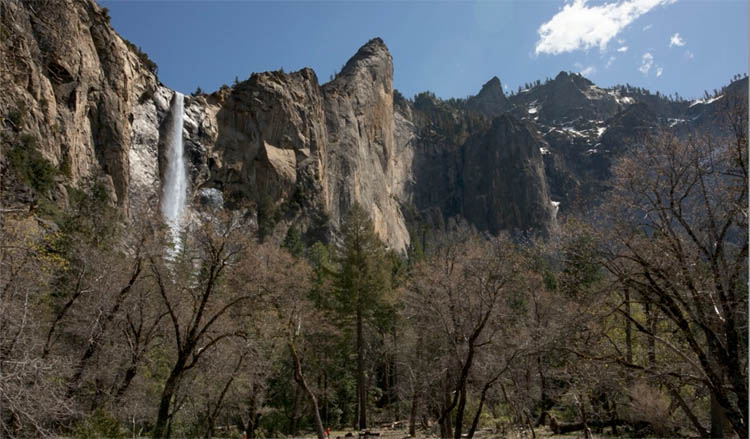
Here I have a photo from Yosemite that needs a lot of work.
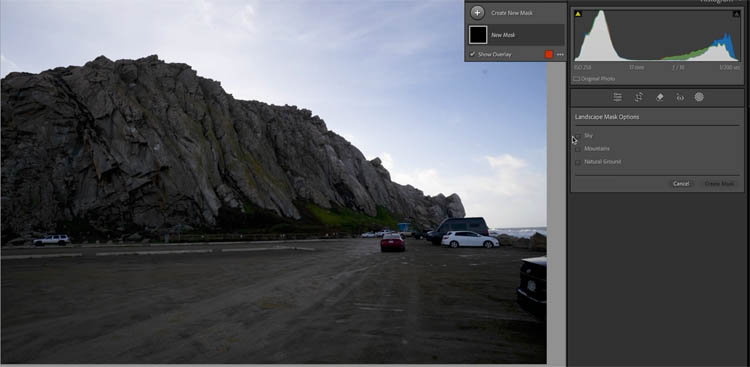
Click on masks.
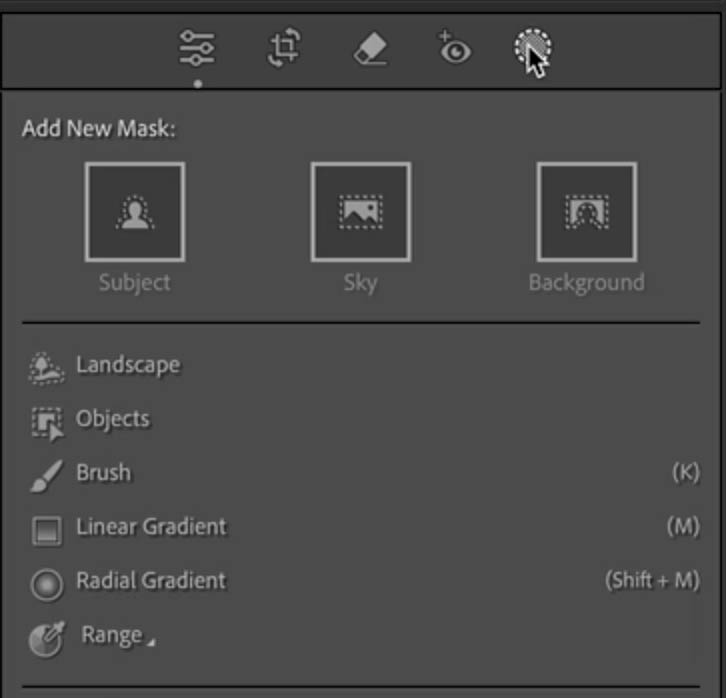
Choose Landscape

You will see a list of the features that Lightroom/ACR recognizes.
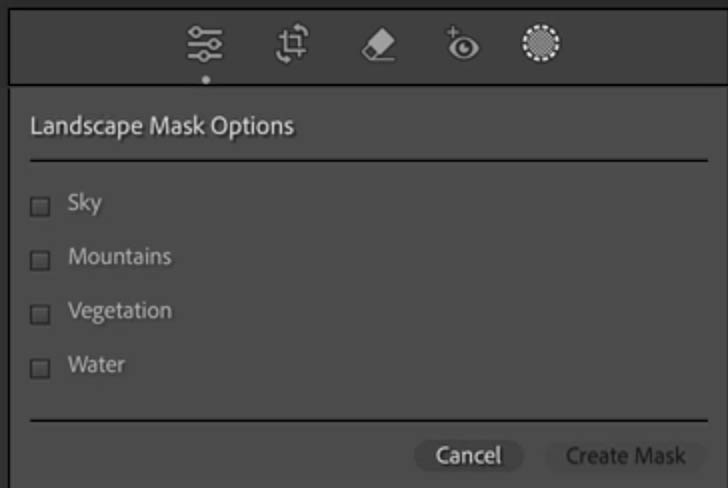
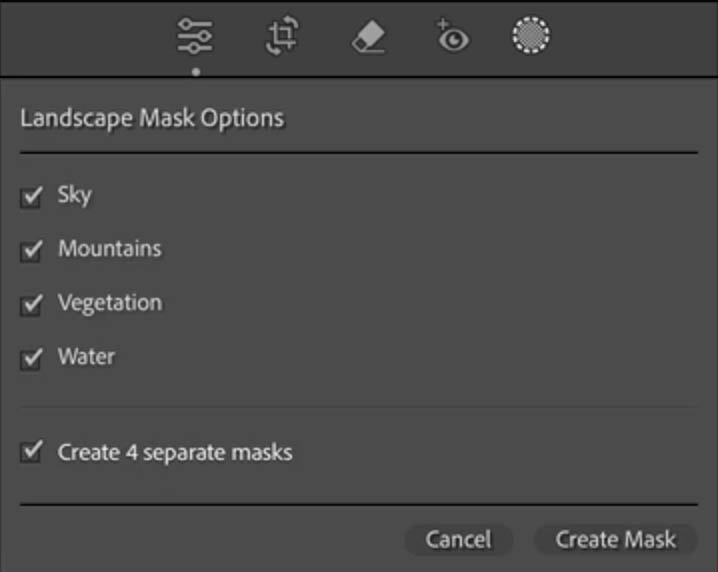
Choose the ones that you want to make masks from.
Click Create Mask
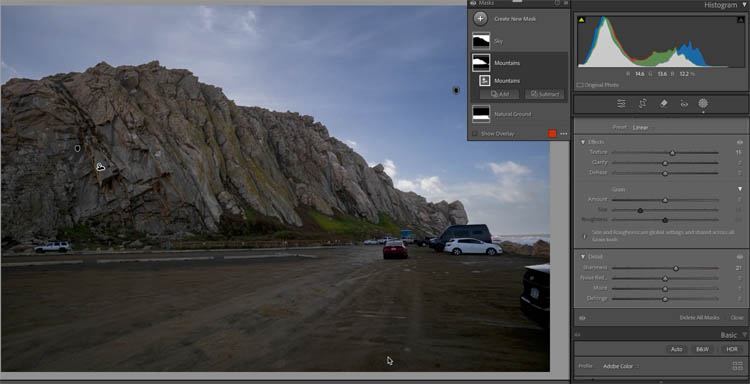
Here is the Masks panel

Choose Mountains
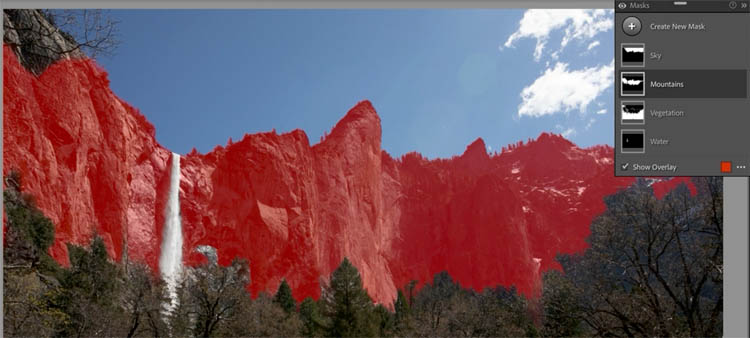
Make adjustments and only the mountains are affected.
We can also adjust the waterfall, it shows as water.
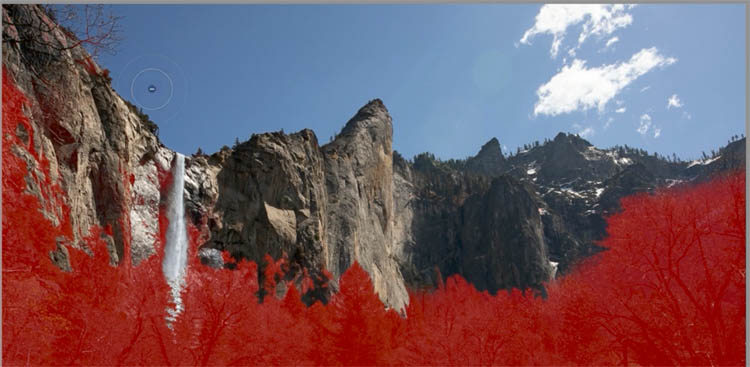
Lets look at Vegetation.
Notice it sees vegetation at the top of the mountain too.
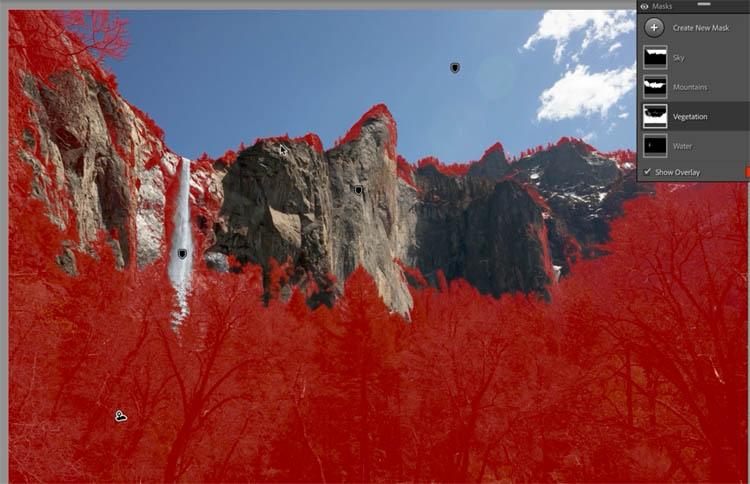
Let’s exclude the mountain top.
Click on Vegetation.
You will see the pane expands to show Subtract and Add
Click Subtract and choose the brush
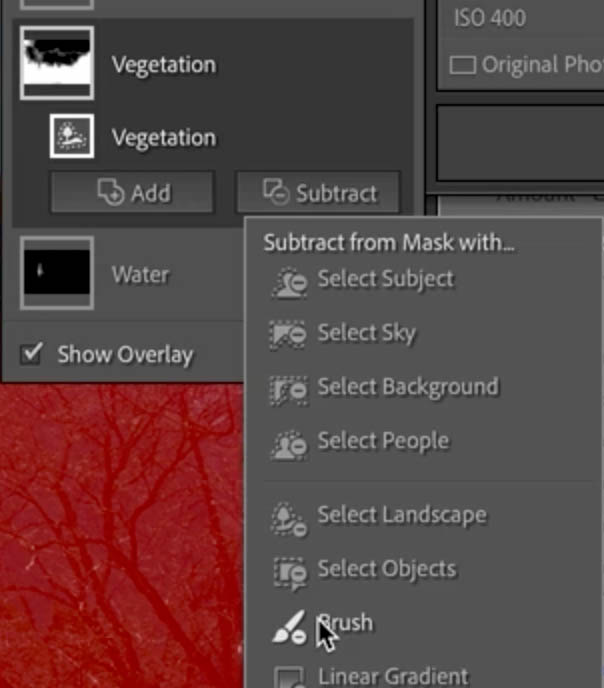
Paint away the areas that you don’t want included in the mask.
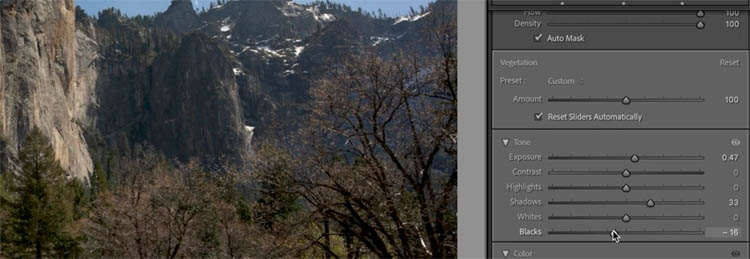
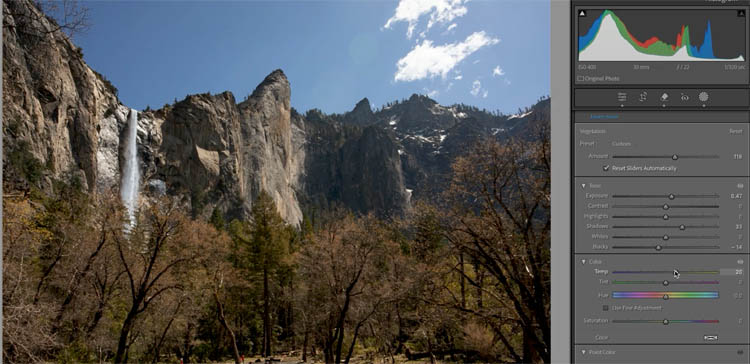
Make some adjustment for the trees.
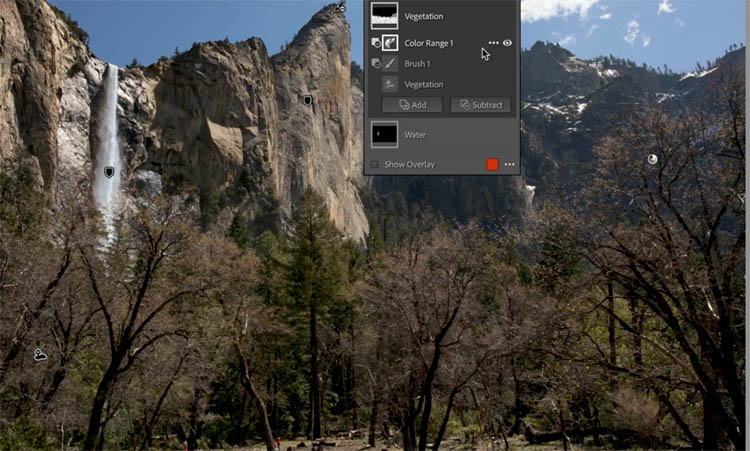
Refine the mask
Notice it looks a little cloudy around the tree details, this is the Mask edge. This is because the mask isn’t that good around trees.
Fortunately we have tools and techniques to help.
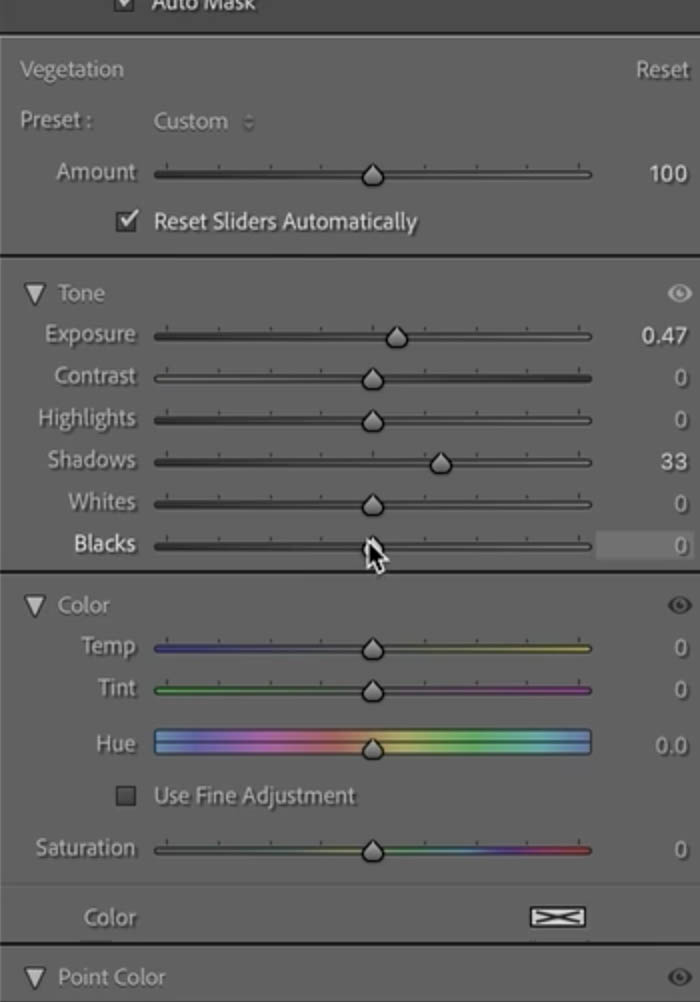
Push the blacks a little rot the left to reduce the mask edge.
Choose subtract and Color range from the mask panel.
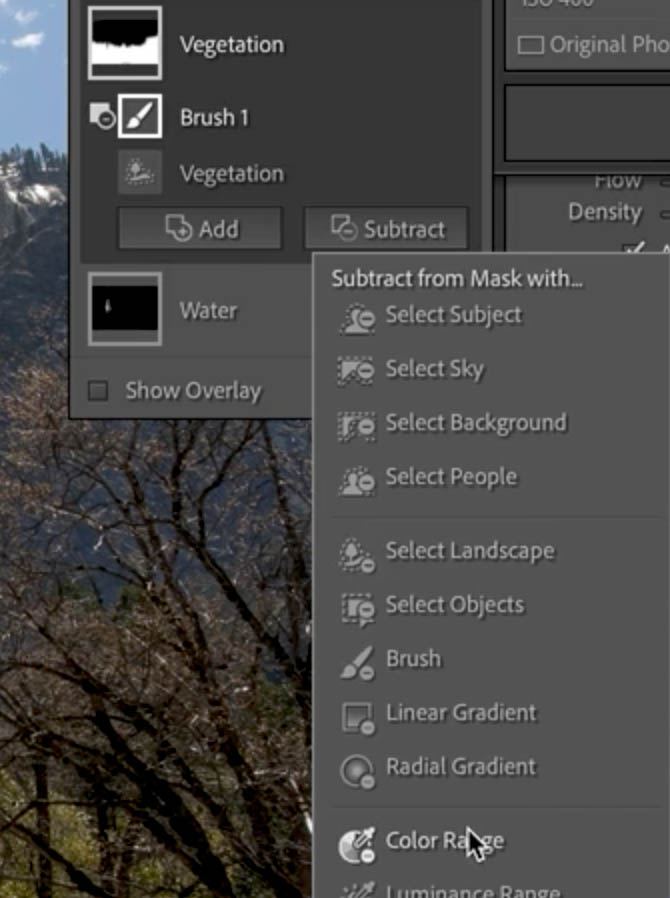
With the Color range eyedropper, click on the area that you want to clean up (remove)
You will see it gets shown in red.
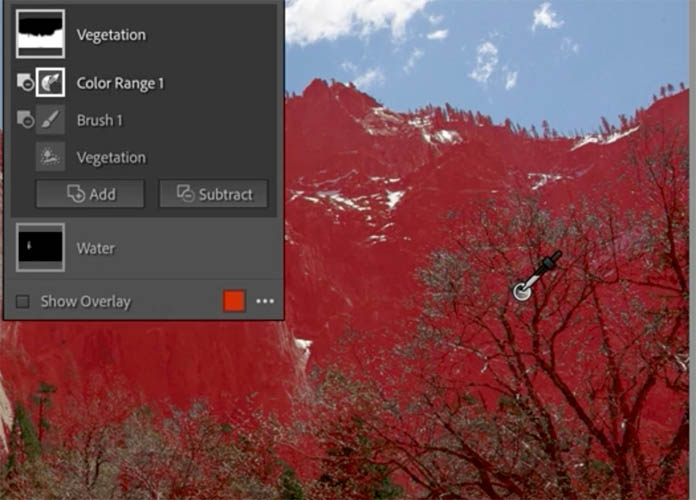
Adjust the amount of the color range to help make a better mask. (Shown clearly on the video at the top).
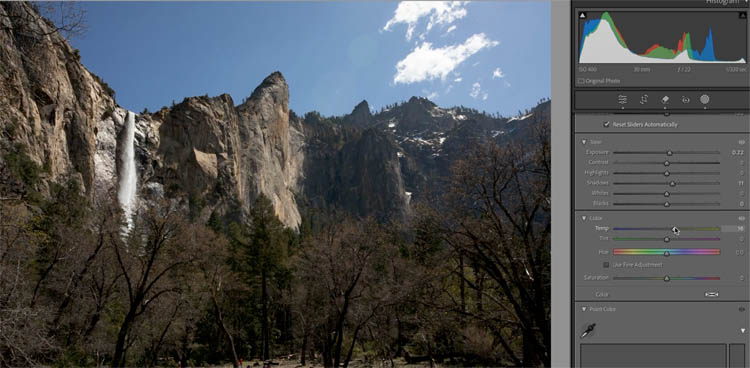
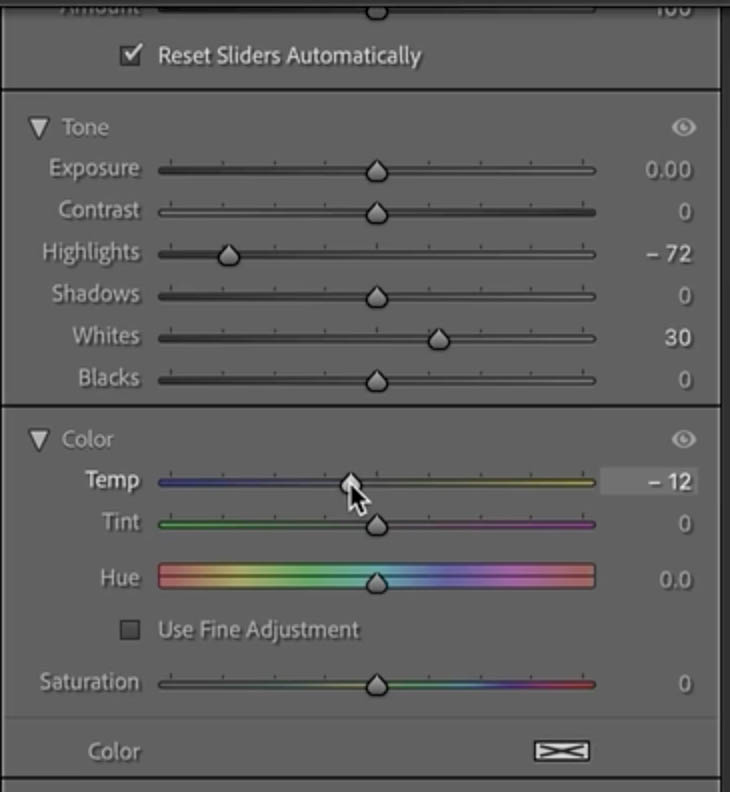
Add warmth to the rest by slightly increasing the color temperature.
Reusing the settings
Let’s look at a different example.
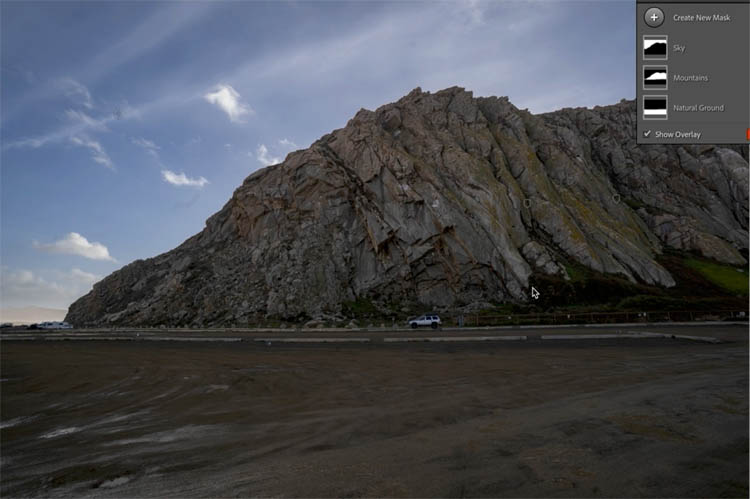
Create the masks.
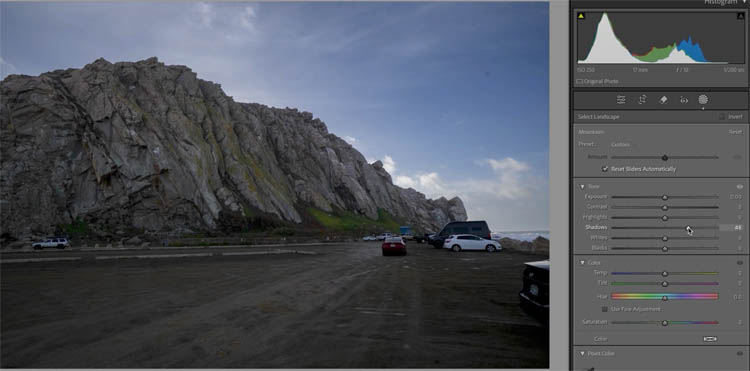
Notice on Natural land, it also included the Mountains (Although I would call it more of a rock).
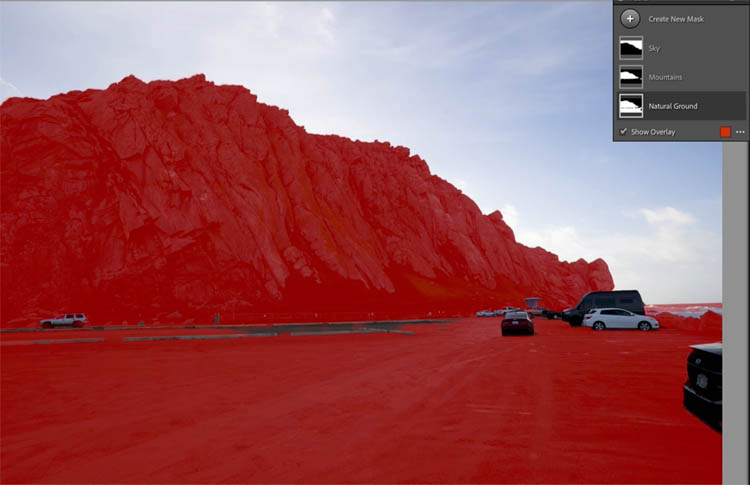
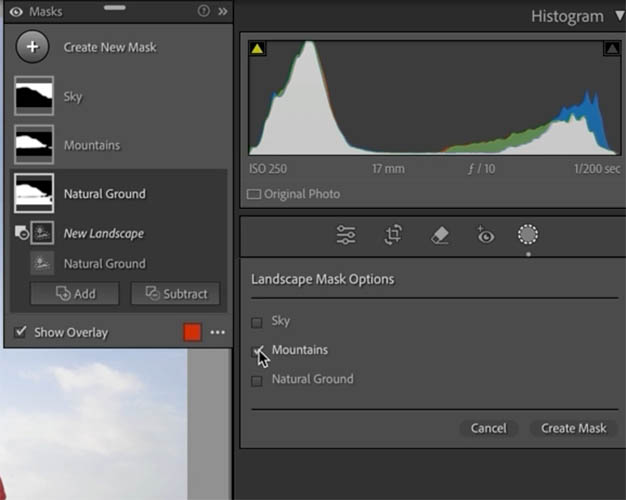
To remove the mountain from the mask click on Natural Ground
Choose subtract and Select Landscape

Choose mountains from the check box.
And click Create mask. Because we are using Subtract, just the mountain will be removed (subtracted) from the mask.
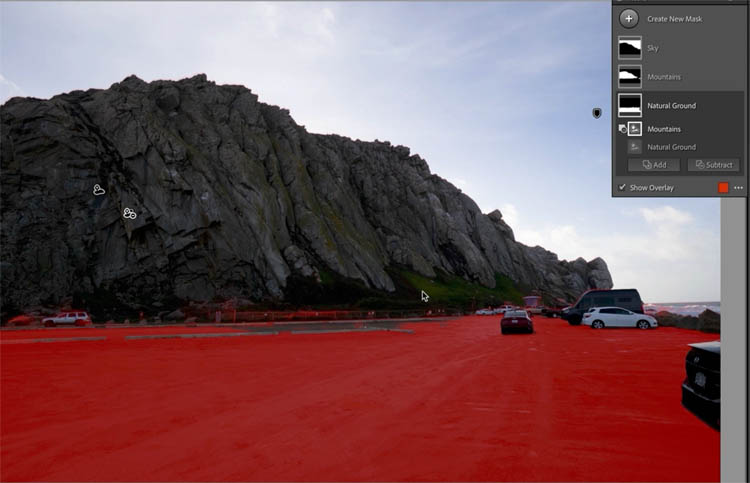
Now the ground is isolated on its own mask.
Here I have adjusted the sky and the rock. You can see the settings in the panel and on the video.
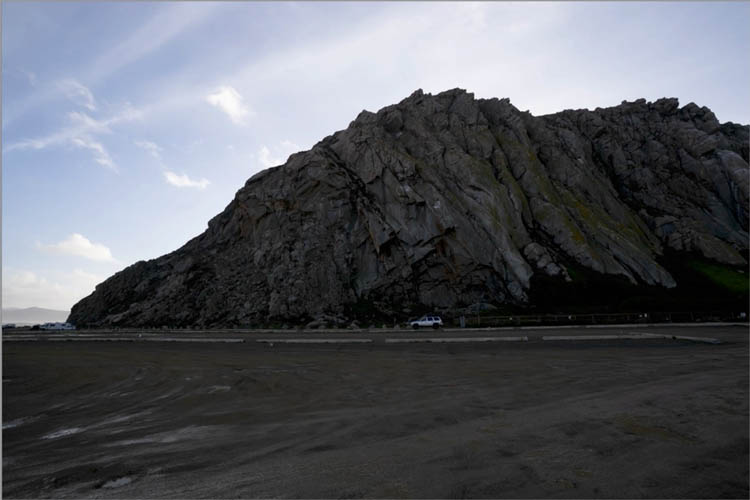
Well, it looks like I have another shot of the other side of the rock.
You don’t have to make adjustments again. Because it uses ai to make the masks, we can reuse the masks, even though the rock is a different shape.
Click on the adjusted image thumbnail from the filmstrip (Will be develop settings>Copy in ACR).
Shift-Click on the thumbnail of the image that we want to copy the settings to.
Click Sync
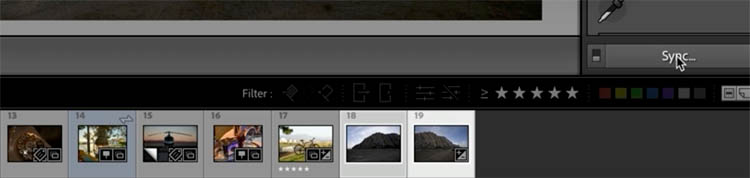
Choose just the Masking from the pop up menu.
Click synchronize
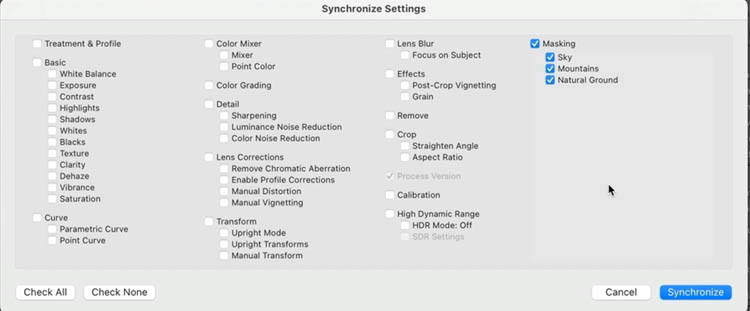
And the settings copy over perfectly.
I hope you found this tutorial useful!
Here are more resources on the latest Photoshop and Lightroom UPDATE.
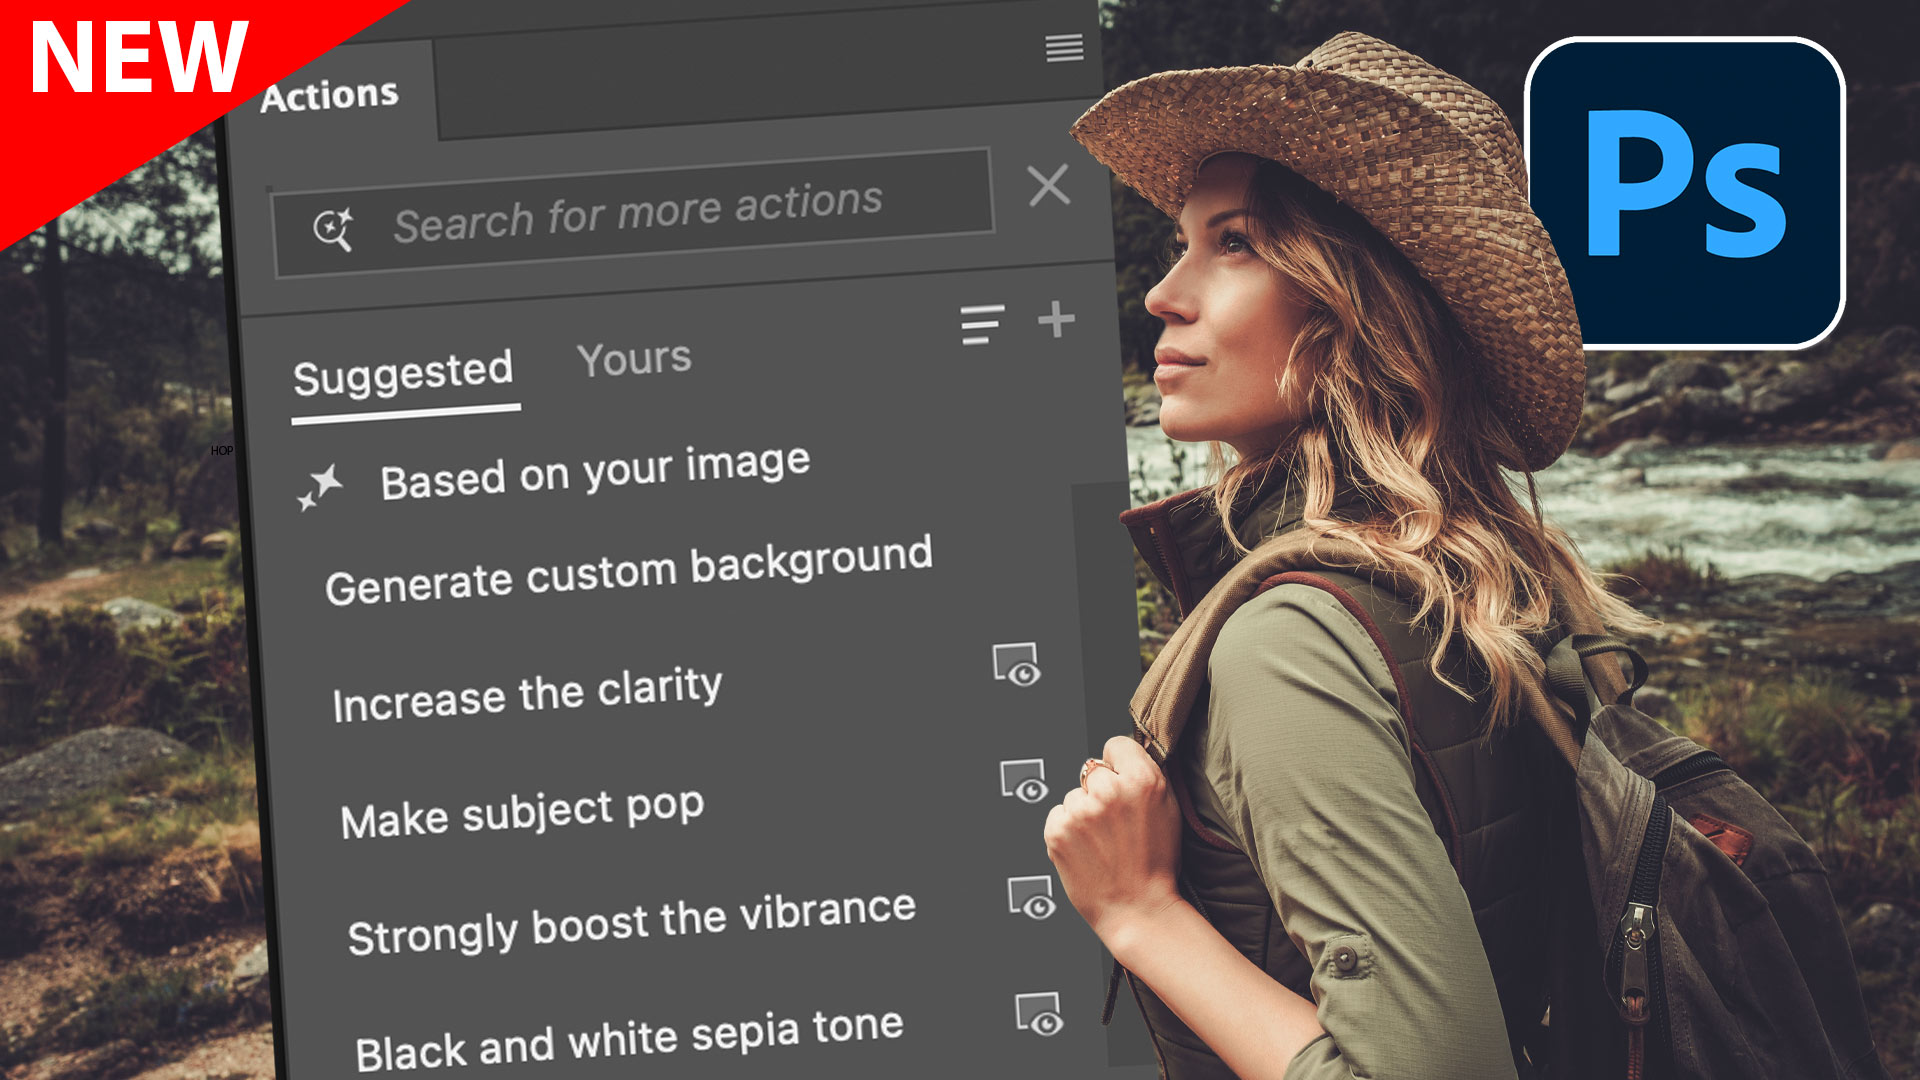
7 Favorite new features in Photoshop 2025 April update
Adjust Colors
Reflections Removal
Auto Selections | Auto selections on difficult images
Select details
Great to see you here at the CAFE
Colin
PS Don’t forget to follow us on Social Media for more tips.. (I’ve been posting some fun Instagram and Facebook Stories lately)
You can get my free Layer Blending modes ebook along with dozens of exclusive Photoshop Goodies here