
Using the amazing eyedroppers in Photoshop for single click color, lightness and shadow correction.
An often overlooked tool in Photoshop is the eyedroppers, They really are powerful once you know how to use them. This tutorial will shows you exacly how you can get quick and reliable color and luminance correction is Photoshop. I’m using Photoshop CC, but this will work with just about any version.
Watch the video and then read the step by step instructions, they compliment each other.
The eyedroppers can be found in many places in Photoshop such as Levels and Curves and they often get overlooked.

There are three eyedroppers:
- Black: Sets the black point (darkest part of the image).
- Gray: Sets the white balance.
- White: Sets the white point (brightest part of the image).
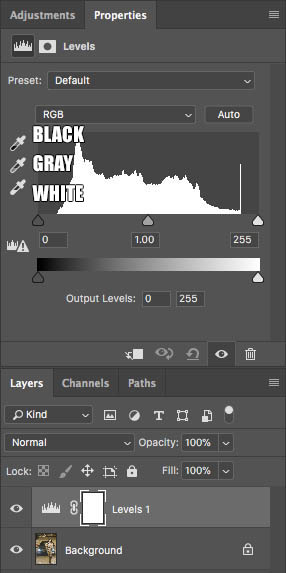
The eye droppers are also found in the adjustment layers, such as levels and curves.
Before we correct the image, we need to calibrate, or more correctly, build in some headroom to the settings. This will allow subtle detail in blacks and whites to show thorugh.
Setting up the Eyedroppers (Only have to do this once)
Let’s start with the black point.
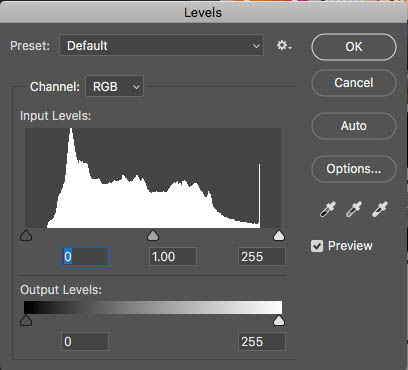
With the levels adjustment layer open, double-click the top eyedropper. (Must have a document open to use Adjustment Layers).
![]()
![]()
You will see a color picker. Change the B setting to 5.

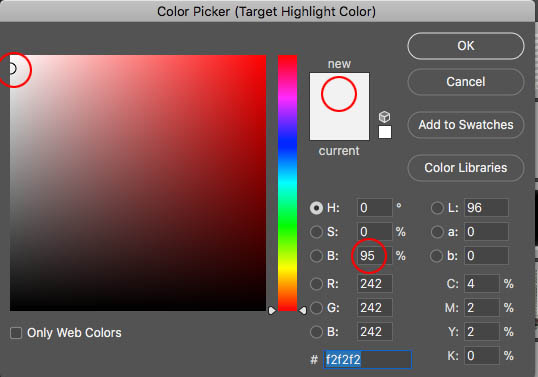
Double click the bottom eyedropper (white).
![]()
![]()
Change the B setting to 95.
We have now given ourselves 5% headroom in the blacks and whites.
You will see a dialog box each time that offers to save new defaults, Click yes, you will never have to do this again, until you reinstall Photoshop or reset the preferences.

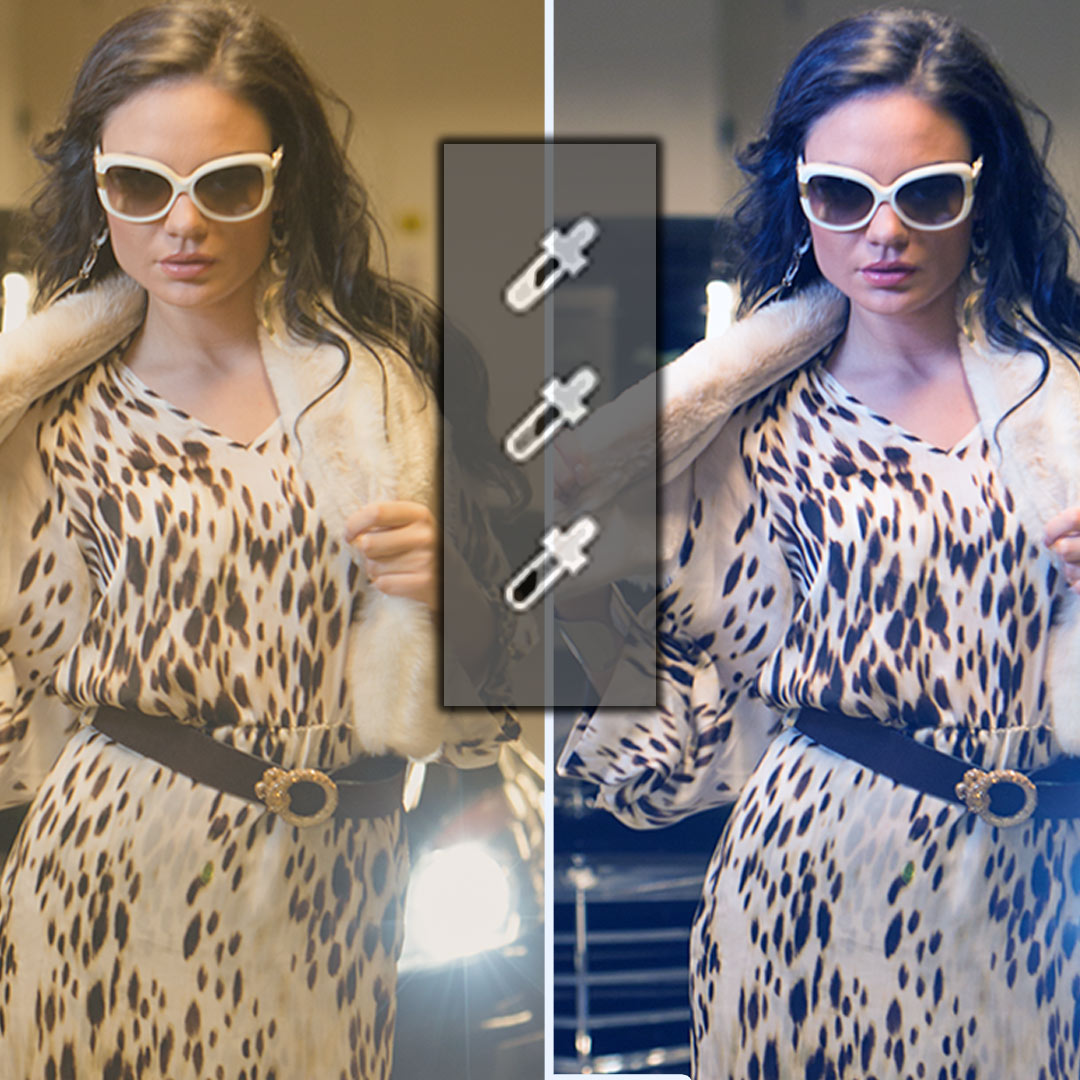
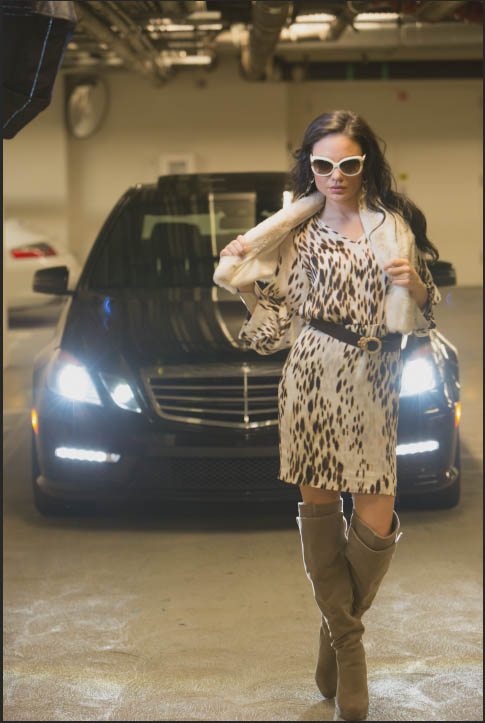
Setting the shadows and highlights of a photo using eye droppers in Photoshop
Let’s start with this photo that I shot in an underground parking building. Because of the flare from the car headlights, this image is lacking contrast (stong blacks). It also has a warm color cast. Lets fix it in 3 clicks.
Step 1. Setting the Shadows
Create a levels adjustment layer
Choose the Black eyedropper
Now we neeed to find the darkest point in the photo
Hold down the alt/Option key and drag the black triangle to the right. You will see clipping in the photo indicating where thae darkest points are located.
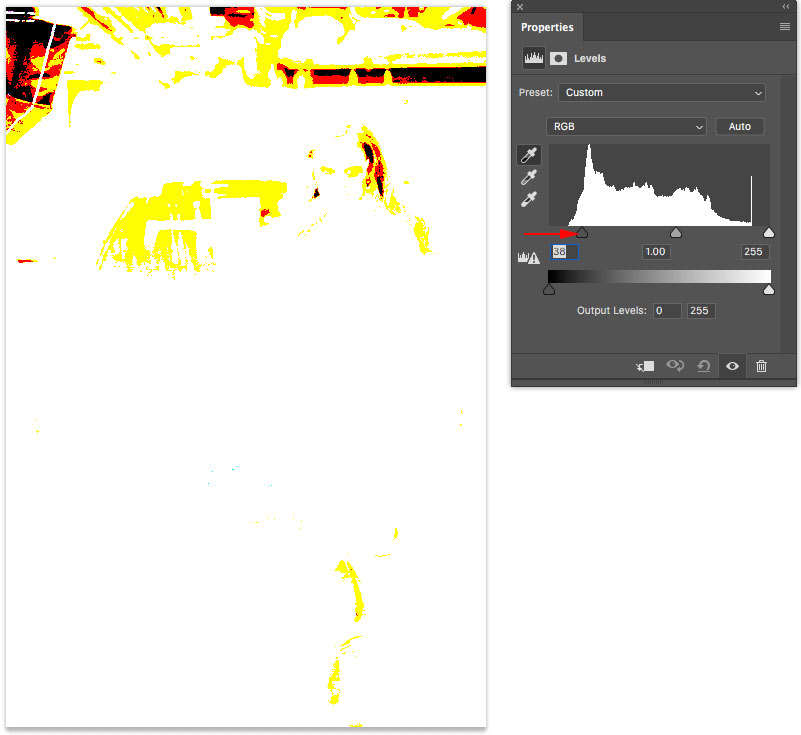
The darkest point in on the A/C duct on the ceiling. Click with the black eyedropper and the blacks now look really nice and rich.

Step 2. Setting the highlights
Let’s locate the brightest part of the photo.
Hold down Alt/Option key and drag the white triangle to the left. You will see clipping about the headlights of the car.
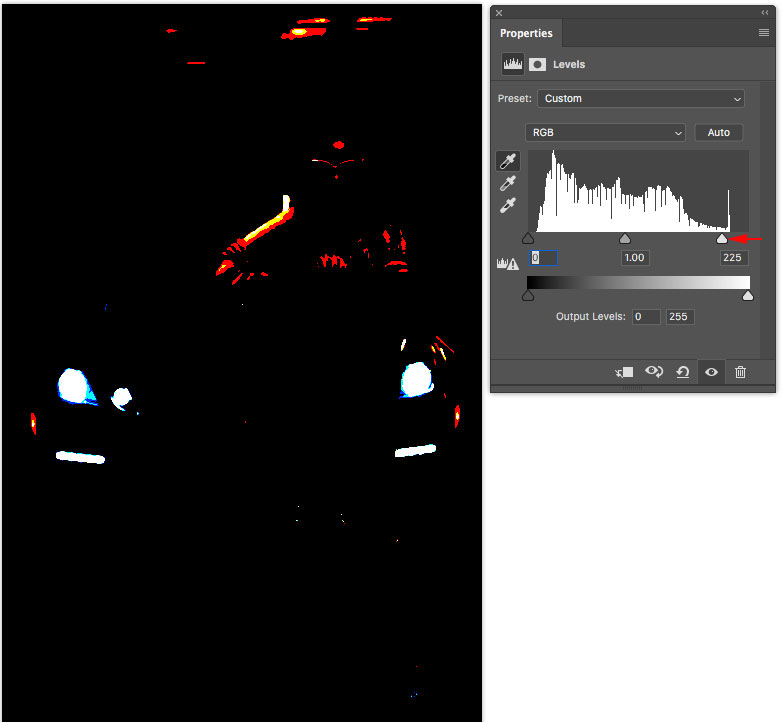
Sometimes, I ignore areas that are producing light (you should try it first) and look for other area that are the brightest but that may contain some pixel value (not blown out).
In this case, I clicked on the reflection in the car windshield with the white eyedropper. This brightens up the photo nicely.

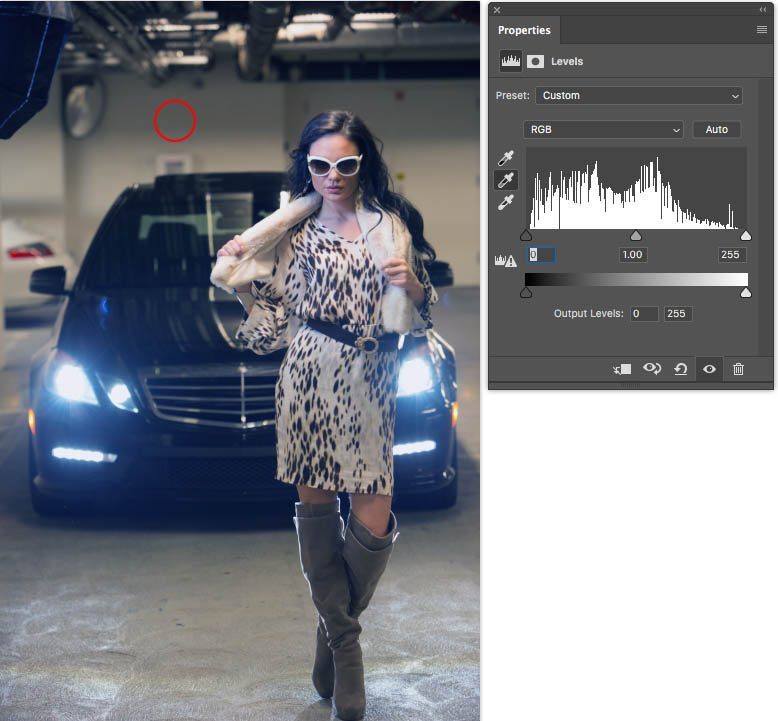
Setting the color balance with Photoshop eye droppers
Now its time to set the white balance and remove the color cast.
Choose the gray dropper.
![]()
![]()
Look for an area in the photograph that should be a neutral gray or white. I know the wall should be gray.
Click on it with the gray eyedropper and look at that, the color cast has been removed.
I hope you enjoyed this little tutorial. The curves tutorial is here
If you like these kinds of techniques, you really should check out my flagship training: Photoshop CC for Digital Photographers. (Also available in CS5 and CS6 versions). This comprehensive training will teach you everything you need to know about working with photos in Photoshop and Ive been making this training for 15 years and 7 versions, improving on it with each version. You won’t find a better Photoshop resource anywhere.
Drop a comment and let me know if this tutorial was helpful, and don’t foget to sign up for our weekly newsletter to get more free tutorials and goodies!
Great to see you here at the CAFE
Colin Smith
PS Don’t forget to follow us on Social Media for more tips.. (I’ve been posting some fun Instagram and Facebook Stories lately)
You can get my free Layer Blending modes ebook along with dozens of exclusive Photoshop Goodies here 


