It’s a good idea to back up the data on your iPhone regularly in case disaster should strike. It could get lost, stolen or dropped, but with a backup you can quickly and easily get up and running with a replacement iPhone.
(It’s also a good idea to
insure your iPhone for these reasons, especially if you can’t afford to buy another one.)
Backing up your iPhone is easy and should you wish to protect your iPad too, then you can use the same steps.
We recommend creating multiple backups through various methods to ensure that your data is truly safe. If you use just one, then any problems with that file could leave you without the very things you hoped to preserve. We’ll outline a few different options below, so pick at least two to be on the safe side.
How to back up your iPhone to iCloud
The simplest route to backing up your iPhone is by using Apple’s iCloud storage service. All users get 5GB of space for free, but that isn’t usually enough to make a complete backup especially if you take a lot of photos or videos.
At the moment Apple offers extra storage for the following prices;
- 50GB – £0.79/$0.99
- 200GB – £2.49/$2.99
- 2TB – £6.99/$9.99
You can upgrade to any of these by going to Settings > [Your account name] > iCloud > Manage Storage. You’ll now be able to select either Buy More Storage or Change Storage Plan then move to the one that suits your needs.

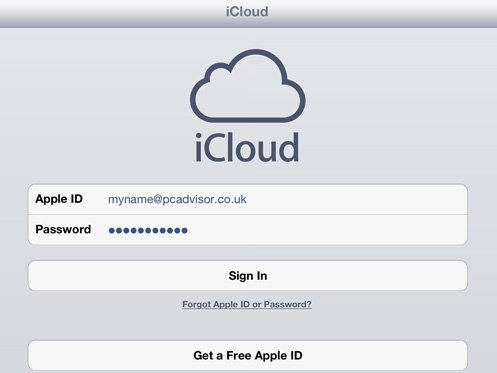
With the capacity increased it’s now time to create an actual backup. Go to Settings and tap on your account name at the top of the screen. When you first set up your iPhone you would have also created an iCloud account, so this should be in place without your needing any additional steps.
Select iCloud > iCloud Backup then enable the iCloud Backup option. This should create a new backup.
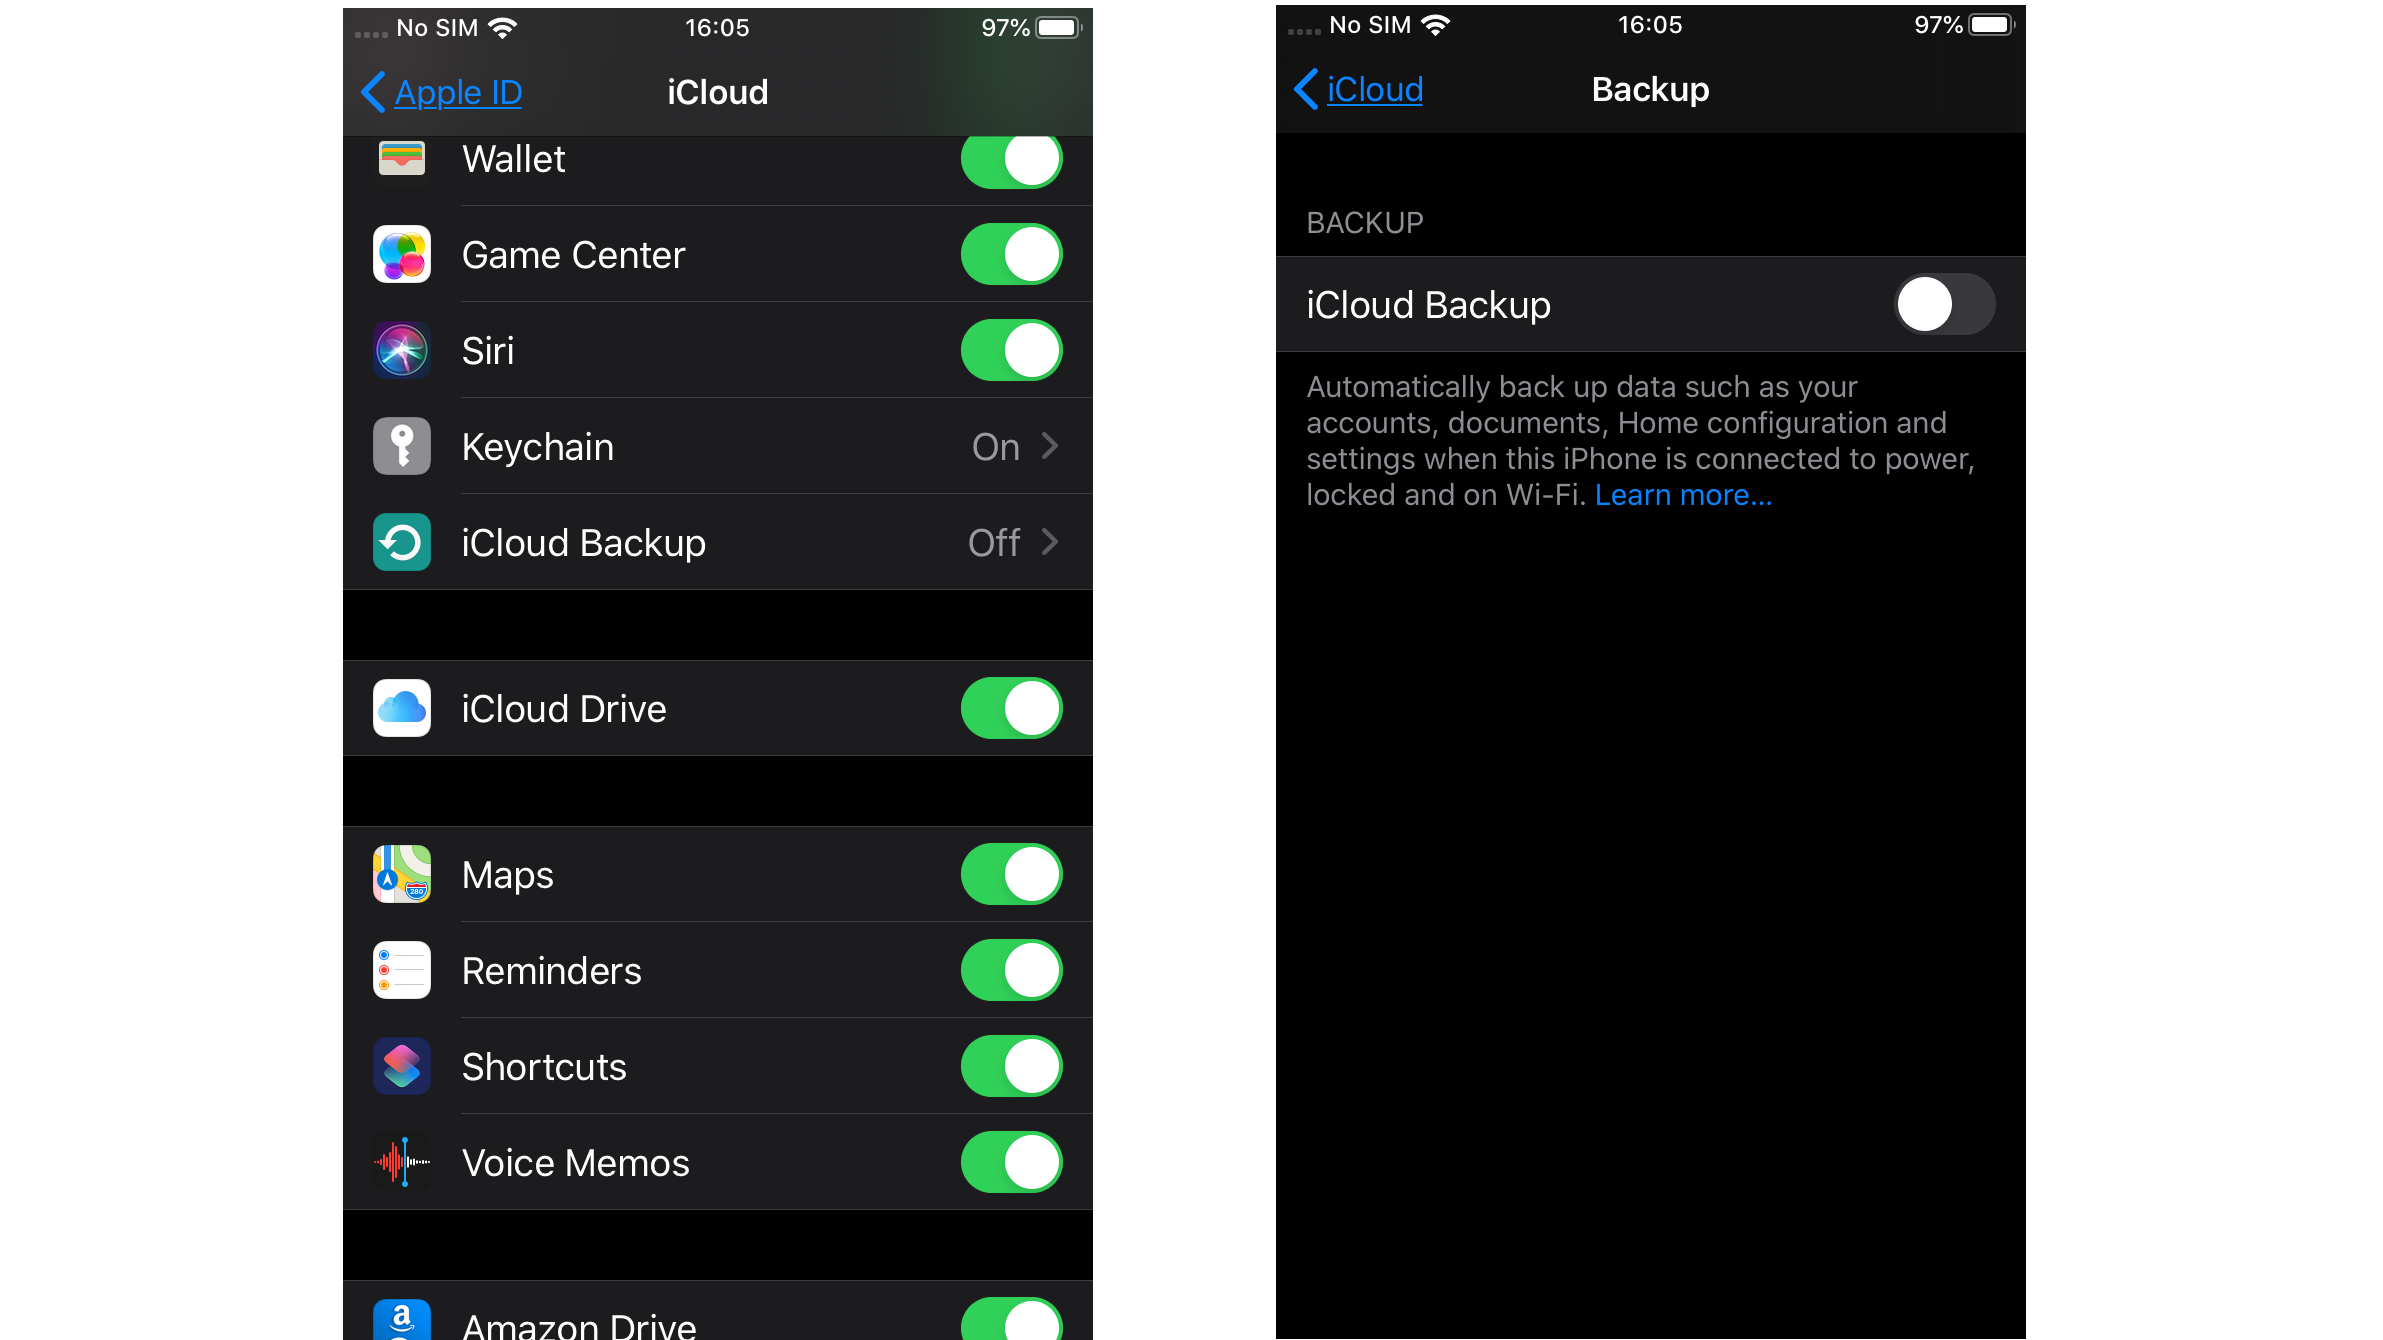
You don’t have to make iCloud backups manually: they happen automatically when your phone is on charge – usually overnight. Make sure your Wi-Fi router is turned on, as you don’t want that backup to use up your mobile data.
How to back up your iPhone using iTunes
Apple has discontinued iTunes on Mac with the release of macOS Catalina, but if you have a Windows 10 PC, you can create a backup with iTunes and keep it stored on the hard drive. To do this, open iTunes (or download and install it from the
Apple site), then plug your iPhone into the PCs USB port.
You should see the iPhone appear in the top left-hand corner by the play controls. Click this to open the device menu, then select Summary in the column on the left. In the main pane you’ll find a box entitled Backups. Within this is the choice to either Automatically Back Up or Manually Back Up and Restore, and there are further options for either method.
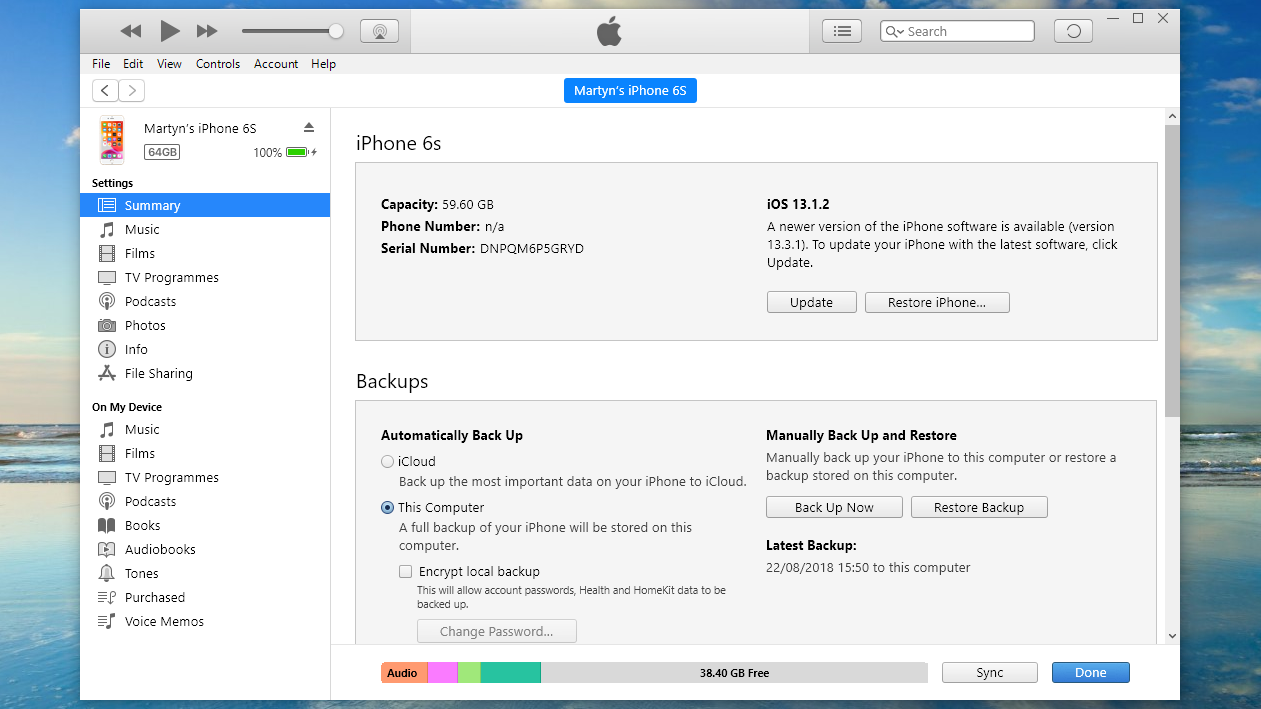
Using the Automatic route will mean that each time you plug your iPhone into the PC and run iTunes, it will create a backup. You’ll want to choose the This computer option to ensure the backup is stored locally on your PC. Of course, if you want to create a one-off then click the Back Up Now button in the Manual section.
You don’t have to use Apple’s software to complete this process, as there are also third-party backup solutions available. These include
DearMob iPhone Manager, among others. To see how the software works, read
How to back up your iPhone on Windows 10 without iTunes.
Using Third-party software
Due to the nature of cloud services, it’s actually quite simple to have much of your data stored online instead of locally in your iPhone. For notes and documents there’s Microsoft’s
OneDrive or
Google Drive, the first of which offers 5GB of free storage and the latter 15GB.

Google Photos also offers unlimited free storage of HD images and videos so long as they are either 16MP or 1080p formats. This is a particularly useful way to have another place where the items that usually take up the most space on your device are kept.
Again, Google comes to the rescue for Contacts, albeit with a little help from apps like
Contacts Sync for Google Mail that can move all the ones currently on your iPhone and copy them to your Google account.
Remember all purchases made on Apple Music, iTunes, or the App Store can all be downloaded again without the need for backups, so you can simply re-download apps and other content. However, if you have an iCloud or iTunes backup, all apps can be reinstalled automatically, rather than the time-consuming process of doing it manually.
For more ways to keep files safe, take a look at our
best cloud storage roundup.