
5 (really 6) Wacom Tablet tips to get the most out of your wacom tablet
1. Sneaky tip for fast Dodge and Burn switching
2. How to test and fix tablet aspect ratio
3. How to fix the annoying ring around the curser on Windows 10 and the pen settings
4. Pen smoothing, when it’s good and when its not
5. Quick access to the Radial Menu
6. How to back up your Tablet settings
We all love our Wacom Tablets. They are so much better for drawing and painting in Photoshop and they give you access to a number of pressure sensitive options in tools, especially the brush tool. Here is a selection of my favorite tips to help you get more out of your Wacom tablet and to solve common annoyances. I personally use the Intuos Pro medium and also a Cintiq 22″.
Tip 1. Sneaky tip for fast Dodge and Burn switching
Let’s start with a basic photo. We can do some dodging and burning to bring out more detail. (full Dodge and burn in Photoshop tutorial)

Step 1
In the layers panel, hold down the Alt/Option key
Click on the new layer icon.
![]()
![]()

This gives us a New Layer with options
Choose Overlay for the mode.
Check Fill With Overlay-neutral Color.
Click OK.

Step 2
Press the D key to reset the foreground background color.
Choose the brush tool
Set Opacity to 30%.(tap 3 key)

Step 3
Go into your tablet preferences.
(If you want to get the full functionality out of your tablet, make sure you have the Wacom driver installed.)
If you don’t have it, you can get it at: http://www.wacom.com/en/support/product-support/drivers
Step 4
Click Wacom Tablet. (do a search on windows “Wacom” to find the tablet preferences)


Step 5
Under Tool, choose your pen, click the erase option
Under the eraser, change it to a key stroke.
Set the x key as the Keystroke. (swap foreground and background colors)
Click OK.


Step 6
You can change between foreground and background by tapping on the tablet with the back of your pen.

Step 7 – Dodge and Burn with the pen
Increase the size of the brush.
Control + Option drag on Mac/Alt + Right Mouse drag on Windows – drag left/right in order to decrease/ increase brush size. (Or use the touch ring on your tablet)
Turn ON the opacity pressure in the tool bar.
![]()
![]()

Step 8
Let’s do the burning (darkening) first.
Make sure black is set as the foreground color.
![]()
![]()
Use your pen to go around the edges to create a vignette effect


Step 9
Make your brush smaller.
Darken the shadows down a little bit by painting with your brush.

Step 10 Dodging (lightening)
Flip the pen.
Tap on the tablet to change the foreground color to white.

Step 11
Paint the light using your brush. (more detailed directions here)

here is before and after

Tip #2: Draw rounder circles
Have you ever wondered why your circles look squashed? Why is is hard to draw a circle? It might be your preference.
Step 1
Draw a perfect circle. I have used a stencil to make sure I’m drawing a perfect circle. If you don’t have a stencil, use a common house hold item, even a toilet roll.

If the circle looks perfectly round, skip to the next tip (#3), you are good.
If the circle doesn’t look so perfect in Photoshop, then keep reading.

Step 2
Open Tablet Preferences.

Step 3
Select Mapping.
Check Force Proportions.

Step 4
Draw the perfect circle using your pen.

Now the circle is correctly proportioned, which means that everything you paint now, will have the correct proportions. (aspect ratio).

Tip #3. How to fix the annoying ring that appears around your pen in Windows 10
If you have used a tablet in Windows 8, or Windows 10,a ring will appear when you touch the pen and you cant paint. There are 2 things you need to do to turn off the ring. Its really easy once you know how. It took me hours to figure this out which is why I’m making this tutorial to help everyone else.
Annoying ring:

Here we are in Windows.
Grab the Brush by pressing the B key.
If you click and hold, the annoying circle will appear.

Step 1 Turn off visual pen effects
Go to your Windows menu.
Click on Settings.

Go to Devices.

Go to Pen & Windows Ink.

Turn visual effects off.

Step 2 – Pen and Touch Preferences in Windows 10
Go to Search Windows.
Search for Control Panel.

Go to Hardware and Sound.

Then select Pen and Touch

Select Change Tablet Pen Settings
Click Settings.

Turn off Enable press and hold for right-clicking.
Click OK.

Important! Apply the settings.

Go back to Photoshop.
Now, when you click and hold, you can draw without that annoying ring appearing

Tip #4 Pen Smoothing, when it’s good and when it’s not
You want to draw with Smoothing turned on if you need drawing or sketching. Smoothing makes it easy to draw curves.
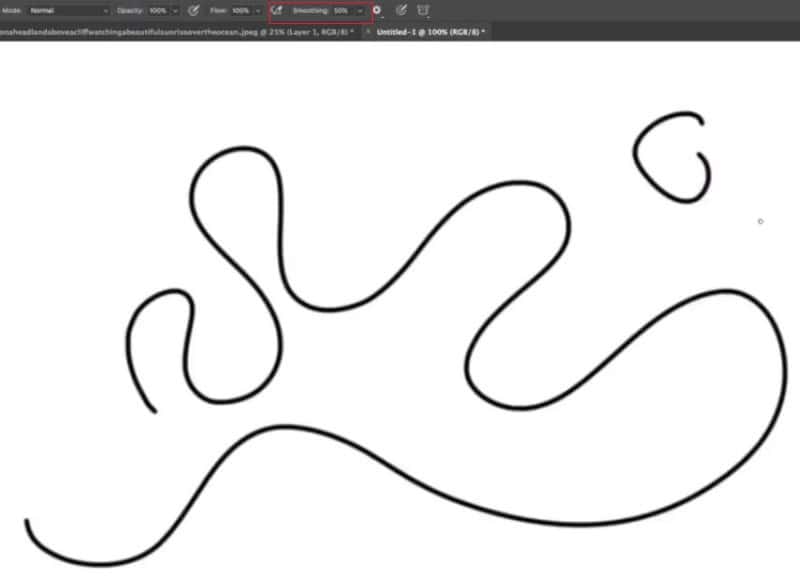
You want to have the Smoothing turned off if you’re doing Photographic work like dodging and burning and whenever precise smooth pen strokes are not important because it will slow down the responsiveness of the brush.
![]()
![]()
Tip #5 The onscreen radial Menu in Photoshop
On my tablet there are 8 express keys.

By using the radial menu you can extend that and have all the keyboard shortcuts and little tricks and tips right there at your fingertips.
Step 1
Turn on the touch by pulling the little switch on the side of your tablet.

Step 2
Tap with three fingers to bring up the Radial Menu.


If you have an older tablet that doesn’t support the Touch, you can enable the Radial Menu by using the button on your pen or an express key on your tablet.
Step 3
Click on the little gear icon in the radial menu to customize it.
![]()
![]()
In this menu you can set shortcuts, keystrokes and many different options.

Tip #6 (Bonus Tip) How to back up your Tablet settings
You spend a lot of time setting up your tablet. You program the express keys, touch rings, pens and radial menu. If you reset your computer or upgrade programs, you don’t want to have to do it all again. You can back up and restore your settings as your personal preset. Here is how.
Step 1
Search for Wacom Tablet Utility.

Step 2
Open Wacom Tablet Utility. (works the same on mac and windows)

Click Backup.

Step 3
Enter the name for your backup file.
Select the destination for your file.

Click Save.

Step 4
Whenever you want to get those saved settings click Restore.

Find the file and click open.

Your settings will be restored.

I hope you enjoyed this tutorial. If you did, don’t forget to subscribe so you can get new tutorials coming out every week. Don’t hesitate to drop a comment and share your opinion.
Until next time, I will see you, at the Cafe.
Here are some useful resources for further learning.
Fully comprehensive training on Wacom Tablets and Photoshop CC
Photoshop CS6 and Wacom Tablets
Photoshop CS5 and Wacom Tablets
My Dodge and Burn Tutorial
Thanks for checking it out!
Colin
PS Don’t forget to follow us on Social Media for more tips.. (I’ve been posting some fun Instagram and Facebook Stories lately)
You can get my free Layer Blending modes ebook along with dozens of exclusive Photoshop Goodies here 


