
There are a number of pressure sensitive tool in Photoshop that can only be used with a pressure sensitive pen and tablet. This tutorials looks at how to set up and use the pressure settings in Photoshop.
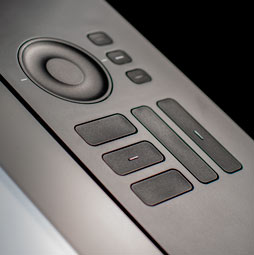
We begin by setting up the Wacom tablets to work exactly the way you want them to in Photoshop. We set up the drivers and Interactive Pressure Profiles in this video. The following text has additional information to help you understand pen pressure in Adobe Photoshop.
Pen pressure strokes in Photoshop
If you open the bushes panel and look at the brush profiles, you can see the types of dynamics that are on or off by the shape of the preview. I’ll explain here.
Normal brush, no pressure and a hard edge

Normal brush, no pressure, soft edge

Tapering shows that dynamics are on for pen pressure for size, this is under the shape Dynamics tab.

Pen pressure set to opacity, you can find this under the Transfer dynamics tab in the Brushes Panel

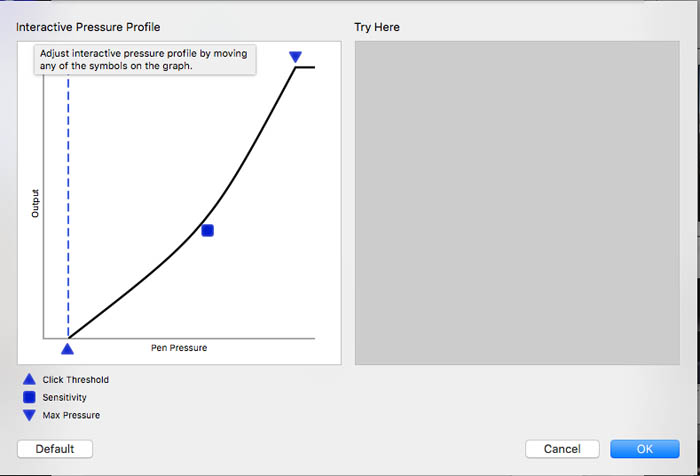
Interactive Pressure Profile
This panel under the Wacom driver preferences allows you to full customize the way the brush pressure works. Bottom is the light end, and the top is the heavy end. You can choose how hard you need to push to begin pressure and also how hard you need to push to reach full pressure. The sensitivity square allows you to make the pressure more or less sensitive at various pressures.
I hope this tutorial helps you. If you are wanting to learn more about your Wacom tablet, you should check out the video based Premium series “Wacom Tablets in Photoshop” by Wes Maggio and Colin Smith, It’s the best resource for learning a Wacom tablet for the past decade, now in its 8th edition!
Thanks for checking this out, more new tutorials here at PhotoshopCAFE every week!
Colin
PS Don’t forget to follow us on Social Media for more tips.. (I’ve been posting some fun Instagram and Facebook Stories lately)
You can get my free Layer Blending modes ebook along with dozens of exclusive Photoshop Goodies here 


