
This tutorial is an old favorite of mine. I have been using this technique for a long time. In the past, I used to make selections to change the color of parts of a photograph. Since I discovered this tip, I never make selections to change colors any more. This is so simple and quick to do, it’s one of those “I wish I had known about this before” techniques as you remorse all the wasted time in the past.
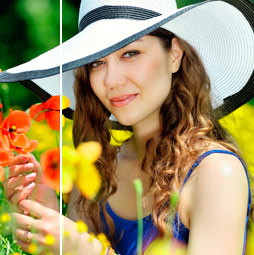
I used to do this technique with the Hue/Saturation adjustment, but it’s much better and faster to do it with an adjustment layer. You will also notice that you can use the built in mask in the Adjustment layer to save a lot of time and get better results. Most of the time, you don’t have to do any masking, but I used an example that does require masking so that you will know how to do it when the need arises, because it will!
You can fins the image I used for the tutorial on . The number of the image is #73372537 (You can follow along without having to buy the image) For instructions on using Adobe stock, check it out here.
PS Don’t forget to follow us on Social Media for more tips.. (I’ve been posting some fun Instagram and Facebook Stories lately)
You can get my free Layer Blending modes ebook along with dozens of exclusive Photoshop Goodies here 


