
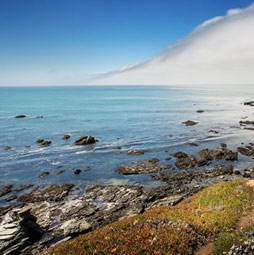
A newer option in Photoshop’s ACR and Lightroom is the ability to work with HDR photos. These programs can now work in 32 bit mode. What this means to you is the ability to make the enhancements that you are used to with an excption. You are able to work with merged HDR images, meaning that you have a lot more tonal range, or details in shadows and details in highlights to work with. The result is a photograph that looks very close to what you witnessed with your eyes. This is not a tutorial on the basics of HDR and stylized looks, we have that tutorial here.Rather, this is a tutorial on how to achieve the most natural result possible. The adjustments in Camera Raw andLightroom are identical.
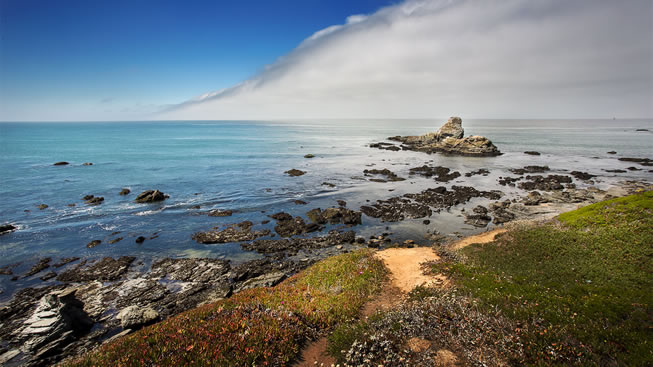
Here is the final result
If you like this tutorial..
Check out Colin Smith’s best-selling video training on HDR. This is one of the most popular HDR training videos in the world!
HDR Resources
Check out our free HDR resources at PhotoshopCAFE
Colin Smith’s HDR tutorial
HDR in Camera Raw (Photoshop CC 2015) and quick HDR guide
Basic HDR explaination (Video)
Written tutorial on HDR in Camera Raw (What’s new)
HDR in Lightroom
Tone Mapping HDR in Lightroom and ACR
If you are ready for deeper learning see my Premium training on HDR as well as Photoshop and Lightroom which cover these topics in greater detail for those of you who really want to master the subject.
Thanks for reading / watching and don’t forget to share these resources with your friends.
See you at the CAFE!
Colin
Get your free presets pack
You can download some free goodies, get the actions pack and the free ebook at https://photoshopcafe.com/freepresets
 |
HDR, Panorama and Timelapse.
|
PS Don’t forget to follow us on Social Media for more tips.. (I’ve been posting some fun Instagram and Facebook Stories lately)
You can get my free Layer Blending modes ebook along with dozens of exclusive Photoshop Goodies here 


