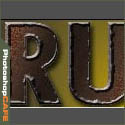
How to make rusted text effect in Photoshop
Step 1
Start with some test on a new layer.
 Rasterize the type, by right clicking on the name on the layer thumbnail and selecting “rasterize text” (Render type in PS 5.0 and 5.5)
Step 2
Select the text (Ctrl/Cmd+Click on layer thumbnail)
Select the linear gradient tool and choose the “copper gradient” fill the text with the gradient.

Step 3
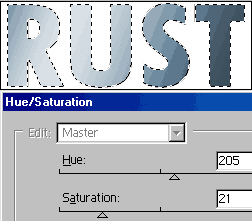
Change the color of the text by using the Hue/Saturation option. Press Crtl/Cmd+U to open the command and set it for a gray/blue color.
Duplicate the layer.
Step 4
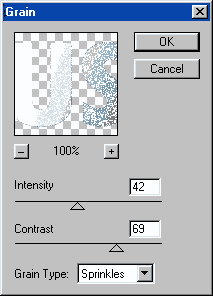
To add the texture:
Filters>Texture>Grain
Shoose the settings as shown to the right.
Step 5
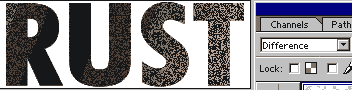
Switch to Difference mode and notice how the color begins to come out.
Step 6
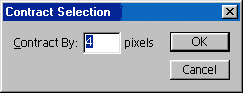
Now load the layer as a selection by Cmd/Ctrl+Clicking on the layer thumbnail.
Select>Modify Contract Choose 4 pixels.
![]()
![]() In the bottom of the toolbox click on the quickmask button, or press the “Q” key
In the bottom of the toolbox click on the quickmask button, or press the “Q” key
Step 7
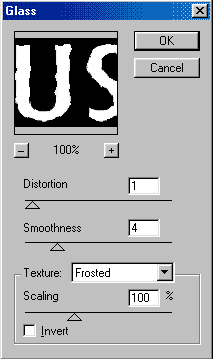
Filter>Distort>Glass
Choose the settings shown.

Step 8


Click off the quickmask tool or press “Q” again.
Duplicate the layer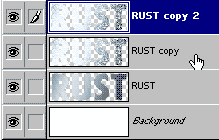
Step 9

Press the Delete/backspace key to delete the selection.
Step 10
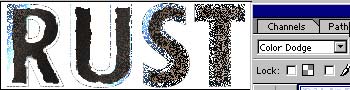
Switch to color dodge mode.
Step 11
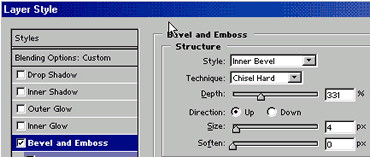
Add an inner bevel to the layer.
Also add a drop shadow to the original text layer for effect.
Here is the effect with a shiny border, for a variation please continue.

Step 12
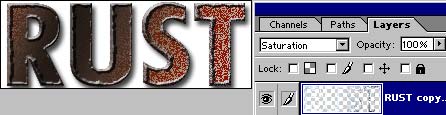
Change the mode to Saturation
Ctrl/Cmd+U for the Hue/Saturation
Change the color to suit
Step 13

Drop onto a colored background for effect.
There you have it… Rusted Text. Rust never sleeps! (And neither does Colin these days
Photoshop VAULT
Access valuable Photoshop extras and goodies for free and much more a

PS Don’t forget to follow us on Social Media for more tips.. (I’ve been posting some fun Instagram and Facebook Stories lately)
You can get my free Layer Blending modes ebook along with dozens of exclusive Photoshop Goodies here