

1
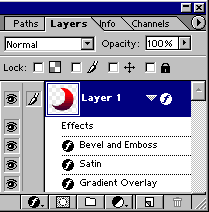
Make sure you have your image on its own layer with no background.
This is the #1 mistake people make, in older versions of Photoshop you would have saved it on a colored background

2
Now go File>Save for web
You should see this box open.
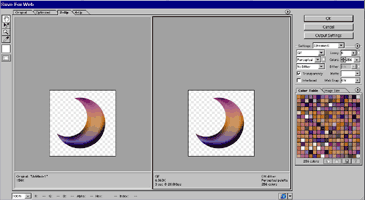
3
![]()
![]()
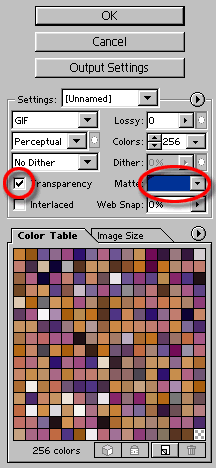
Make your setting gif and use the smallest amount of colors you can without affecting the appearance of the image.
The 2 things to remember here are:
1. Make sure Transparency is selected.
2. Set the Matte color to the closest match of the background color you will be placing the image on. If you are unsure then set the Matte to “None” (more about Matte in step 4)
Click ok and save your image.
4
Some more information on Mattes.
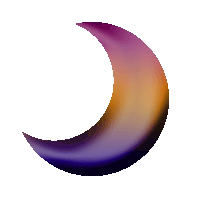
Mattes puts a thin outline around the image to get rid of what we call halos.
On the right you can see an example of a halo. Look familiar? This is the sign of an amateurish webpage. Believe me there are already enough bad webpages out there without us adding to them.
5
Here is the same image with Matte set to none. Notice the halo is gone, but it is still a bit jaggy around the edges.
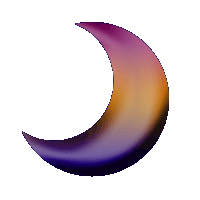
6
Here is the same image, this time saved with a black Matte. Notice how nice and sharp it is?


Always choose a matt color if you can. This way all your transparent gifs will look nice and clean.
This Matte trick will also work with transparent PNGs.
Stay tuned for more
Get in-the-know!
Photoshop VAULT
Access valuable Photoshop extras and goodies for free and much more a

PS Don’t forget to follow us on Social Media for more tips.. (I’ve been posting some fun Instagram and Facebook Stories lately)
You can get my free Layer Blending modes ebook along with dozens of exclusive Photoshop Goodies here


