
There is a little nostalgia in this tutorial for me. This is one of the first tutorials I ever wrote and it was the effect that inspired me to start writing tutorials. Read about it here on the PhotoshopCAFE history.
I have recently updated the screen captures, but the effect still works today the same way it did 13 years ago!
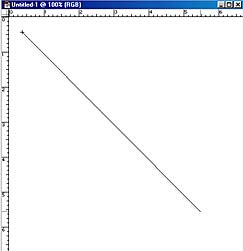
Step 1
Select the gradient tool by pressing “G” Now set the tool to linear gradient in the Gradients Palette. I chose the copper preset. Take your mouse to the top left and click and drag to the bottom right.
Step 2
This has now created a gradient fill

Step 3
Filter>Add Noise your image should look grainy like this. Select Monocromatic so that strange colors are not added.

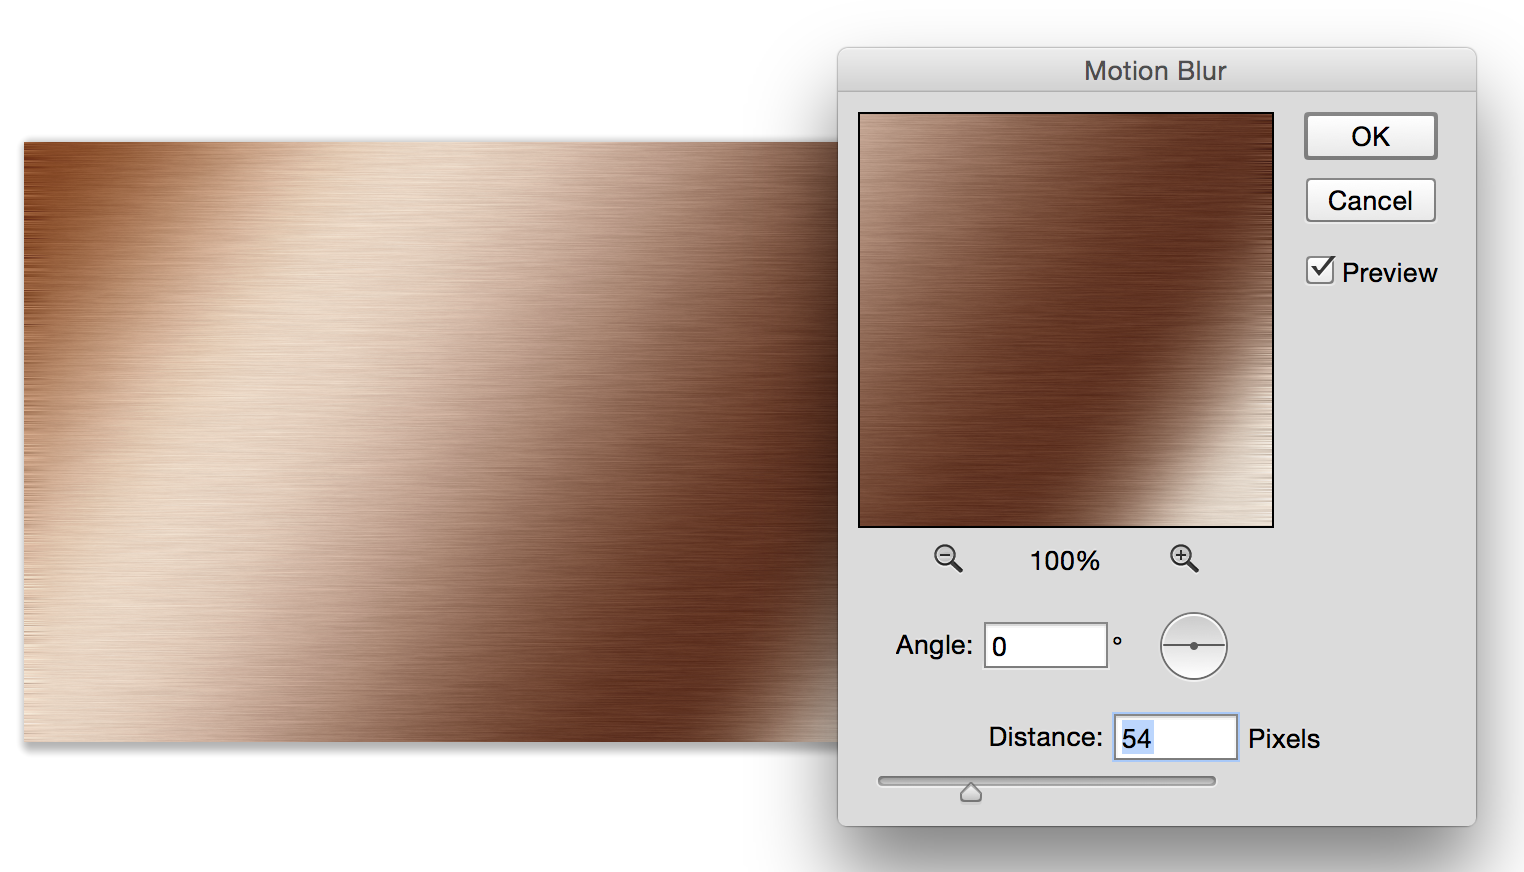
Step 4
Almost done, now go to filter>blur>motion blur. Set angle for 0 and distance to taste.
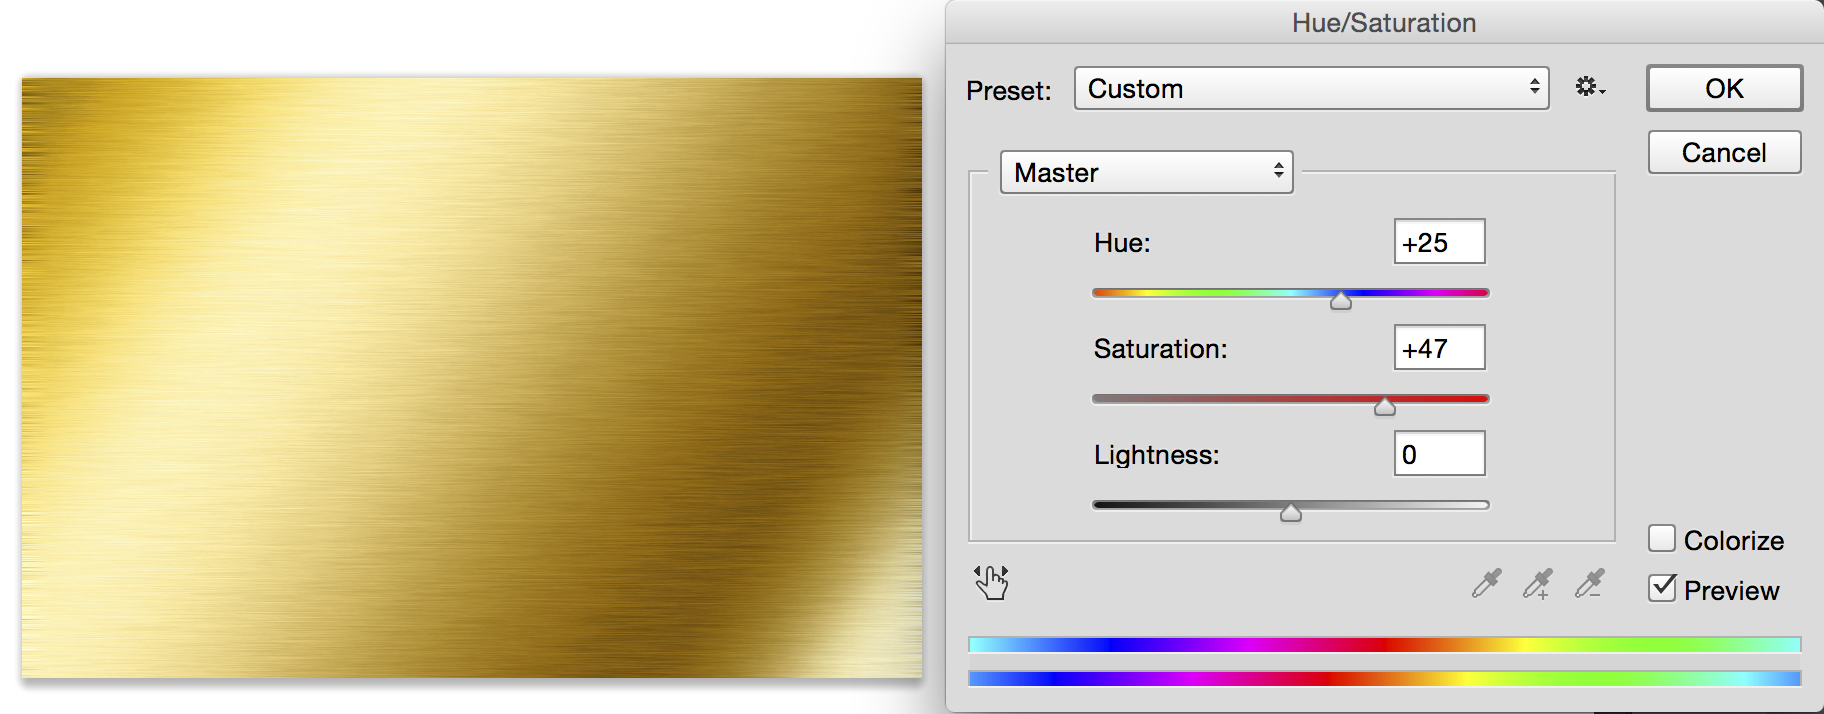
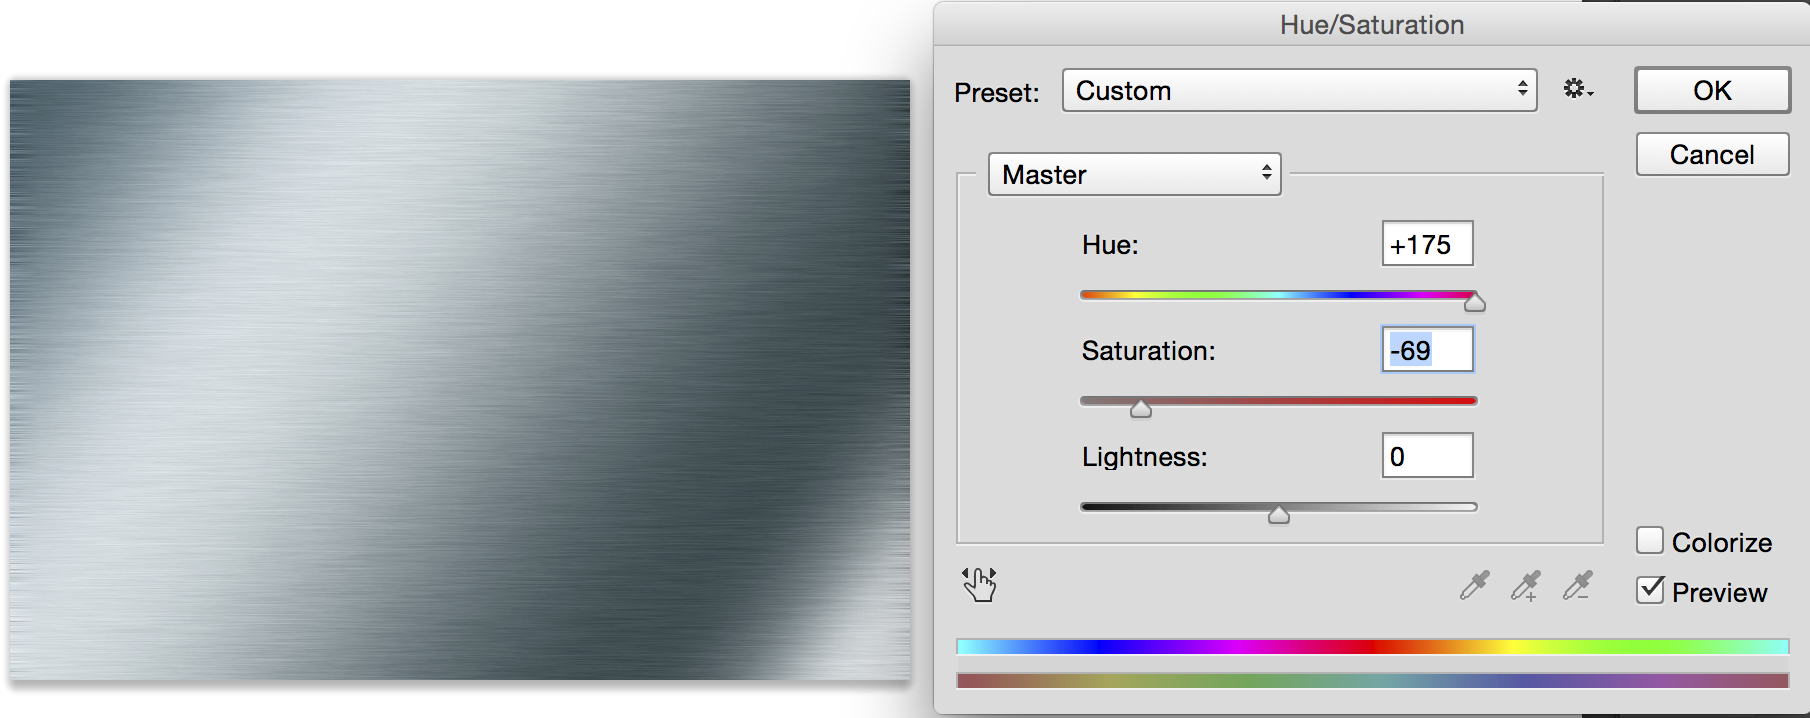
Step 5
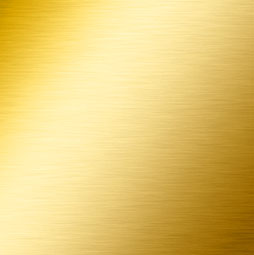
To change the color: Hue/Saturation, Ctrl/Cmd +U. Slide the Hue slider to get differant colors.
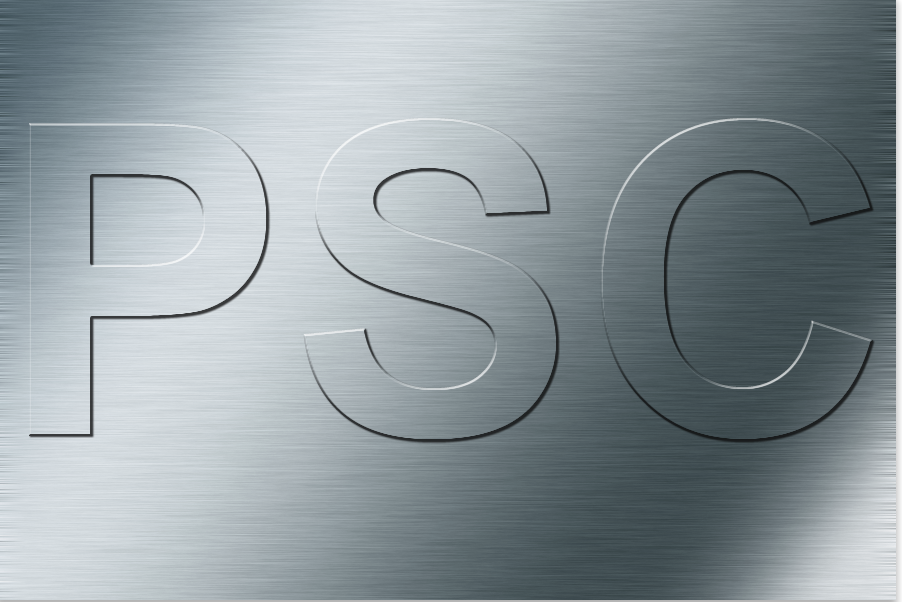
Learn how to stamp some text into this effect here
Photoshop VAULT
Access valuable Photoshop extras and goodies for free and much more a

PS Don’t forget to follow us on Social Media for more tips.. (I’ve been posting some fun Instagram and Facebook Stories lately)
You can get my free Layer Blending modes ebook along with dozens of exclusive Photoshop Goodies here


wadfyiwefgwagfygweyaufsejgyewfhewjghf
hnjgyuhfjh
Thanks for this tutorial! Instead of just applying the hue/saturation, create a hue/saturation adjustment layer. This gives you the ability to go in and adjust the effect later if you need.
Nice tutorial, very easy to follow thank you
YOU HAVE EXPLAINED VERY LOGICAL THAT IS A THE BEST QUALITY AS A TEACHER
I RESPECT YOU LOT AND VERY MUCH THANKFUL
Wonderful tutorial, I have tried to follow the tutorial and have done well. Thanks