

This Photoshop tutorial shows how to make a blended background blur, so you can show the whole body and have the background blurred in a realistic way without halos.
This is a very real and natural looking effect. While there are many tutorials on blurring the background of a photo, most of them either cut off the feet, or have a weird looking halo around the edges.
(Click to subscribe to our youtube channel for more tutorials). 
This Photoshop tutorial requires just a little bit of extra work to get a much better and more realistic looking result. maybe 30% more effort for a 300% better looking result.
I’m going to show you how to create a gradient background blur. It’s going to reduce the amount of visual clutter. It makes the photograph look more high-end and makes your subject stand out.
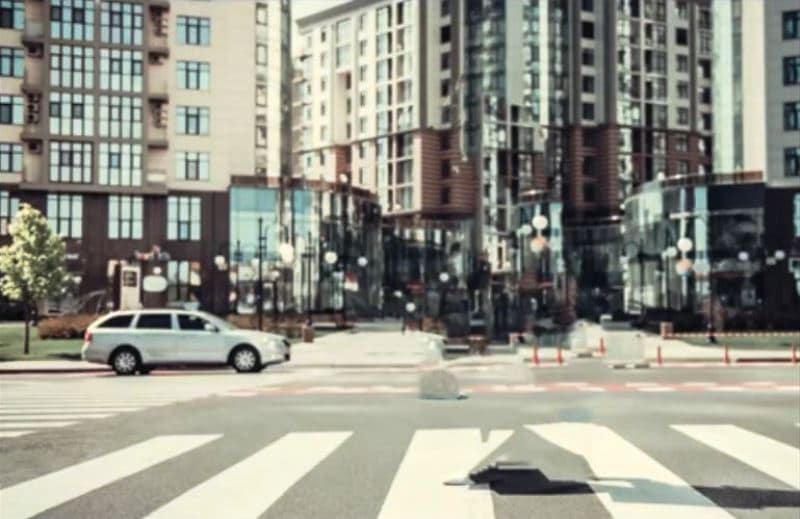
Step 1
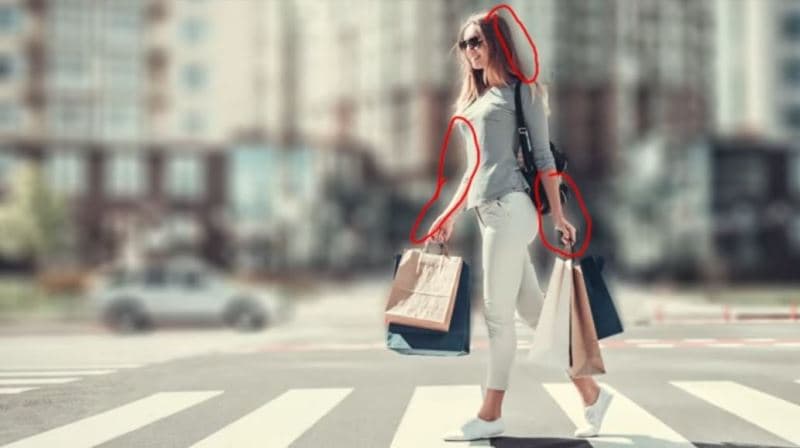
We will begin with this photo that I grabbed from Adobe Stock.

Step 2
- The first thing we need to do is cut out our subject. Grab the Quick Select Tool.
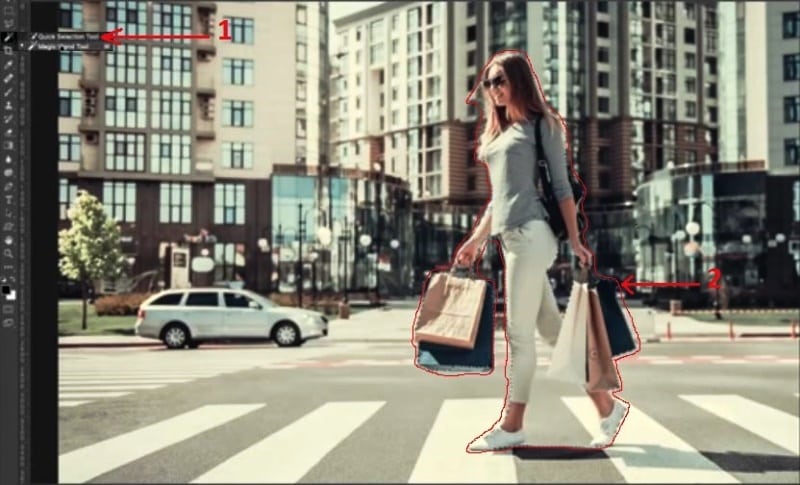
- Make a rough selection around our subject. It’s useful to overselect, then use the Alt or the Option key to go back in and just pick up those areas that we’ve just overselected and which may be somewhat tricky to get.
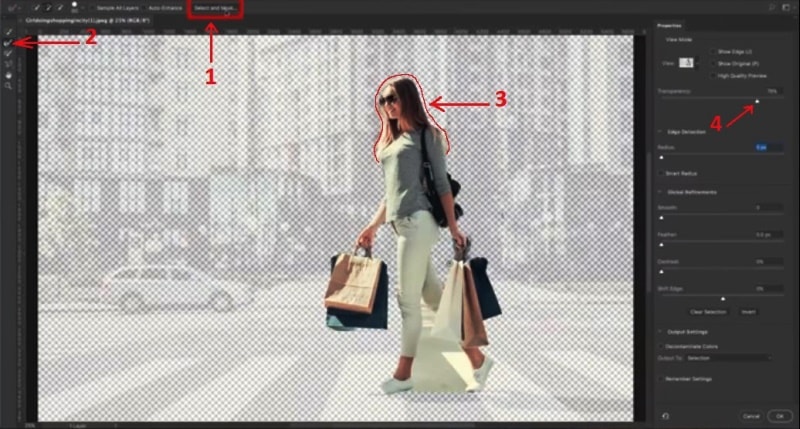
Step 3
- Choose Select>Mask.
- Grab the little tool that looks like a hairy brush.
- Go around the edge of the hair because you want to kind of select the edge of the hair and make it a little bit better. Pick up some of those flyaway hairs and some of the background there.
- You can use the transparency slider to check whether there are some areas that you’re perhaps missing and want to cover better.
Click on Show Edge tool and Increase the radius until you just start to see the edge.
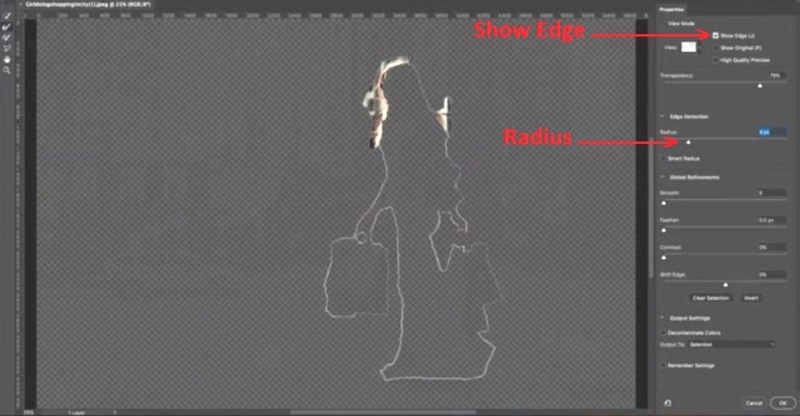
Turn off Show Edge and you can now see that the selection has improved.
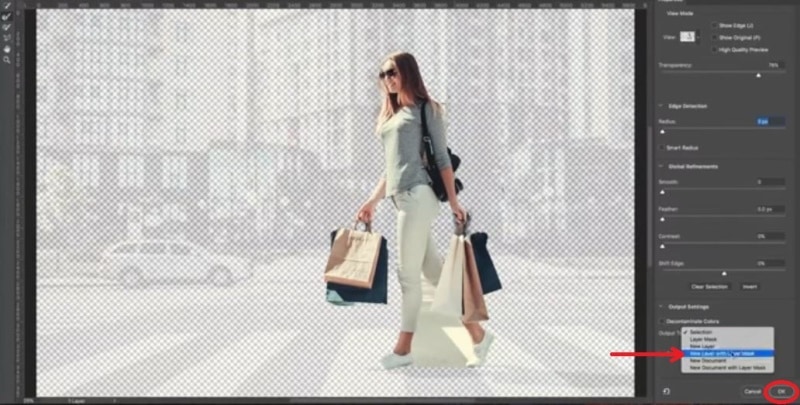
Choose “New Layer with Layer Mask” option. Then click OK.
Step 4
- Hide our woman layer for now by clicking the little eye icon on the layers panel.

- Choose the background.
- Ctrl/Cmd Click on the hidden layer mask mask to load its selection even though you’re working on the background right now.
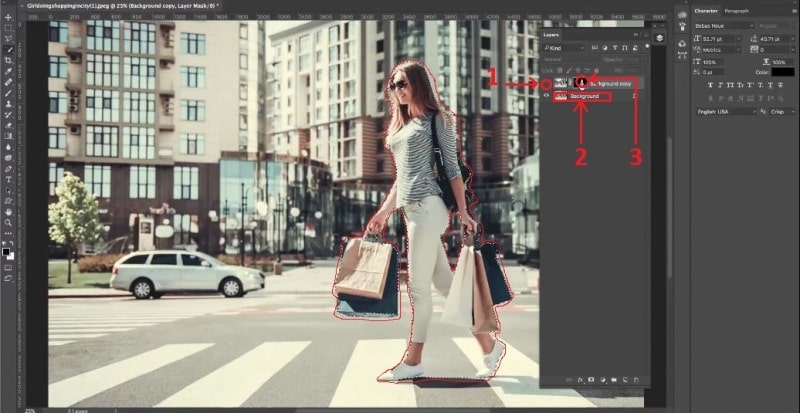
- We are going to expand the selection for a smoother result.
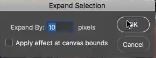
Step 5
Choose Select>Modify>Expand
10 pixels should be fine.
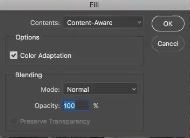
Step 6
And now,we just want to fill the selection with content aware, so hit the Shift Delete / Shift Backspace (Windows).
Choose Content Aware. Click OK.
Hit Ctrl D to deselect.
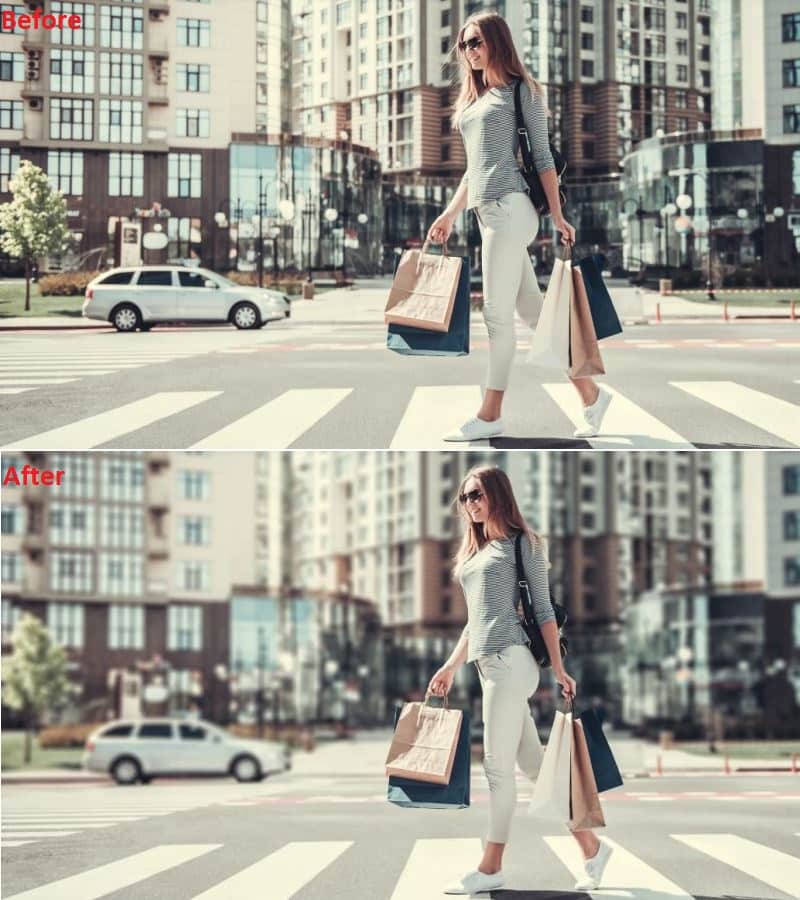
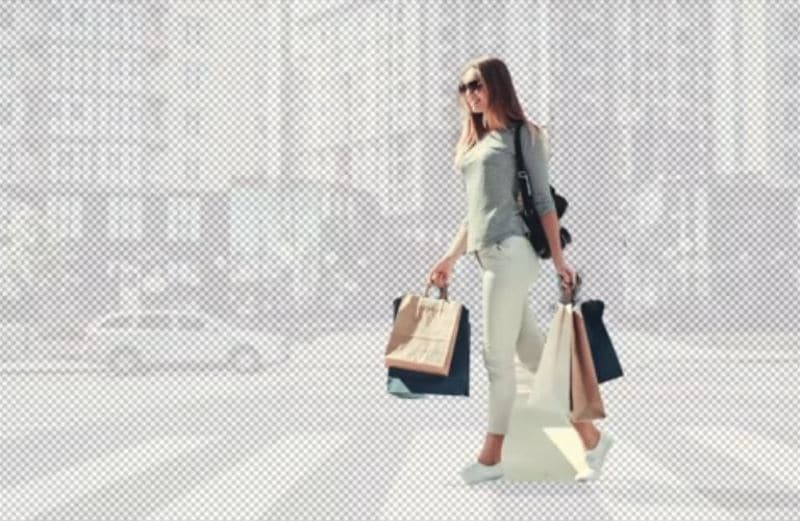
Now you will be able to see the photo without our subject. There may be little bits and remnants left here and there – and that’s perfectly fine. It doesn’t have to be pixel-perfect because you’re going to be blurring that anyway. And that’s exactly what our next step is about…
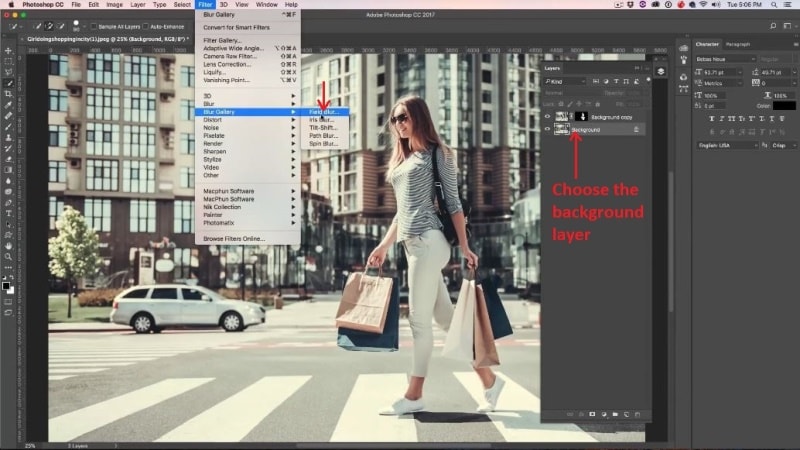
Step 7
Now we will blur the background and it’s not going to affect our woman because she’s on a separate layer. Also, we’re not going to get “halos” around the edges because we’ve used the Content Aware to heal those edges.
![]()
![]()
- Make the woman layer visible again so we can see the result as we work
- Make sure the background layer is still the selected layer. Then go to Filter>Filter Gallery>Field Blur. Field is for depth of field.
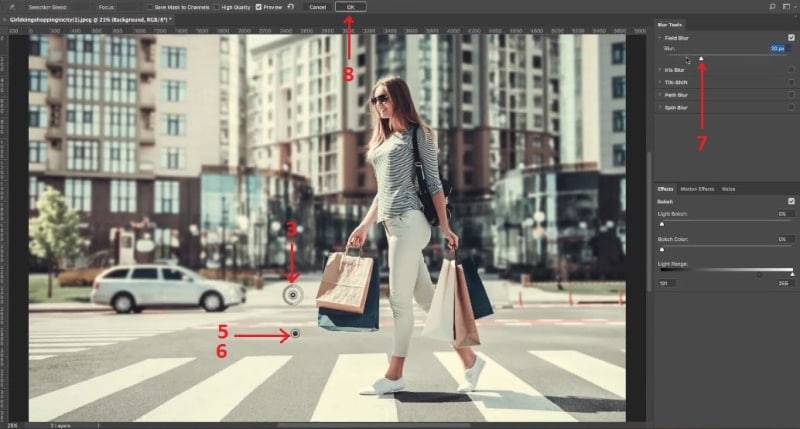
Step 8
- You’ll see a pin represented by a small circle. By using your mouse pointer on this circle you can decide how much you really want to blur it.

- If we want to blur the entire image 1 pin is fine, however the area at the foreground around her feet would look weird. It just wouldn’t blend nicely into the rest of the photo. For this reason you need to create a second point.
- Create a second point by clicking. Set the blur. In this case you want to set that to zero. Hit the Ctrl key or Command key
- Hold Cmd/Ctrl+ double-click, and that takes that to zero.

Photoshop blurs between those two points.
- And then, you can adjust the amount of blur, select the first pin and drag on the circle or use the slider. If you want nothing, take it all the way down. If you want completely foggy background, put it to maximum.
![]()
![]()
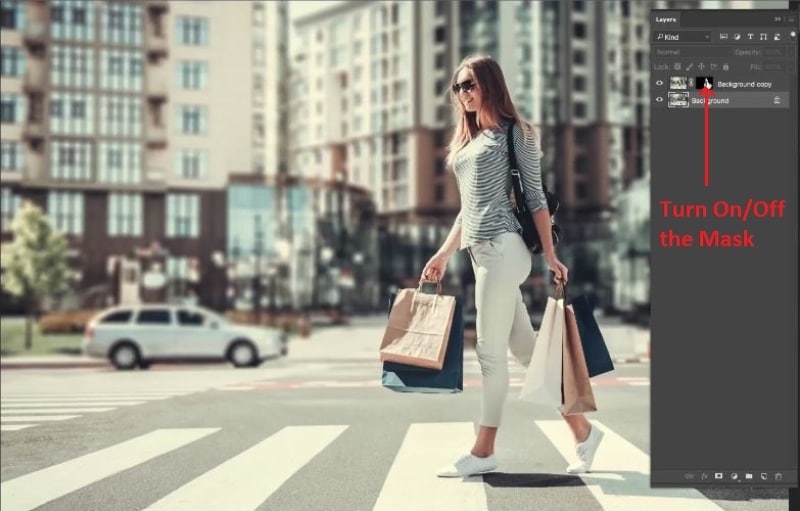
8. When you find that perfect blur just click OK to apply
And here’s our nice work completely done:
Shift+click the layer mask to see the before/after of the effect you have just created.
I hope you enjoyed this tutorial.
Subscribe to our newsletter and you won’t miss a single tutorial.
Add a comment. What’s your favorite techniques that you love to do? Also, what would you like to learn? Let me know in the comments below.
I want to thank Adobe Stock for supporting this video tutorial. Check out how you can become a contributor and also grab some free Adobe Stock images.
Get 10 free images from Adobe Stock
Thanks for checking this out!
Colin
PS Don’t forget to follow us on Social Media for more tips.. (I’ve been posting some fun Instagram and Facebook Stories lately)
You can get my free Layer Blending modes ebook along with dozens of exclusive Photoshop Goodies here 


