Not so long ago there was pretty much one way to interact with a video game: You sat down and played it. Maybe you watched an older friend or sibling play while pointing out all their mistakes, but gaming was never what you’d call a “spectator sport.”
That’s changed in recent years thanks to YouTube gaming celebrities, the booming popularity of professional e-sports, and most importantly, the online game-streaming service Twitch. Firing up a stream and watching someone else play a thousand miles away is now a perfectly legitimate way to enjoy a game. Best of all, anyone is free to participate on either side of a Twitch stream—PCWorld even has its own Twitch channel. If you want to be the one gaming in front of a live audience, you can start doing it today, for free.
Here’s how to stream your games on Twitch.
PC requirements: The bare minimum
This guide assumes that you have a PC with a discrete graphics card and processor powerful enough to stream games. At least to start, you’ll be running your game and uploading video and audio at the same time. There are many Twitch pros who actually use two PCs to accomplish this—one for streaming and one for gaming—but that’s a complex setup that’s beyond this beginner’s guide. (You can learn how to create a dual-PC stream setup in our dedicated walkthrough.)
Twitch recommends that your PC has at least an Intel Core i5-4670 or the AMD equivalent, and 8GB of RAM. Your graphics card isn’t as important a consideration for streaming, but Twitch says it should be at least DirectX 10 compatible. Though if you want to play a modern game, DirectX 11 or 12 is required. (See our guide for the best graphics cards for PC gaming.)
Keep in mind that these are the minimum recommended specs, and a more powerful PC will obviously perform better. Also don’t forget about your internet connection. Twitch’s Broadcasting Guidelines says you’ll need to deliver about 4,500 to 6,000 kilobits per second to deliver 1080p at 60 frames per second, and 3,500kbps to 5,000kbps for 1080p at 30fps.
Getting started with OBS Studio
To start broadcasting to Twitch, you’ll need two additional things: desktop software that can record and stream footage from your gaming computer, and a Twitch account. We’ll start with the software.
Options abound for desktop streaming software. You can find debates over the relative merits online, but we recommend one broadcasting suite that’s free and easy to set up—plus it integrates nicely with Twitch. The program is called Open Broadcaster Software Studio (frequently shortened to OBS Studio), which is the replacement for the classic OBS software.
We’ll discuss the OBS Studio client for Windows, but Mac and Linux versions are also available.
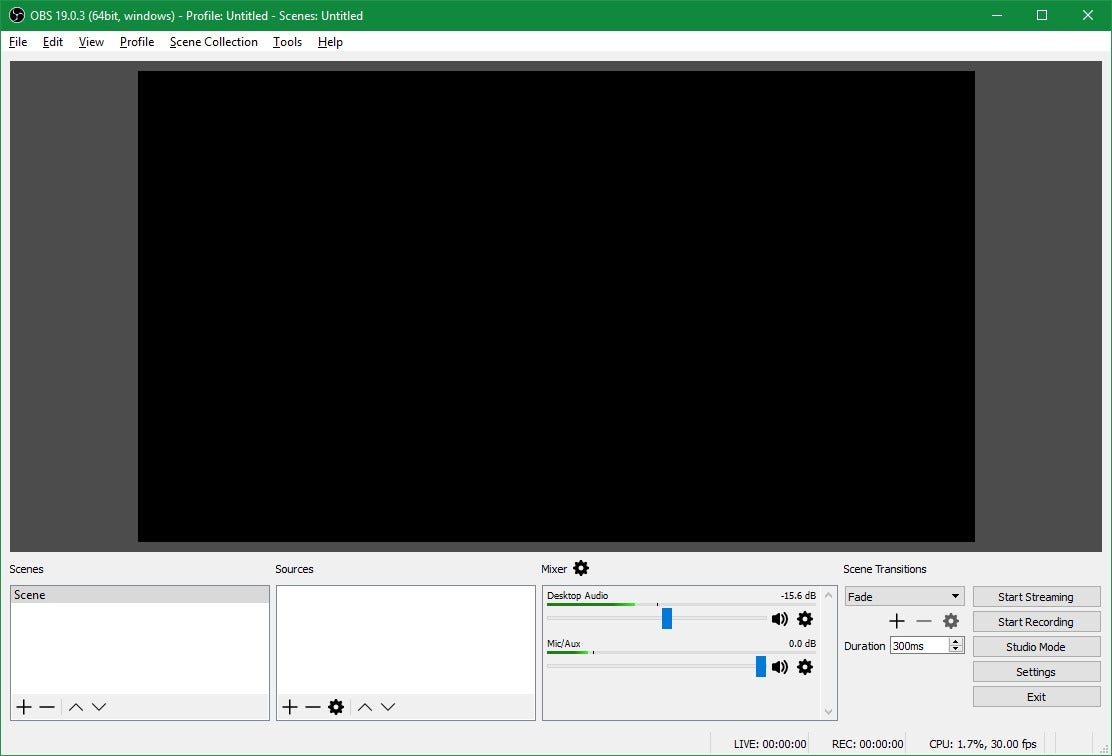 Ian Paul/IDG
The OBS Studio interface on its initial launch. (Click on any image in this post to enlarge it.)
Once you’ve downloaded OBS Studio and run through the installer, the client will launch. You’ll see a window with an empty letterbox screen, and a bank of options at the bottom. Here, you’ll set up the “scene” and sources for your broadcast. The scene in OBS Studio is the final product that you’ll show on Twitch, while the sources are all the various elements that make up your scene.
Most Twitch gaming streams aren’t just a plain screencast of the game itself; they usually include multiple sources, such as a picture-in-picture webcam feed of the player, a watermark, and sometimes even animated screen overlays. Animations are beyond the scope of this tutorial for beginners. We’ll stick to the four basic sources: the game, the webcam, player audio, and the watermark.
Source 1: How to set up the game stream
We’ll start by adding the most important element to the scene: the game window.
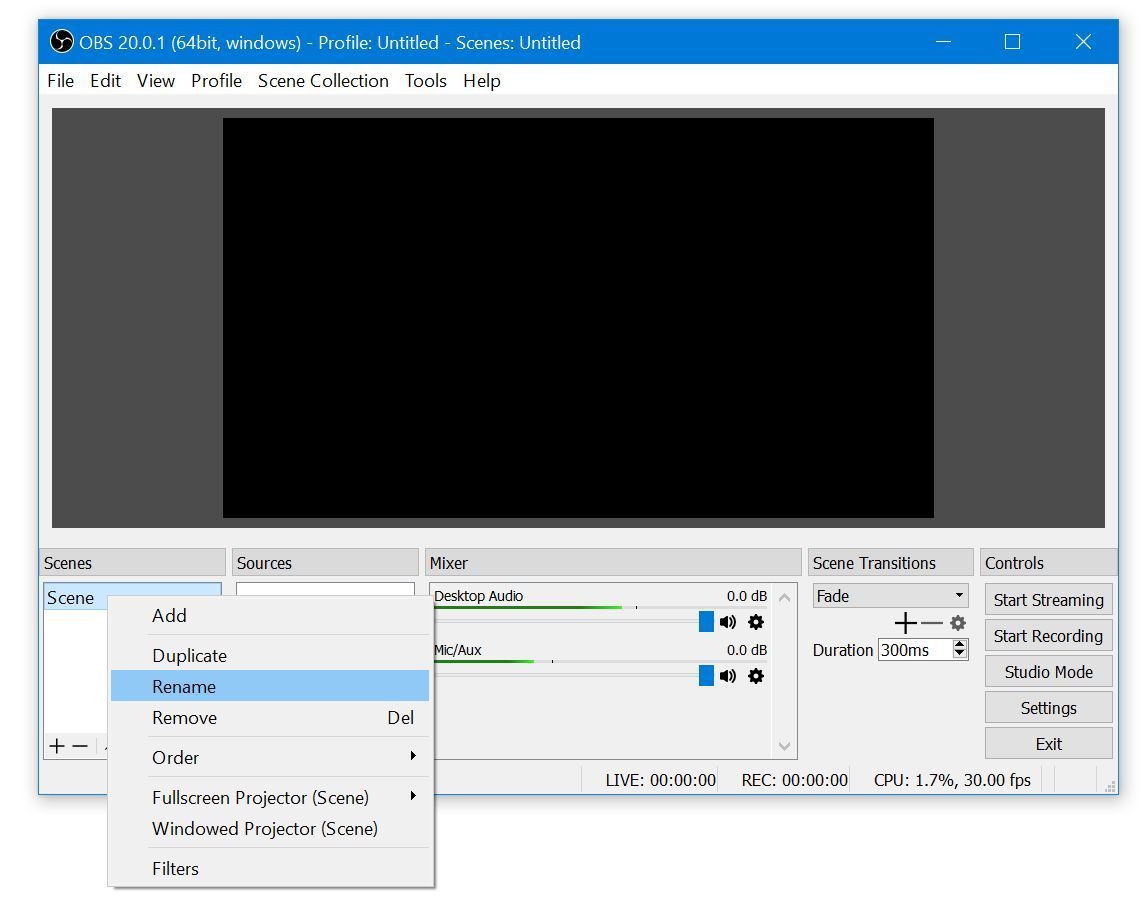 Brad Chacos/IDG
Before we do that, however, let’s rename our scene something more memorable. Below the letterbox, right-click Scene in the left-most panel at the bottom of the OBS window. Select Rename and then give it a better name. In my example, I’m going to stream The Witcher 3 ($40 on Amazon) so I’ll title my scene with the game’s name.
Now let’s add the game feed. Start up your game, and once it’s running press Alt + Tab to navigate back to the OBS window. It doesn’t matter whether the game is in full-screen or windowed mode.
TIP: Multi-monitor users should put OBS Studio in a secondary monitor during the setup process to more easily see what’s going on.
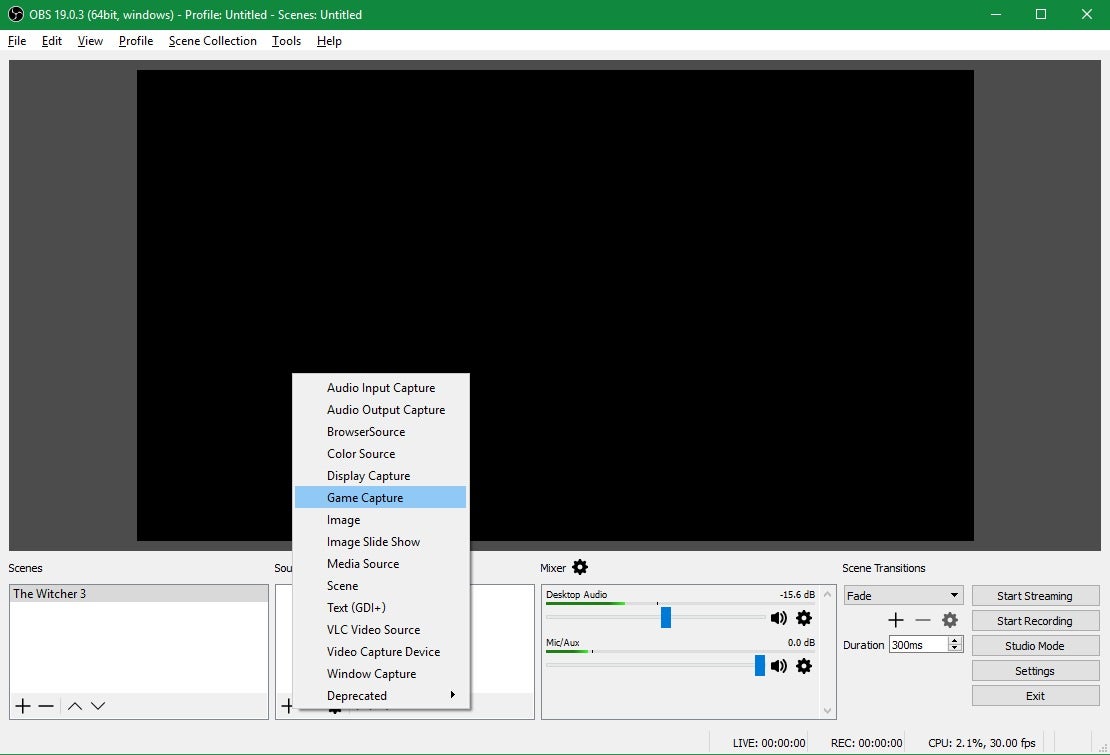 Ian Paul/IDG
Select Game Capture in the sources window to get started.
Next, you’ll add a new source. Click the plus sign in the Sources panel, and from the menu that appears select Game Capture. This will pop open a second window, but just click OK here to open yet a third window.
 Ian Paul
Geralt is waiting patiently while we set up OBS Studio.
This is the properties window and where we add the game. At the top, click the drop-down menu next to Mode and select Capture specific window. Then set the Window drop-down menu to the executable file of your game, which should be listed since it’s running. In my case it’s witcher3.exe.
Once you’ve selected your EXE file, you should start to see a preview of your stream in this pop-up window. There are also a few options you can tweak here—experiment with them if you so choose. Now click OK to return to the main OBS Studio window.
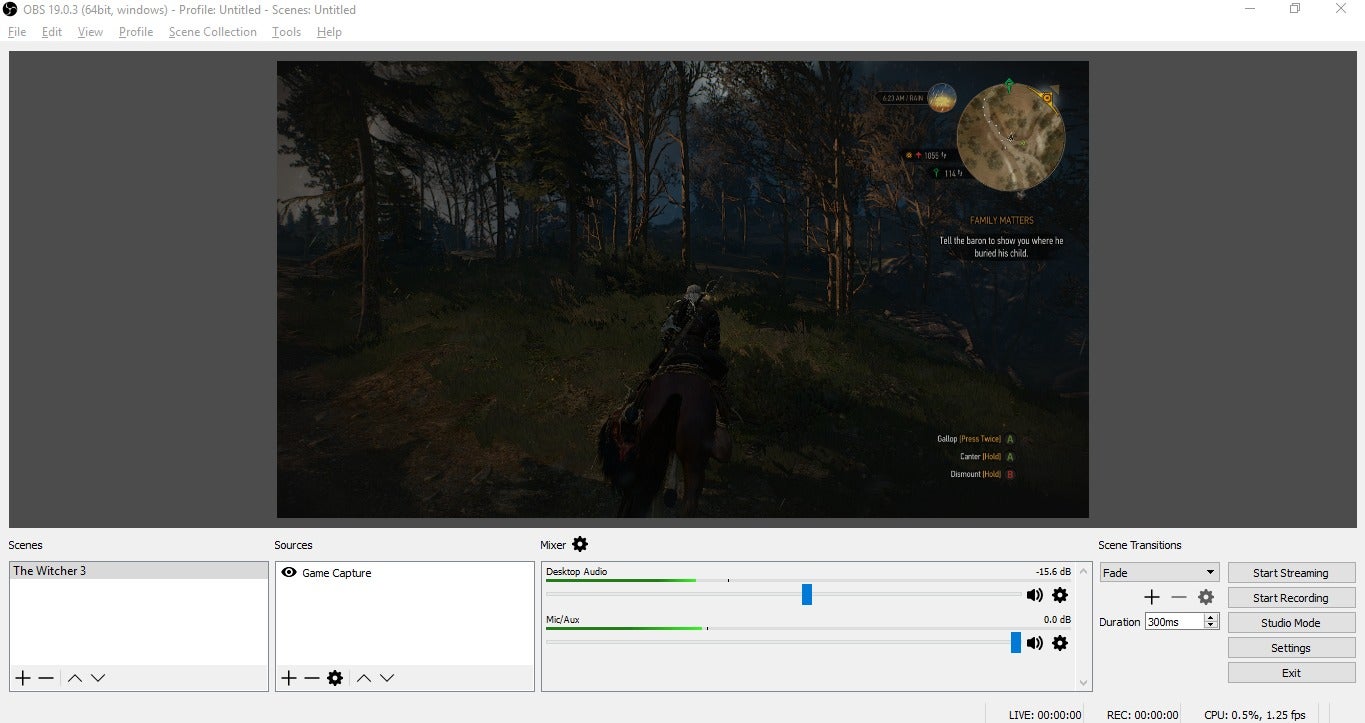 Ian Paul/IDG
Previewing a game stream in OBS Studio on a secondary monitor.
At this point you can see a preview of your stream running in OBS. It should appear surrounded by a red outline. If not, just highlight Game Capture in the Sources panel or click on the game feed itself.
You can use the outline to change the size of the game window. In my case, I ran Witcher 3 at 720p since my external GPU setup can’t handle this game at 1080p. That meant I had to drag and extend the outline to make the game fill the entire letterbox window.
Since OBS Studio is so flexible, Game Capture isn’t your only option. You can also stream your whole desktop instead of just a single program by using the Display Capture option in Sources. This is a good tool for broadcasting something that uses multiple programs, such as a screencast tutorial.
In the OBS Classic days a number of games wouldn’t work with OBS’s default game capture mode. Instead, you had to broadcast your whole desktop. During my time with OBS Studio, however, I didn’t run into that problem.
Source 2: How to set up the webcam feed
Adding a webcam stream gives your gameplay a personal touch. For Twitch streamers, the webcam feed is standard practice. If your PC doesn’t have a webcam, the Logitech C922 ($80 on Amazon) is a stellar one you can add to any PC. It’s very popular with streamers.
To set it up, click the plus sign in the Sources box once again, and from the context menu select Video Capture Device. Once again, a small window pops up that you can pretty much ignore. Just hit OK to get to the new properties window.
 Ian Paul/IDG
OBS Studio’s video capture properties window.
OBS Studio should automatically choose your webcam. If you have two or more options, however, just choose the appropriate one for your broadcast. You can mess with the settings in this window, but as long as your webcam is selected from the drop-down list at the very top, it should work just fine.
The more important thing is to decide on the angle for your webcam. Do you want it to shoot you from above, like it’s sitting on top of your display? Or would you prefer a straight-on shot or something from below? To get an idea of webcam placement see what others are doing on Twitch and find what works for you. Also pay attention to lighting to make sure you’re clearly visible.
While using natural light is the easiest and cheapest way to illuminate yourself, you’ll probably want a bit more control. You can find bulb-based lighting kits on Amazon for pretty cheap but there are some drawbacks including heat and fragile build quality. Or you can go down the route of LED-based systems which are typically more expensive — but come with perks like color temperature control and no heat output. In a pinch you can even use a desk lamp like BenQ’s ScreenBar that not only works as an awesome lamp, but can double as a light for streaming!
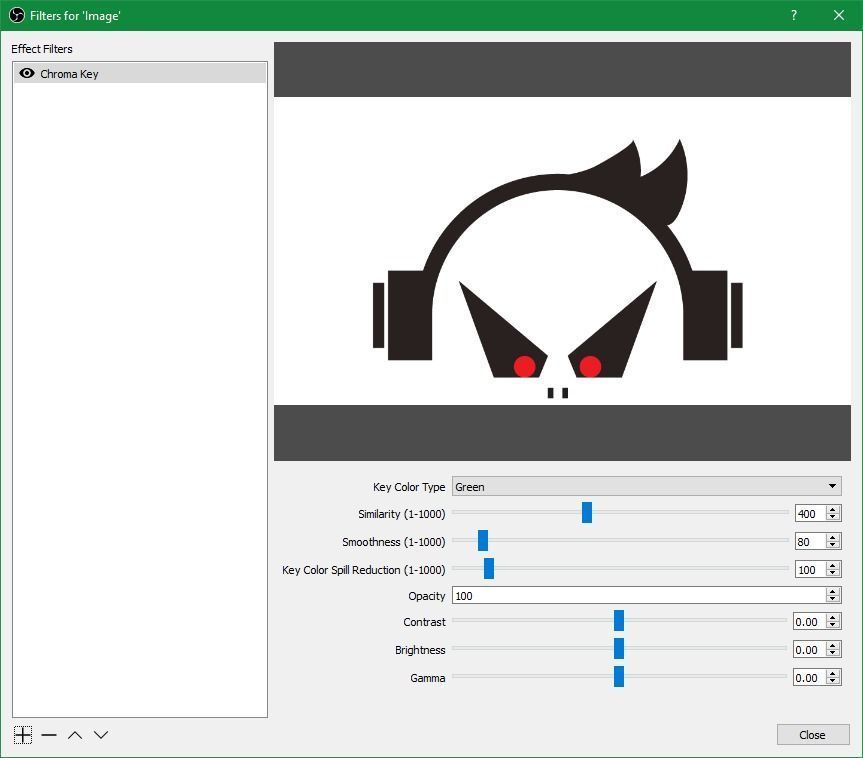
If you’d rather not have the background of your home office or den show up, you’ll need to use a chroma key to get that green screen effect. You can actually make this happen with nothing more than a sheet or large curtain and some even lighting, though basic green screen setups can be found online for as little as $20. To play with chroma key settings in OBS Studio, right-click on Video Capture Device in the Sources panel and select Filters > Effect Filters > Chroma Key.
If you need detailed help to set this up, there are tons of tutorials on YouTube—such as this one—that show the process.
 Ian Paul/IDG
Hello, webcam!
Once your webcam is enabled as a source, you can choose where it will appear in the final broadcast. The default is the upper-left corner, but you can adjust this by dragging the window around the letterbox area in the main OBS Studio window. You can also use the red border around the webcam to size it to your preference. Many Twitch streamers position their webcam feed in a small area in the lower right corner. That’s far from the rule, however, and the onscreen elements of the game you’re streaming will likely dictate where you place your webcam feed.
Next page: Mixing audio, setting up watermarks and the final stream
Source 3: How to set up microphone audio
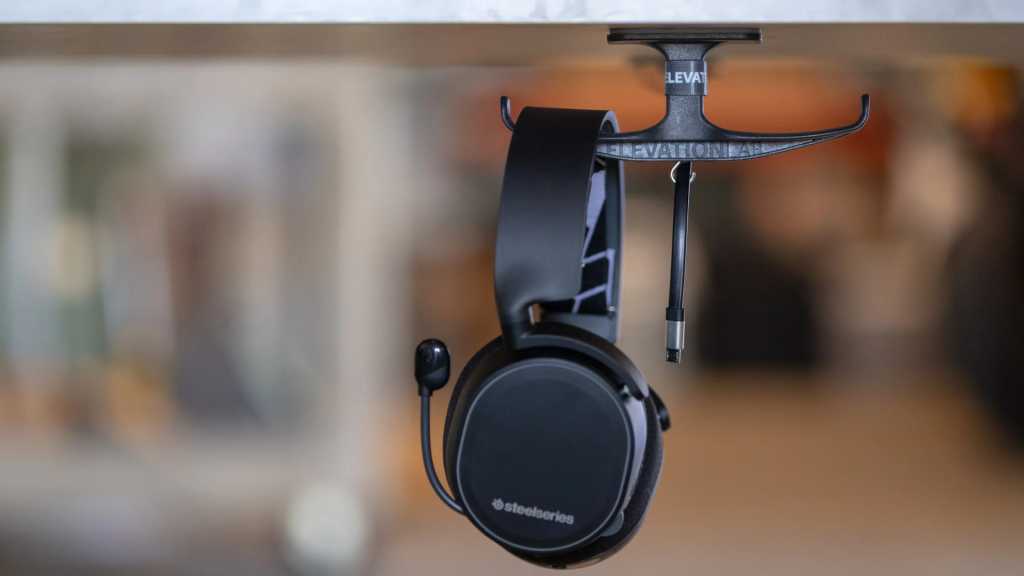
If you don’t have a high-quality microphone there are two ways you can go. The first is to use a headset microphone, which some gamers do. We’ve got a great roundup of the best gaming headsets with the top all-around suggestion being the HyperX Cloud Alpha ($100), while our favorite budget choice is the Astro A10 ($60).
Most streamers use a USB based desktop microphone, however, such as the always popular Blue Yeti ($130). The best USB based mics offer superiour sound quality over headset mics and are generally very easy to use, but do not sound as good as studio/podcast grade XLR microphones like Blue’s Ember ($100). XLR based set ups offer the best sound quality possible but require more equipment, like an analog to digital interface, and a deeper understanding of audio production principles. For now we will focus on the simplier options.
By default, OBS adds a microphone input to you stream, but if you have multiple inputs such as a built-in mic, webcam mic, headset mic, and desktop mic, you should specify which one you want.
 IDG
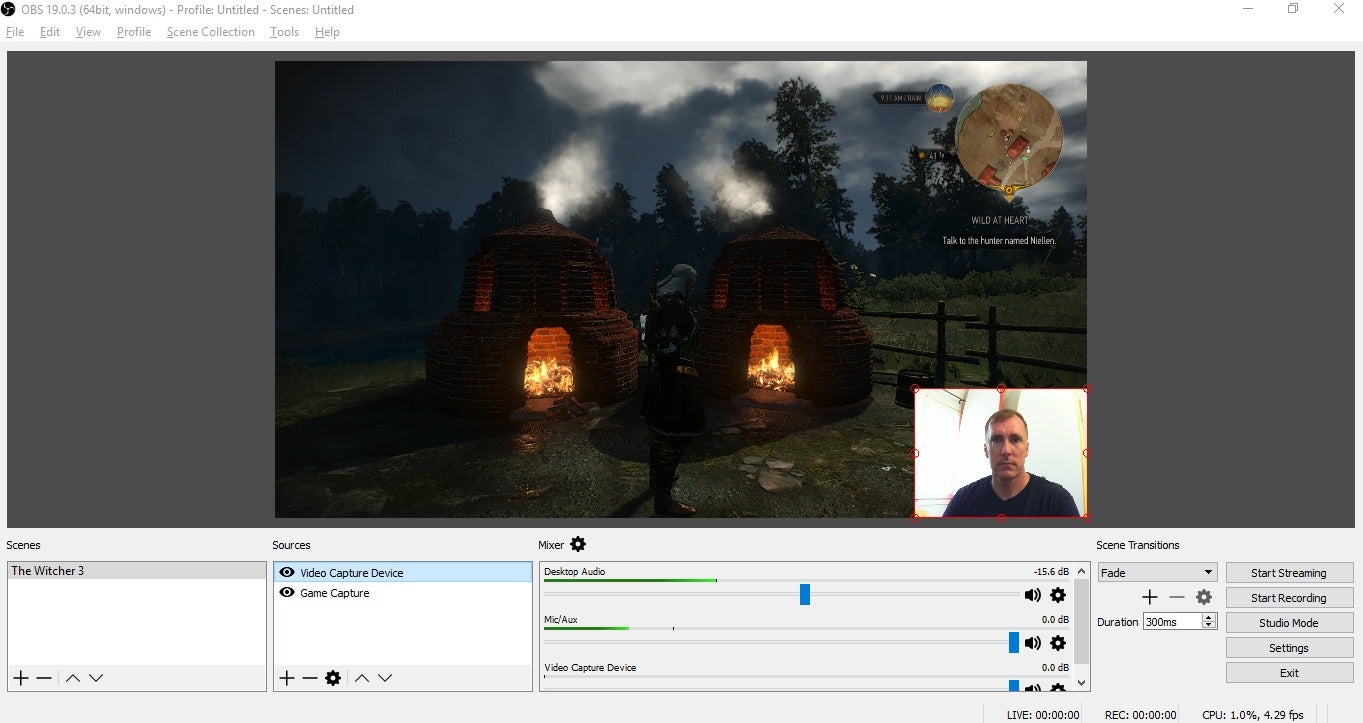
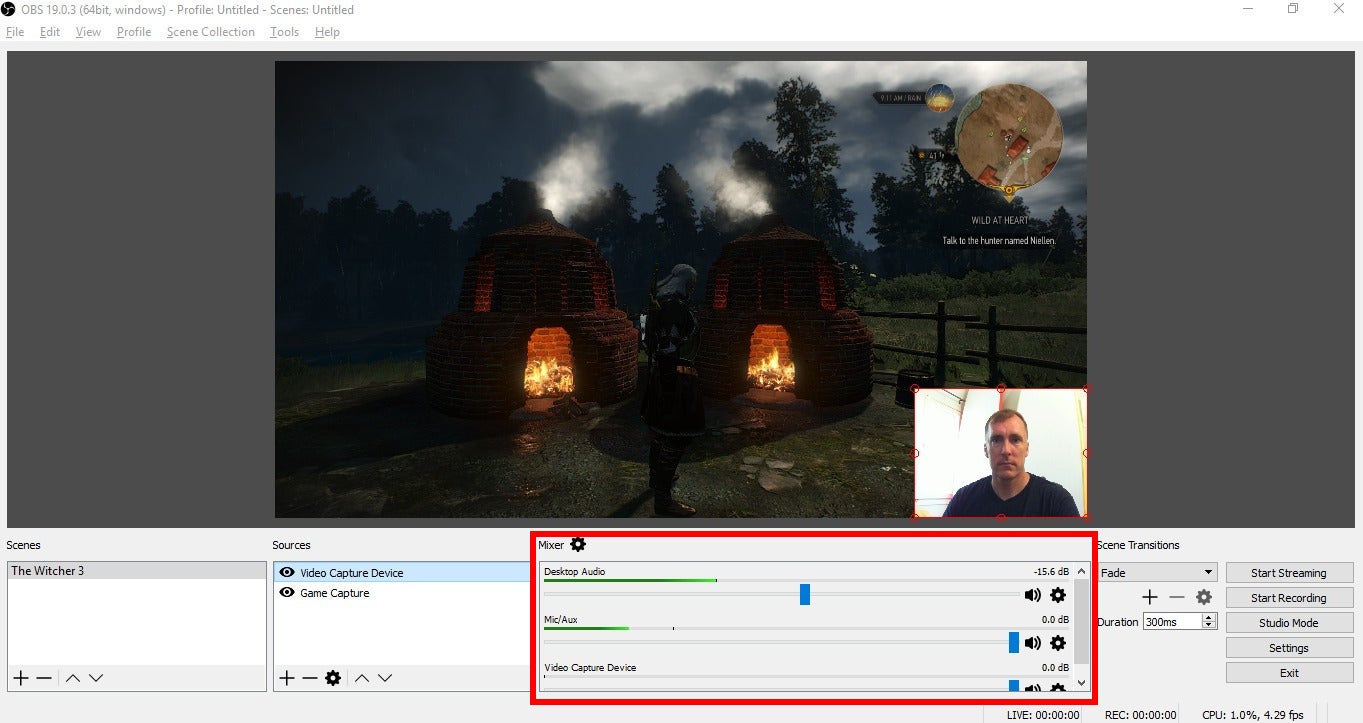
IDGMixing your audio sources is available from the main dashboard.
To do that look below the game and webcam stream window for the section called Mixer (highlighted here in red). Now find the Mic/Aux entry and click the settings cog on the far right. This will bring up another properties box. Click the Device drop-down menu and select your microphone and then hit OK.
Now you can mix the various sounds to get the right settings for your stream. Many people lower the desktop sounds and raise their microphone so that viewers can hear the streamer over the game audio. Others choose to make both relatively equal. Whichever way you want to go, lower or raise the blue marker under Desktop Audio and Mic/Aux until you get the desired level for each.
Source 4: How to add a watermark
To give a stream that extra veneer of professionalism, you can add a watermark—the ghostly little logo that appears in the bottom corner of TV broadcasts. For this example, I pulled a sample logo off Freepik.com.
 Ian Paul/IDG and Freepik.com
Click the plus sign again in the Sources box, select Image, and click OK to get to the third window. Choose your image from your PC and then click OK again.
Going back to the main window, click on the watermark image in the letterbox window and it will be outlined in red. Now adjust it for placement and size. If you want to make the image transparent, right-click the image and select Filters > Chroma Key. Then choose a numeric value (out of 100) in the Opacity option to make it more transparent. You can also play around with the various sliders to get your desired affect.
 Ian Paul/IDG
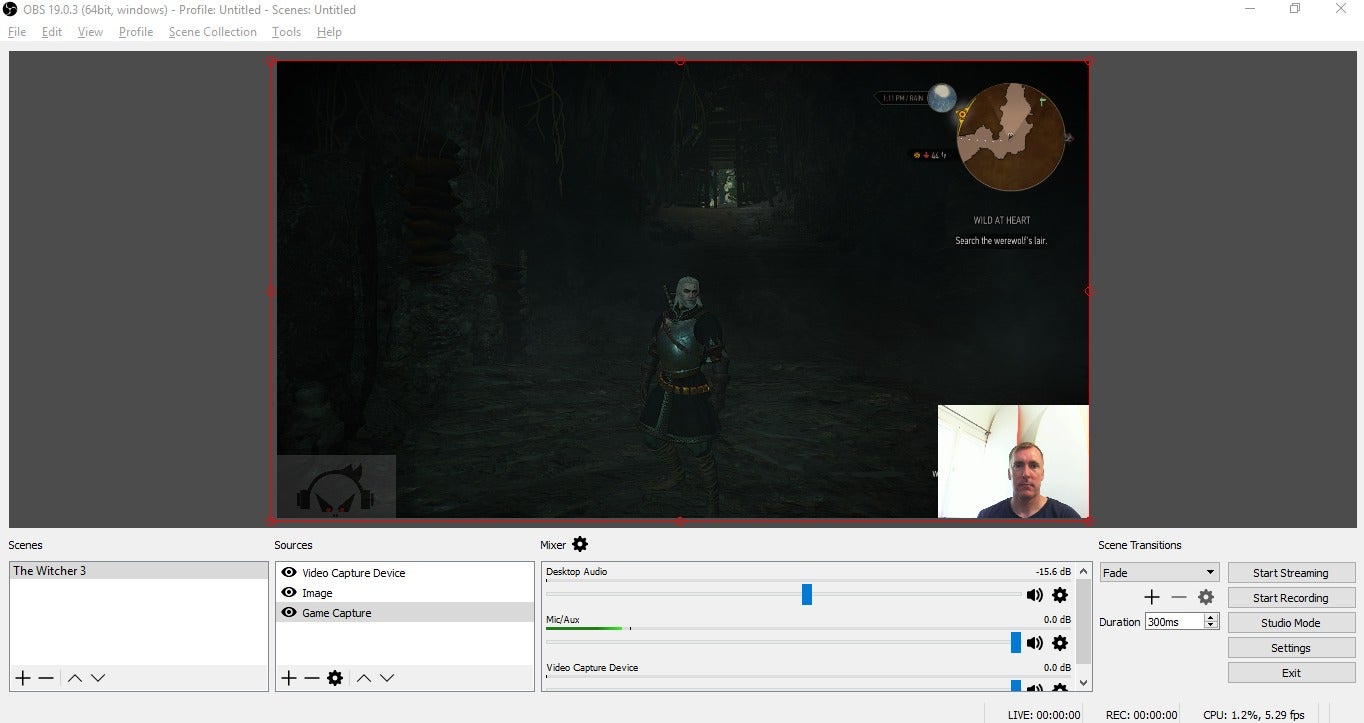
The finished product with game, webcam, microphone, and watermark (lower left).
Now that we’ve got a watermark, preview the complete stream by starting your game. Looking good? Then it’s time move on to the Twitch side of things.
How to stream in Twitch
 Ian Paul/IDG
The Twitch dashboard.
Twitch is simple to set up. Just visit the site and create a user account. Click your user name in the upper-right corner, then in the drop-down menu that appears, select Dashboard.
You can preview your stream from the Dashboard, but it won’t actually appear until you connect your OBS client to your Twitch account. To do this, click on Settings in the left rail of the dashboard. On the next page you should see an option in the main part of the window titled “Stream Key.” Choose that and on the next page, select Show Key. Copy the code to your clipboard.
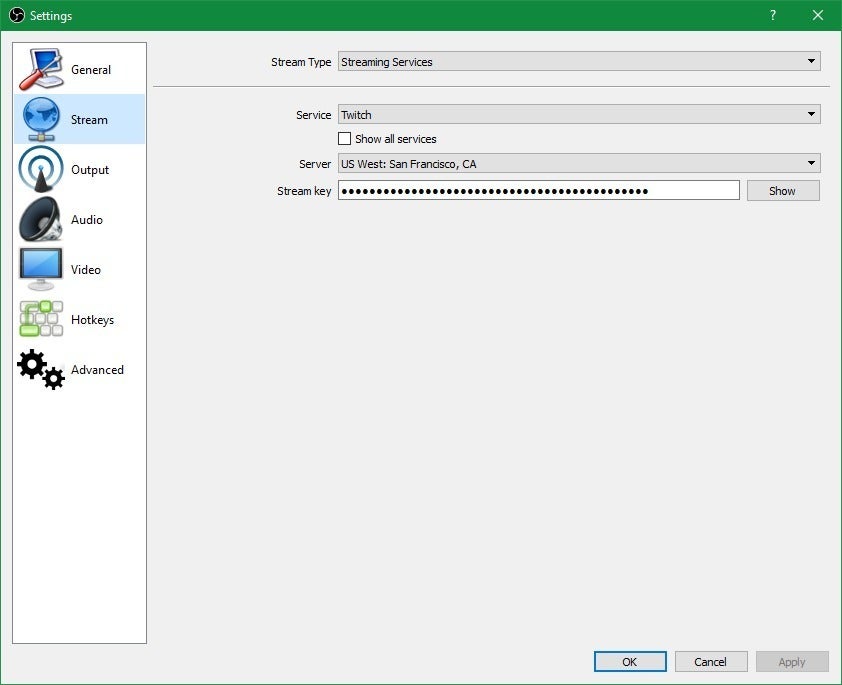 Ian Paul/IDG
OBS Studio’s Stream settings.
Next, open OBS and click Settings in the lower-right corner. In the next window that opens, select Stream. Under Stream Type, select Streaming services, then under Service, select Twitch.
At this point OBS Studio may run a test to find the best Twitch server suited to your location. If it doesn’t select a server close to you, you can choose one manually from the Server drop-down menu. Finally, copy the streaming key to the field marked “Stream Key.” Click Apply and OK, and you’re done.
Now go back and preview your stream in OBS Studio one final time.
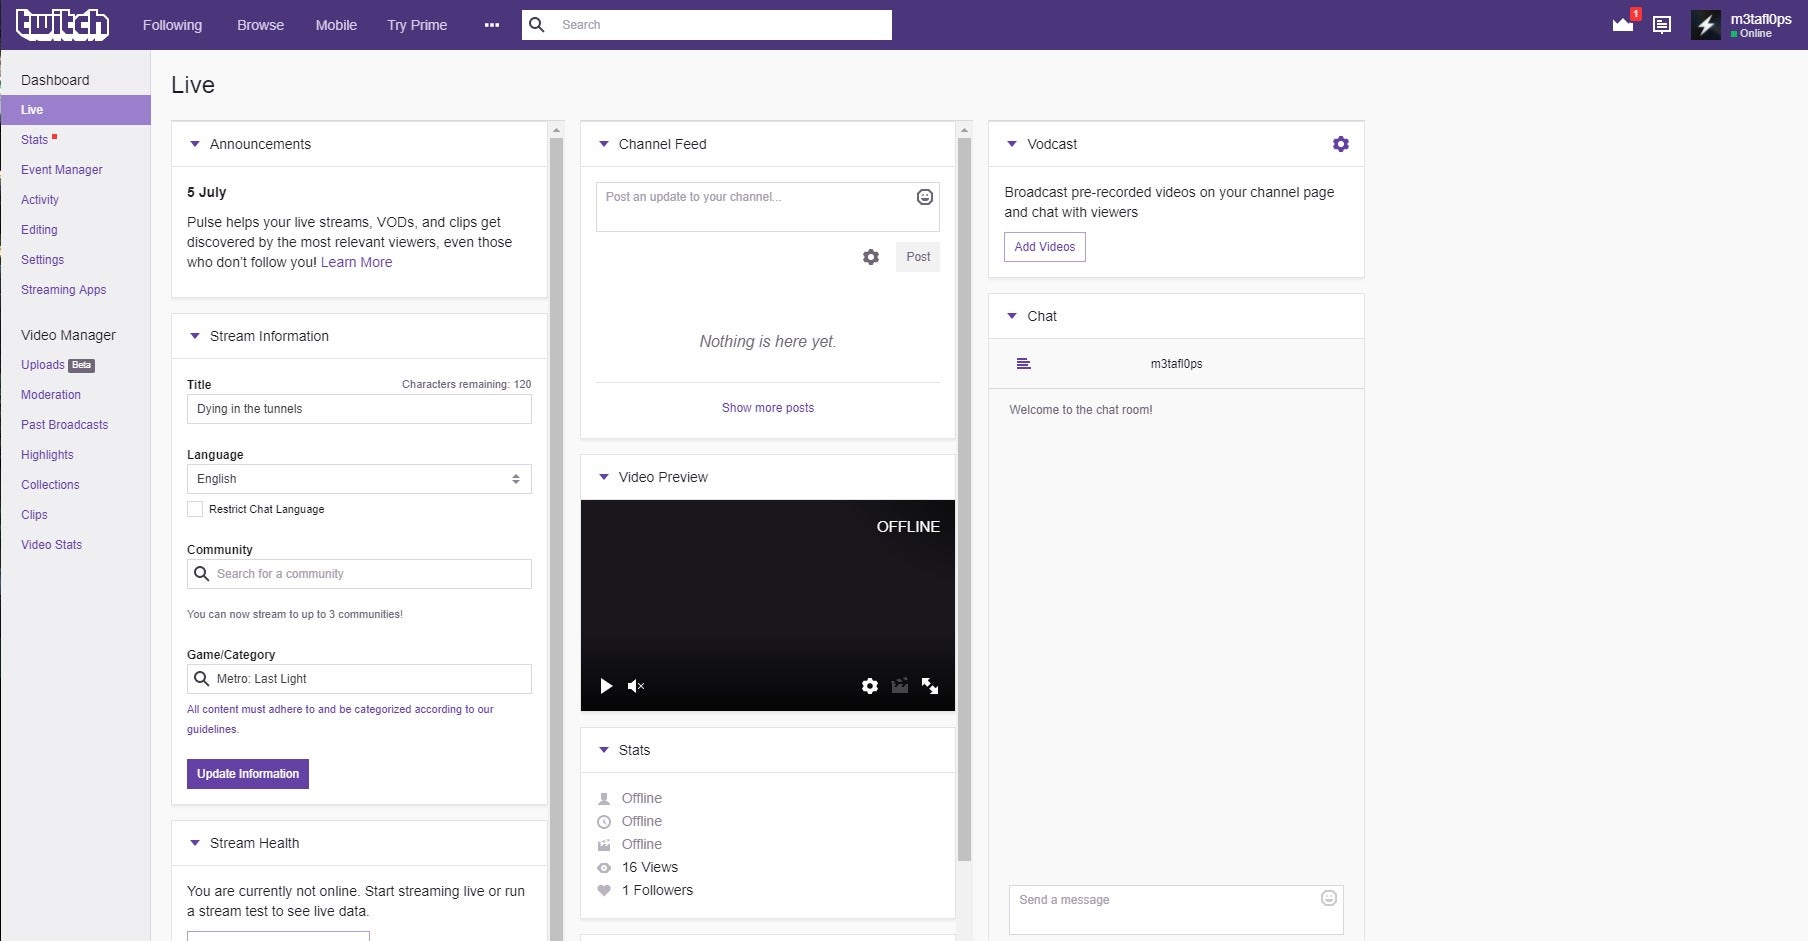
Before we start streaming, go back to your Twitch Dashboard and click Live in the left rail.Under the sub-heading Stream Information, enter a title for your stream and the name of the game, then click Update Information.
Now it’s time to go live.
 Ian Paul/IDG
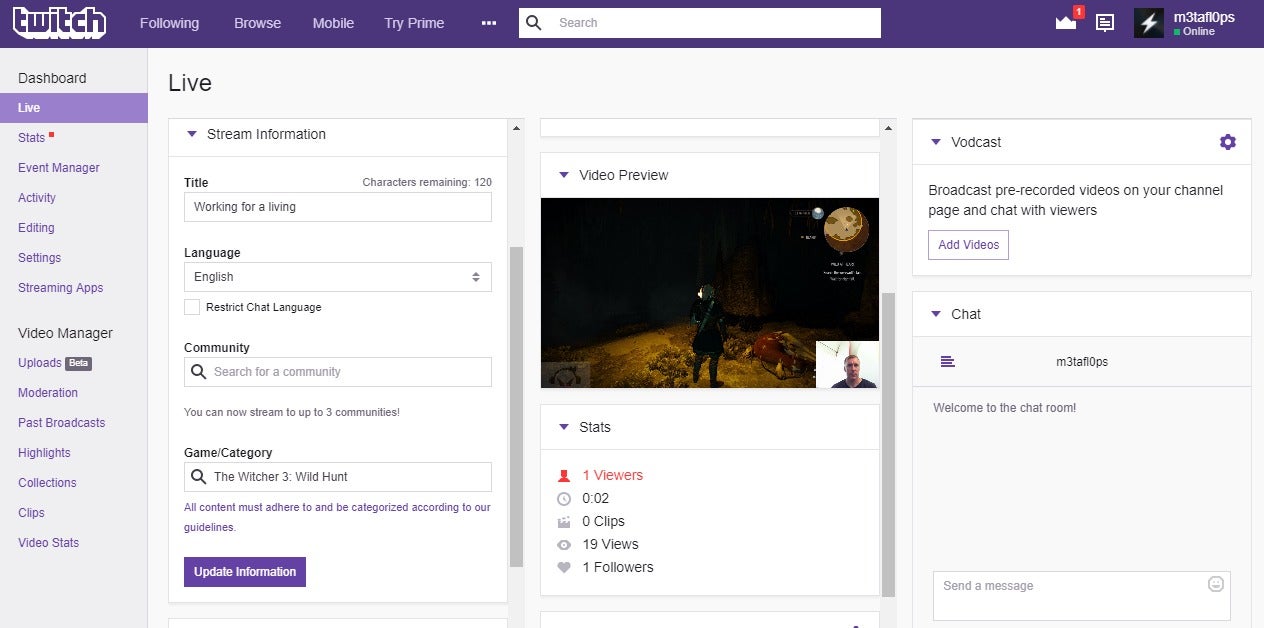
And we’re live!
Back on your desktop, click Start Streaming in the main OBS window. You’ll see the stream appear in your dashboard back at Twitch, which means you’re up and running. Congratulations!
Final considerations
Now the hard part begins. After watching Twitch you’ll notice that some of the most successful broadcasters understand how to balance their attention. When you’re streaming you’re not only playing, but speaking to your audience, responding to viewers on the chat, and occasionally keeping an eye on OBS to make sure the stream is running as expected.
For all of this you’ll definitely want to use dual monitors since your game will take up the entire space of your main monitor—unless you’re crazy enough to play a game in windowed mode. But if you only have one monitor don’t let that stop you. Get your streams going and worry about refining your approach later, or keep an eye on chat with a secondary laptop or tablet to start. Since you’re replying with voice there’s no need to worry about typing—you only need to see the chat.
There’s much more to explore on Twitch and OBS to really master the broadcast, but at this point you have everything you need to get started. Have fun showing off on the big stage!