
New in Adobe Camera RAW 17.3 April 2025 – Landscape masks and more
Adobe Camera RAW (ACR) got a couple of significant new updates. Notably they are Landscape masks and Reflection removal working on other file formats than just RAW. Photoshop and Lightroom got updates too and I have tutorials on those. I’ll link at the bottom. Remember, for the most part, the Lightroom tutorials will also work on ACR as they share the same processing engine. Reflection removal is only in ACR and not in Lightroom at this time.
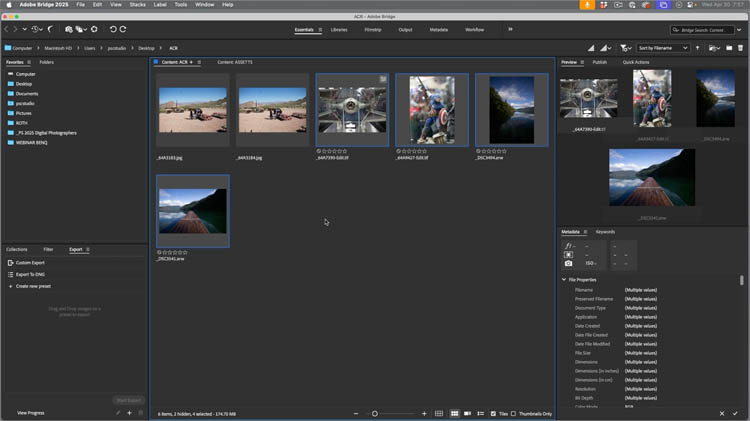
While many Photographers love to use Lightroom, many prefer to use Bridge and Camera RAW. This is probably more common with designers, but either way, they are great options. I’m going to give you 2 examples of each feature here so you can see a simple and more complex example. There is more detail on the video including doing the edits and adjustment live for you to follow along.
Enabling ACR and the new Features
In this case, we are going to launch ACR from Bridge. We can do it from Photoshop too, but I want to open multiple images at once, so Bridge is the way to do it. (Bridge is a free APP that comes with Photoshop).
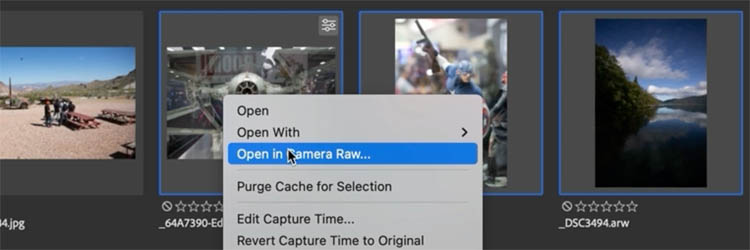
Click on the thumbnails and right-click
Choose Open in Camera RAW,
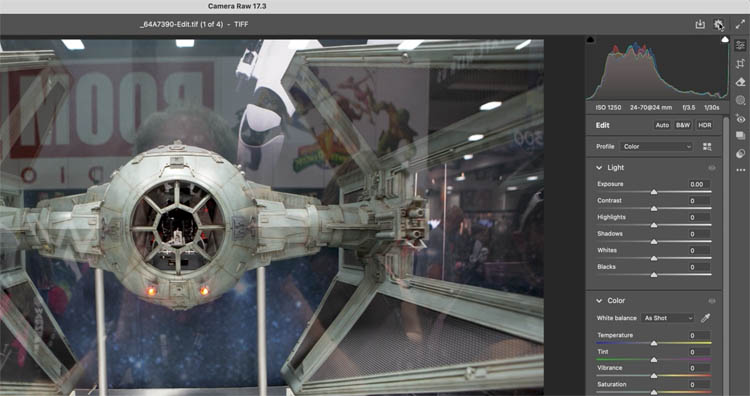
ACR will now open. If you are going directly from Bridge, Photoshop doesn’t even need to launch.
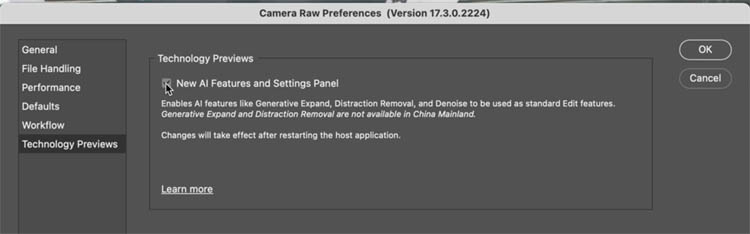
Enabling New features
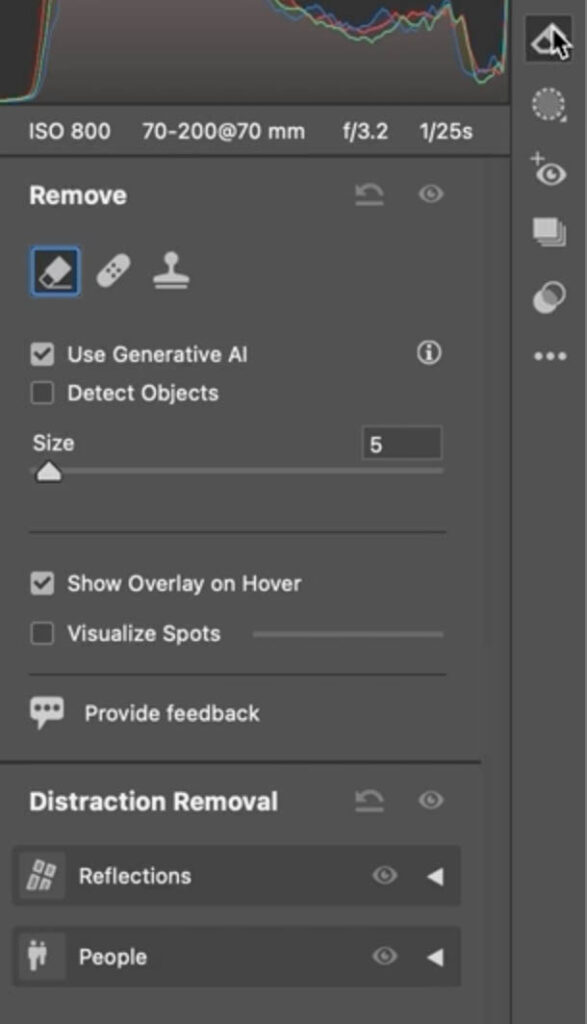
Click the gear icon at the top-right.
Under Technology Previews, turn on the check box. New ai Features and Settings Panel.
You will need to turn this on for REFLECTION REMOVAL to work. Landscape Masks will still work without it.
Restart Photoshop for this to take effect.
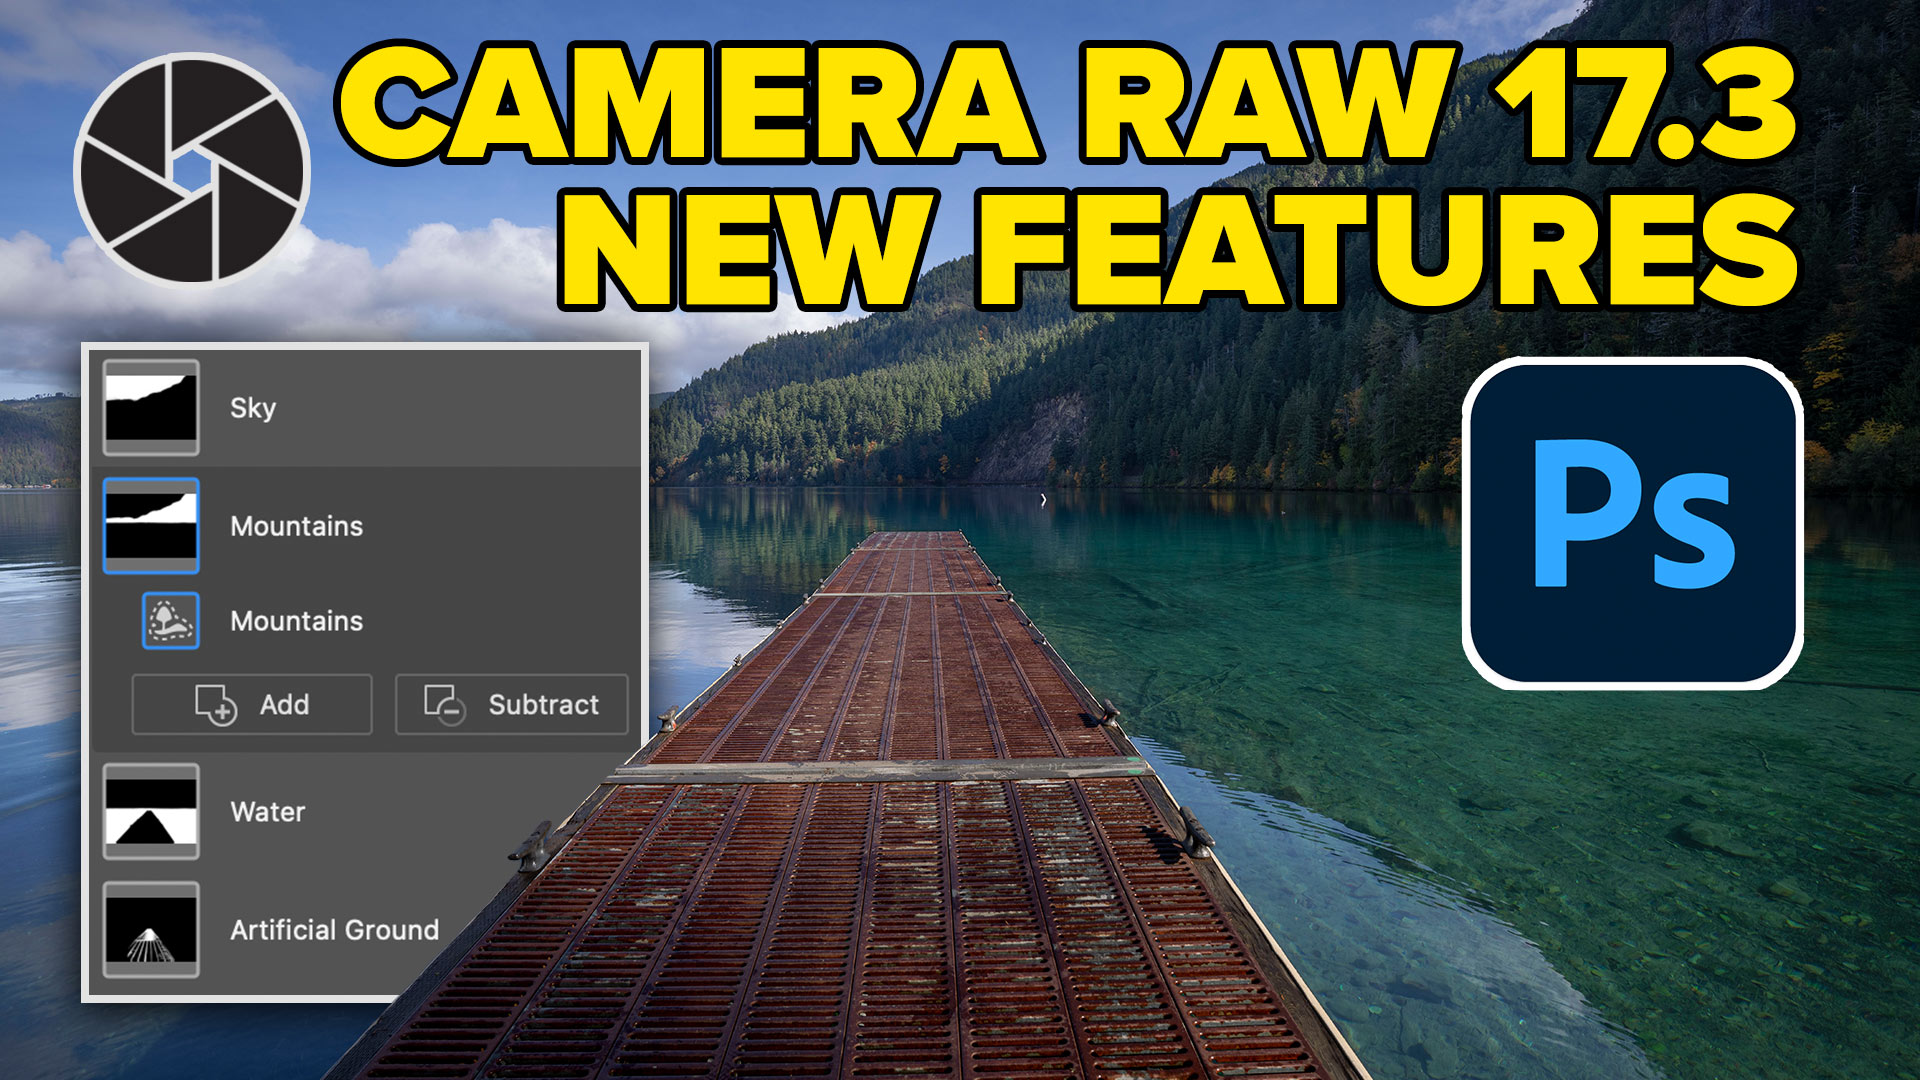
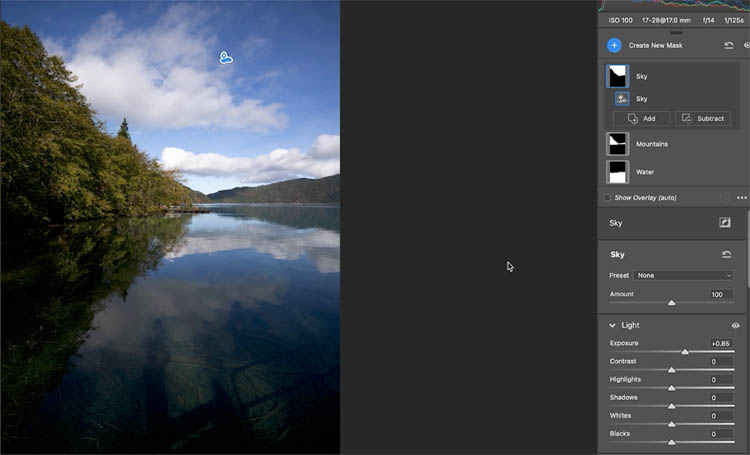
Landscape Masks
New Landscape masks use ai to detect different parts of your image, things like mountains, water, trees, buildings, natural and artificial ground, sky, buildings etc. It will automatically build the masks if these features are detected in your photo. Works similar to the existing select people. It saves you time making selections and allows you to isolate different parts of a photo to do edits on those regions individually.
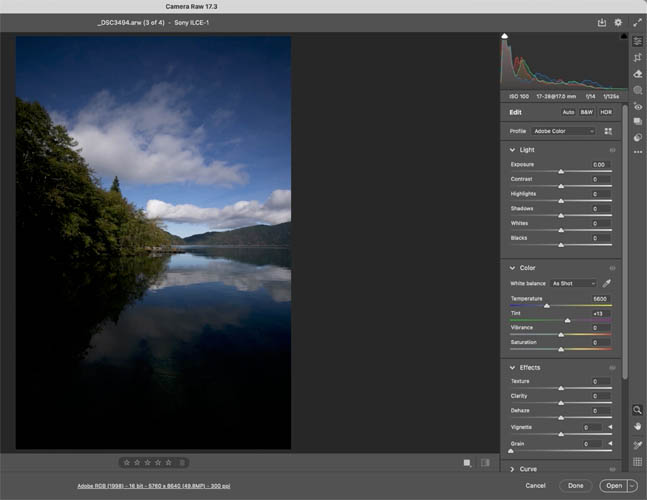
Let’s start with this image.
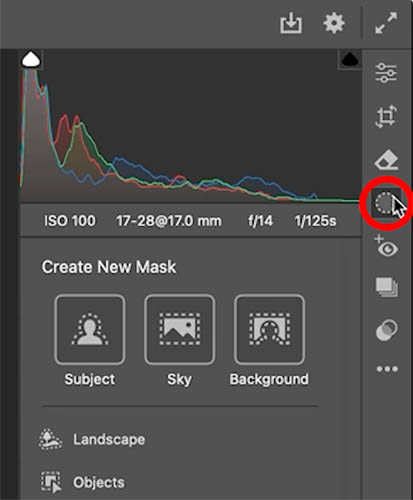
Click on Masks
You will see landscape under Subject, Click on Landscape.
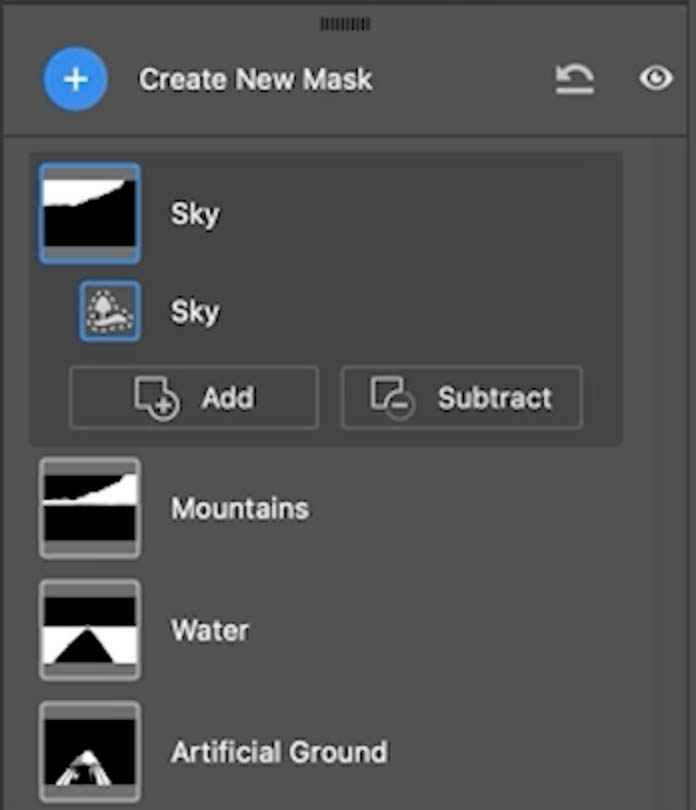
You will see a list of features detected in your photo
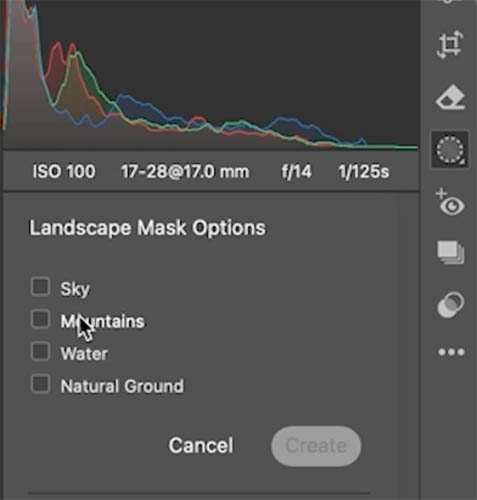
As you roll over each, you can see it highlighted in red ion your image.
Check all the boxes for the masks you want to create.
Make sure the bottom option Create n separate Masks is selected if you want individual masks, You usually do.
Click create

The masks will show up in the masks panel
Click the mask to work with. Let’s start with water.
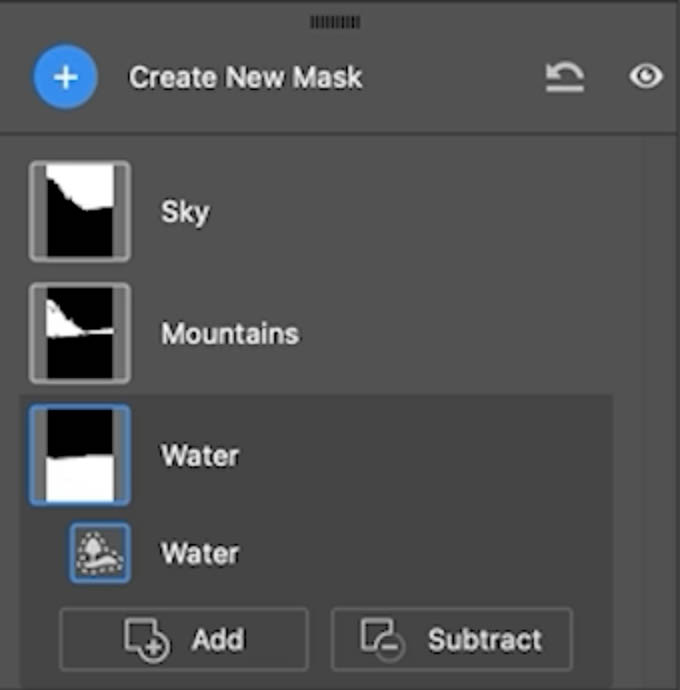
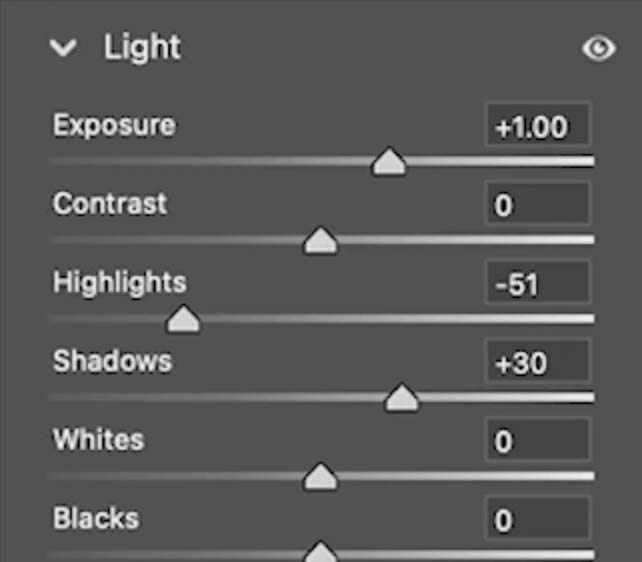
Make your adjustments
See the water is more visible now.

Choose another, mountains
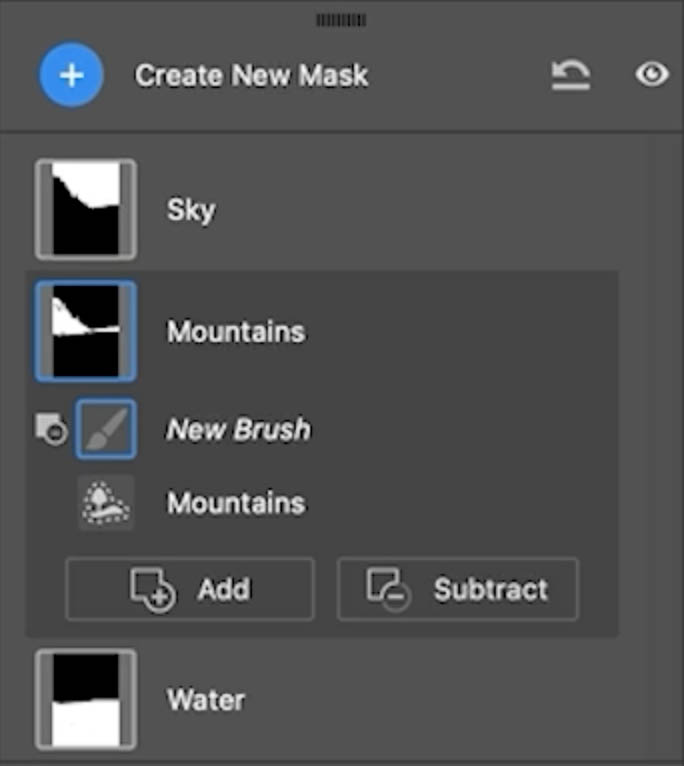
TIP: Don’t Gert hung up on the names of the masks. Even though you may not consider this a mountain doesn’t matter, you know the area you are going to adjust.
As we make the adjustment we are able to bring out the trees on the shoreline.
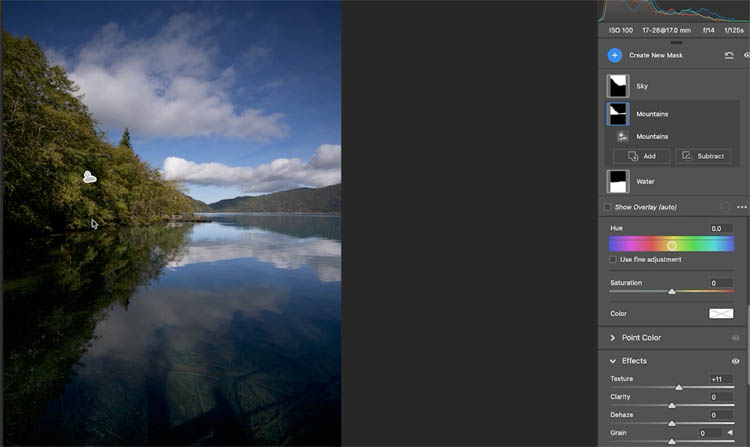
Finally, adjust the sky. That saved a lot of time and it’s a big improvement over the original. (before you ask, “why didn’t you just turn up the brightness on the whole image?” watch the video and you will see why.
Let’s try a tougher example.

Make the mask as we did previously.
A quick adjustment on the water and mountains, what a difference!

When we look at the artificial ground, the mask didn’t get it fully.

Click on the mask and choose add>Select objects
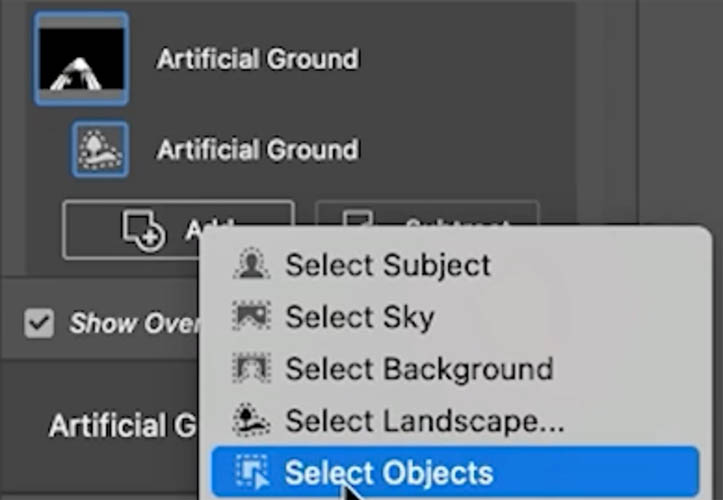
make a scribble selection
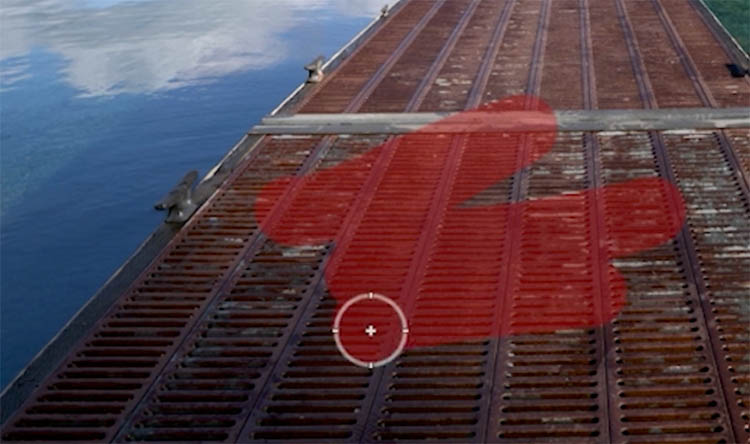
this adds to the mask and we are good to go.
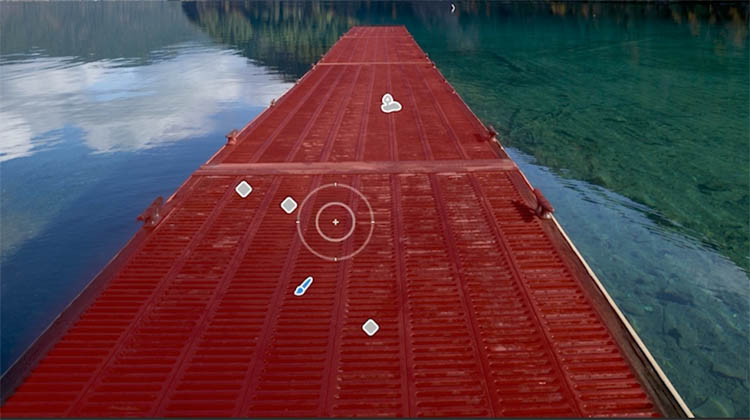
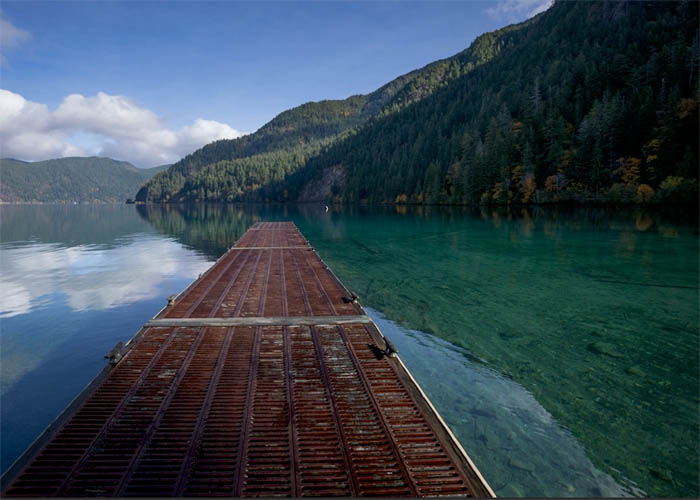
A little adjustment to the jetty and we have much improved image showing the beautiful clear water in upstate Washington. YES! the water really is that clear up there, it’s stunning.
Reflection Removal, the update everyone was waiting for
No hype, I’ve received so many messages from many of you on this. Reflection removal is great, but it only used to work on certain types of RAW files. Now it works on many file types including jpg and TIFF. Now, IMO, it works better on Raw files, as you can see from my previous tutorial on reflection removal. But it works really well still and is a game changer.
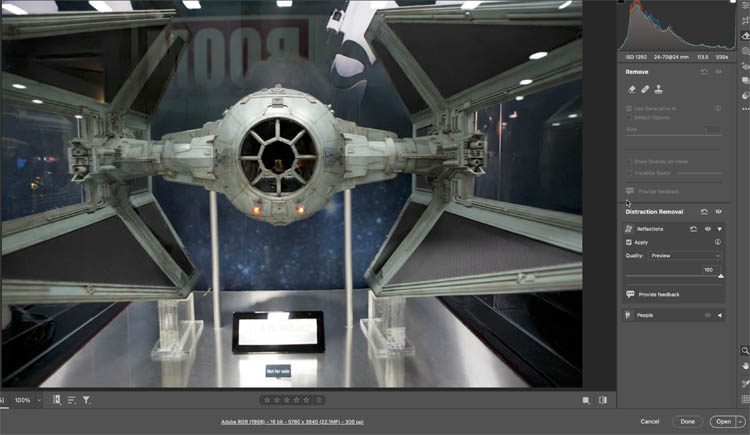
Here’s a simple once to start.
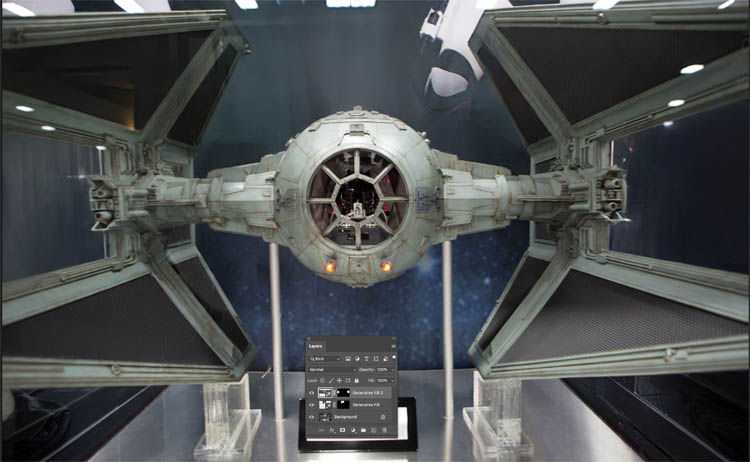
This is shooting through display glass at San Diego Comic-Con. Which you may not notice defined reflections, this is obviously suffering from glare.

Choose The eraser tool
Click on the remove tool (also an eraser)
You’ll see Reflections.
Click, apply
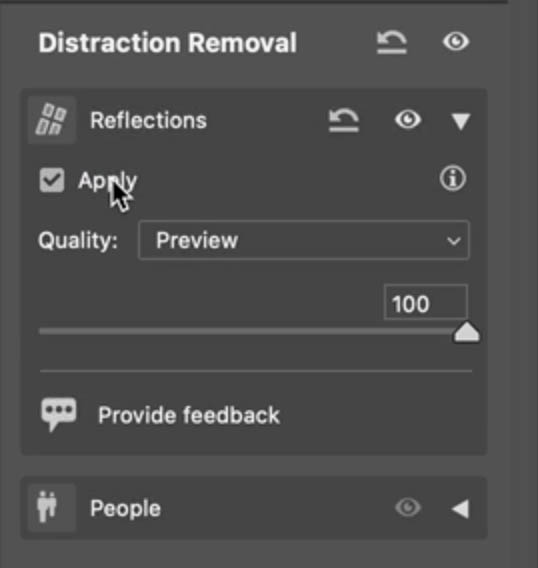
And boom! Reflections gone.

Compare to original again.

Lets use a tougher example.

Here we have applied reflection removal.
You can adjust the amount of reflection removal
If you move the amount slider to 0 you will see the before image.
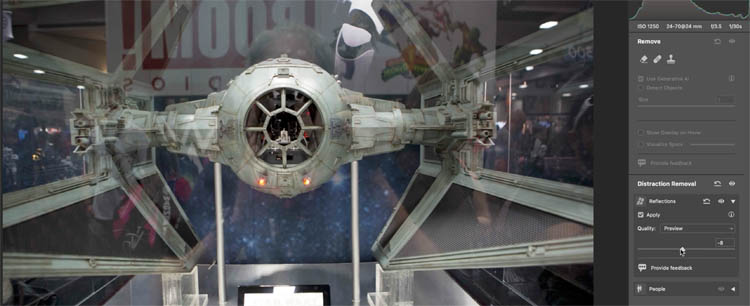
You can go the other way and reduce the image and show more of the reflection.With the slider all the way to the left, we only see what was removed the reflection on its own.
As I mentioned earlier, this still seems to work better on Raw images. But it still work well.
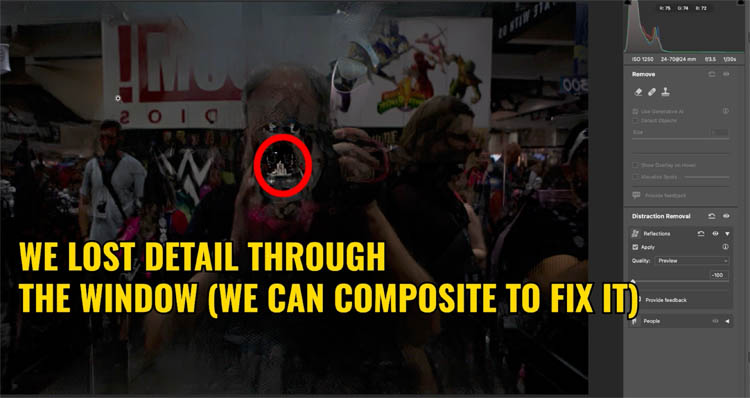
In this situation, it couldn’t tell the difference between reflection on the glass, and reflection on the glass of the model. So it removed the interior of the model too.
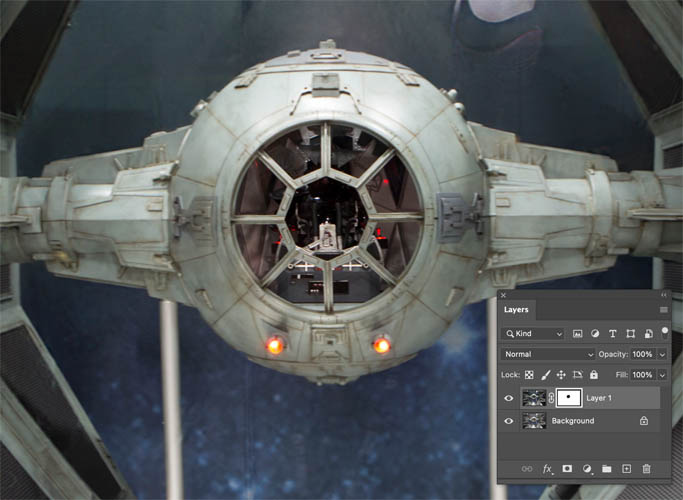
Just for fun, I’ll spend less than 2 minutes on this to see how we can make it better using the Photoshop tools. (This is why you can’t depend 100% on ai, you still MUST learn Photoshop)
Here I masked the inside of Vader’s Tie Fighter with the original to bring back the interior. (About 30 seconds work).
I was asked a few times, if I ran the reflection removal again, would it remove more of the reflections.
The answer is no. ACR didn’t see any more reflections.
After about a minute of applying the selection brush to the top and the center of the 2 wings, and then using Generative Fill we get an acceptable image.
My overall impression of these new features is positive and good time savers. The masks on some subjects weren’t great around the edges and occasionally I found objects being included in masks where they didn’t belong. I do hope this will improve over time, but I’ll be using these tools a lot.
I hope you found this useful and enjoy these new features,
Check out my other tuts on this Photoshop, Lightroom and ACR Feature Drop here:
7 Favorite new features in Photoshop 2025 April update
Auto Landscape Masks
Adjust Colors
Reflections Removal
Auto Selections | Auto selections on difficult images
Select details
See you the CAFE!
Colin
PS Don’t forget to follow us on Social Media for more tips.. (I’ve been posting some fun Instagram and Facebook Stories lately)
You can get my free Layer Blending modes ebook along with dozens of exclusive Photoshop Goodies here 


