
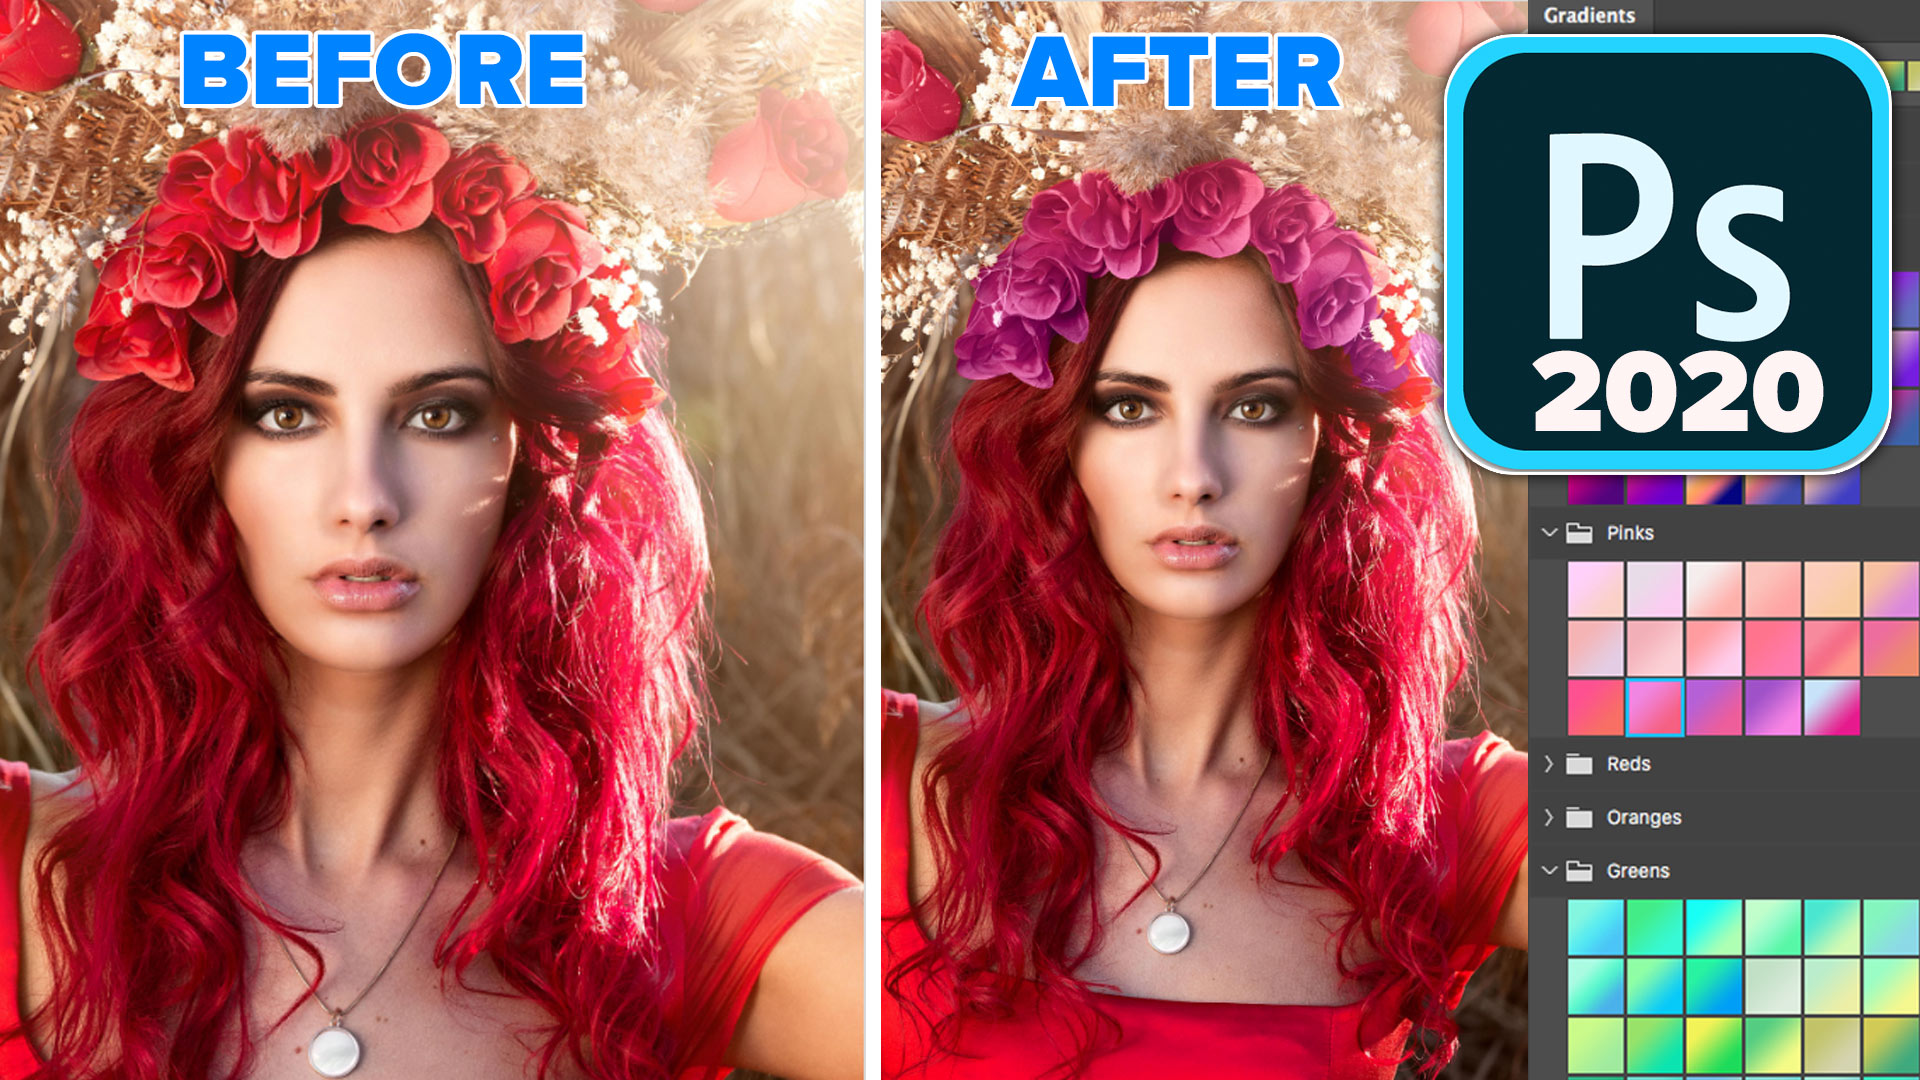
How to use Object selection and new Gradient panel to change colors in Photo in seconds.
In this tutorial, we will look at 2 of the new features in Photoshop 2020. We will look at the amazing Object Selection tool to select parts of a photo. Then we will use the new gradient presets. You will see how the new preset panels work and be able to use gradients to change the color of portions of a photo. This will get you better results than using flat colors alone.
Photoshop 2020 Superguide
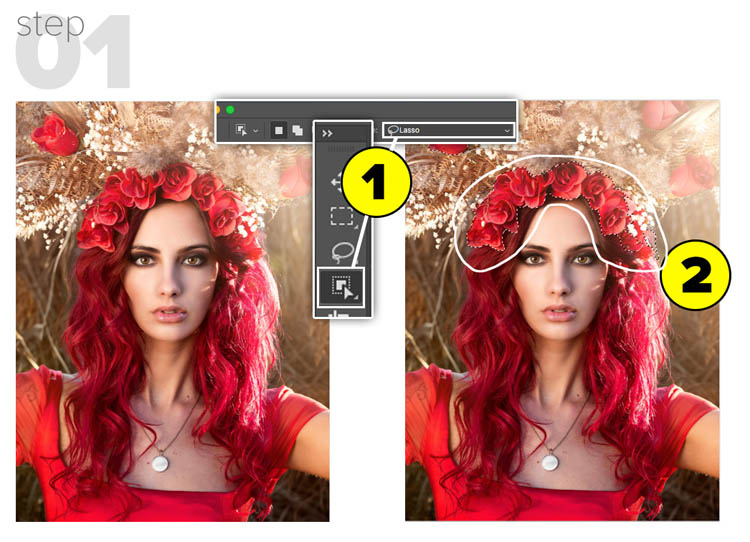
Step 1// MAKE A SELECTION
1. Choose the new Object selection tool. Make sure it’s set to lasso in the tool options bar.
2. Make a selection around the flower crown. Alt/option+Drag to remove from selection.
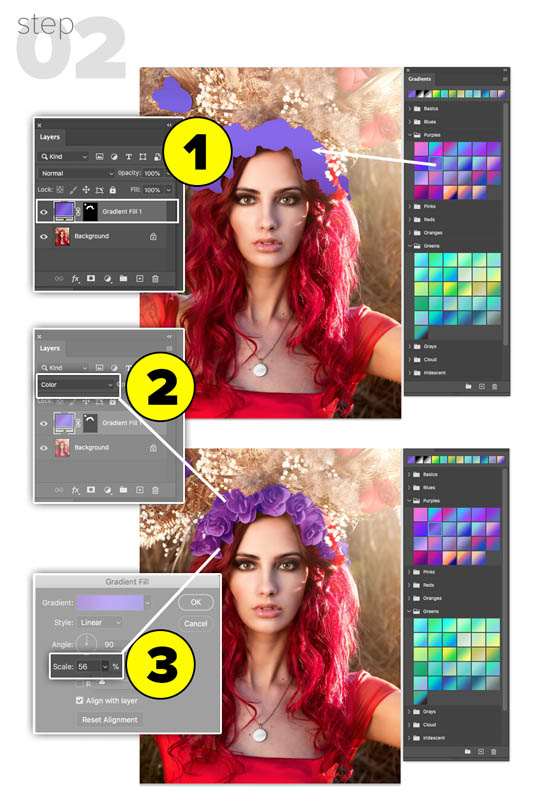
Step 2// APPLY GRADIENT
1. Open the gradient panel. Drag a gradient into the image.
2. Change Layer Blending mode to Color.
3. Click the gradient in the layers panel to open the Gradient options. Change the angle and scale. Drag on canvas to reposition the gradient.
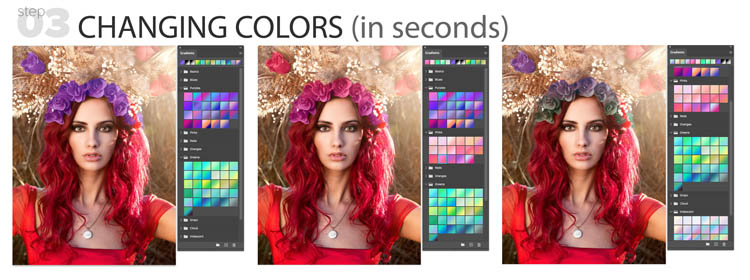
Step 3//CHANGE GRADIENT
With the gradient layer selected, single-click on any gradient to change the color instantly.
I hope you liked this, be sure to check out my other Photoshop 2020 new feature tutorials.
Colin
I hope you enjoyed this tutorial. Don’t forget to check out my other Photoshop 2020 tutorials here on PhotoshopCAFE
Great to see you here at the CAFE.
Colin
Check out all out other super guides here
PS Don’t forget to follow us on Social Media for more tips.. (I’ve been posting some fun Instagram and Facebook Stories lately)
You can get my free Layer Blending modes ebook along with dozens of exclusive Photoshop Goodies here 


